

At this point in the disassembly of your SMo Challenge donor car, you need to start to prepare the cabin areas/internal shell of the car for the roll cage mount installation, seat and steering wheel positioning. Although this may seem to be an assembly area, it is in fact important to do now before the shell/cabin is painted.
Front Mount Preparation 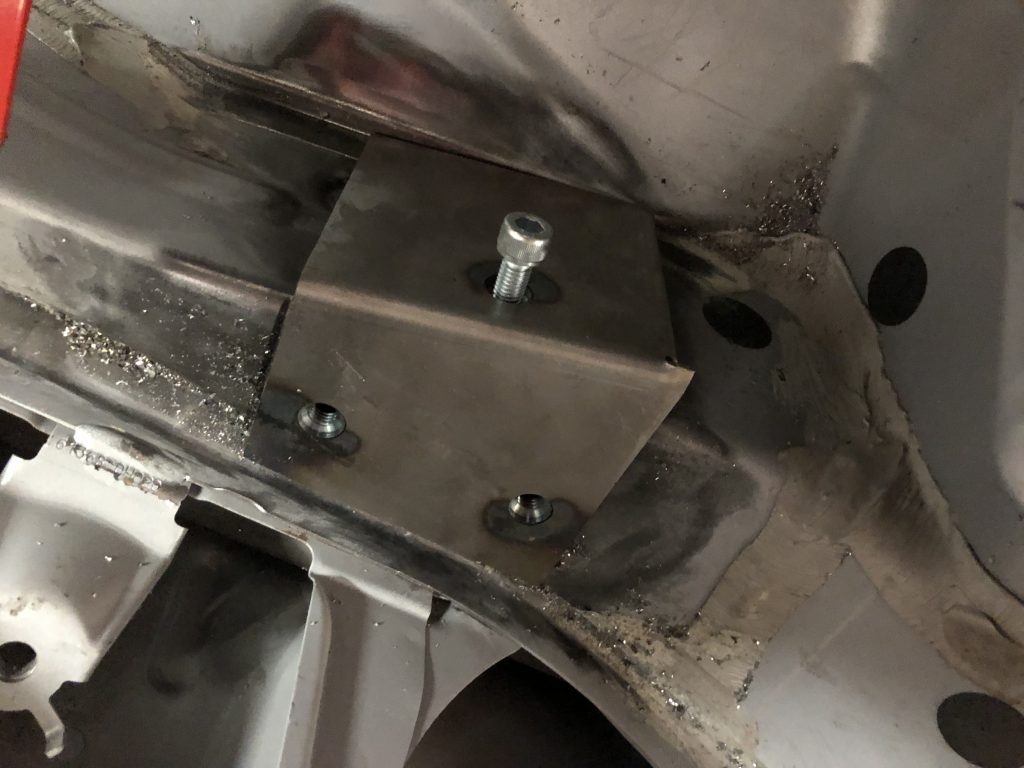
Mid-Point Mount Work 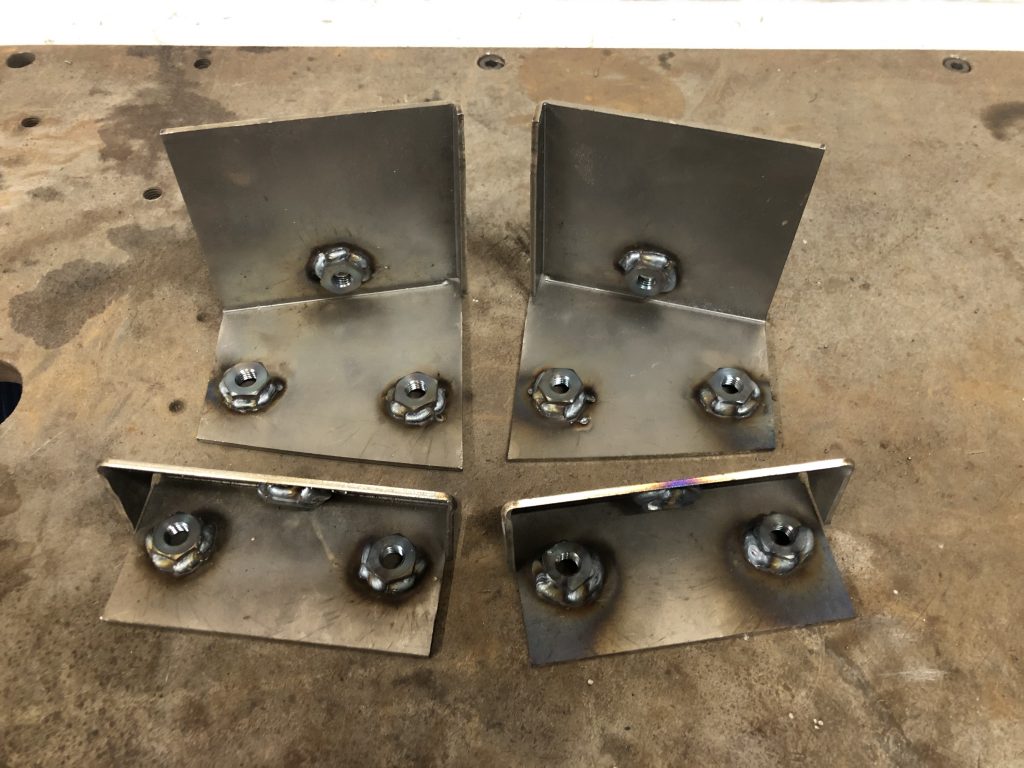
Mounts (With Nuts) 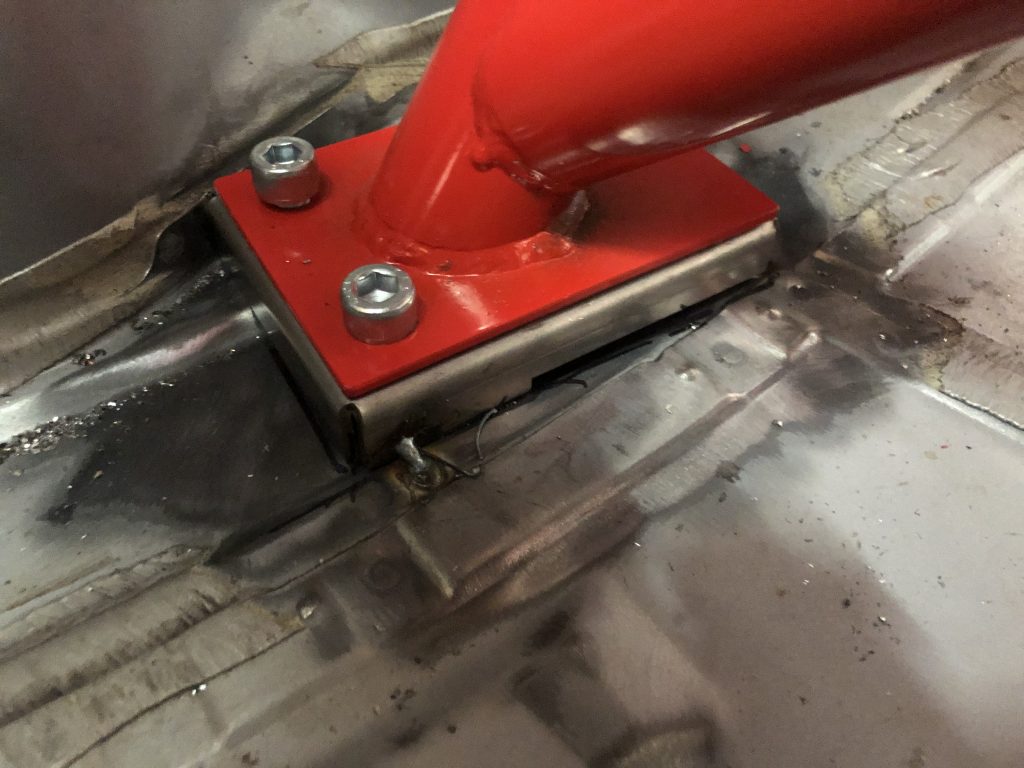
Rear Mount Checks 
Rear Cage Area of Cabin 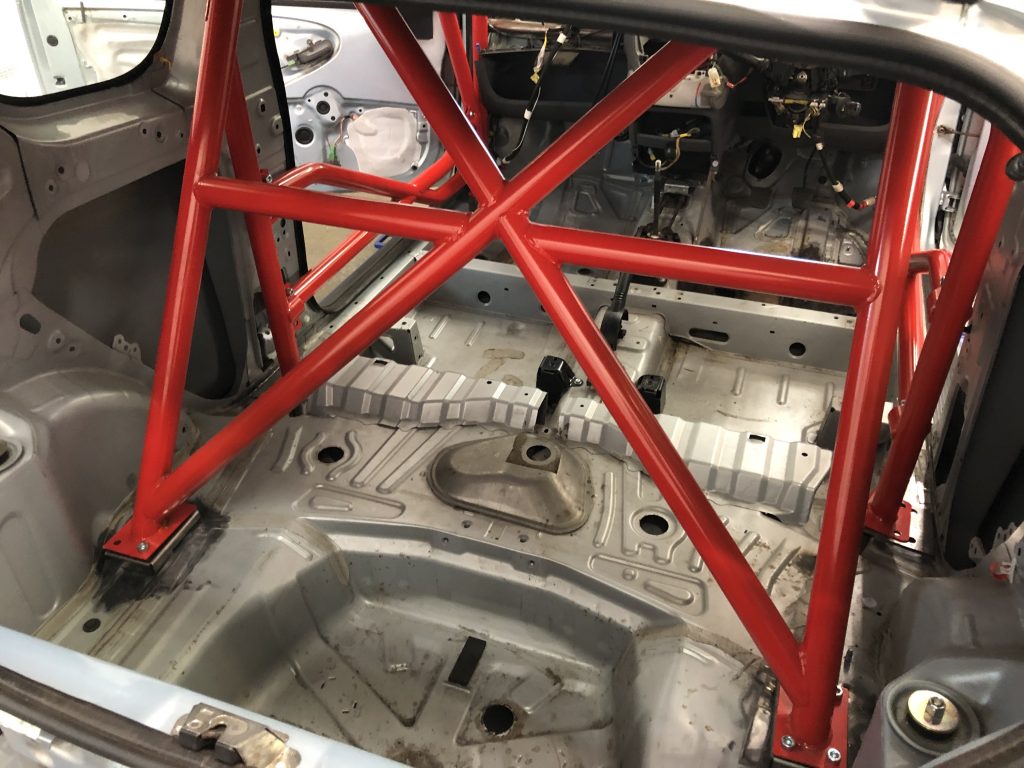
Rear of Roll Cage
| Location | – Driver Footwell – Passenger Footwell – Rear Cabin /Boot Area |
| 2021 Regulations Reference | – 5.3.2 – 5.5.1 – 5.6.1.2 |
| Parts to Discard | – Trim/Clips – Carpet – Gromets/Harness Clips |
| Important Checks | – The condition of the metal surfaces and structure of the car shell. – In some cases, we see rust/rot in the footwells and sills as illustrated. – In some cases, intervention and repairs are required. |
Suggested Preparation Method (8 Steps)
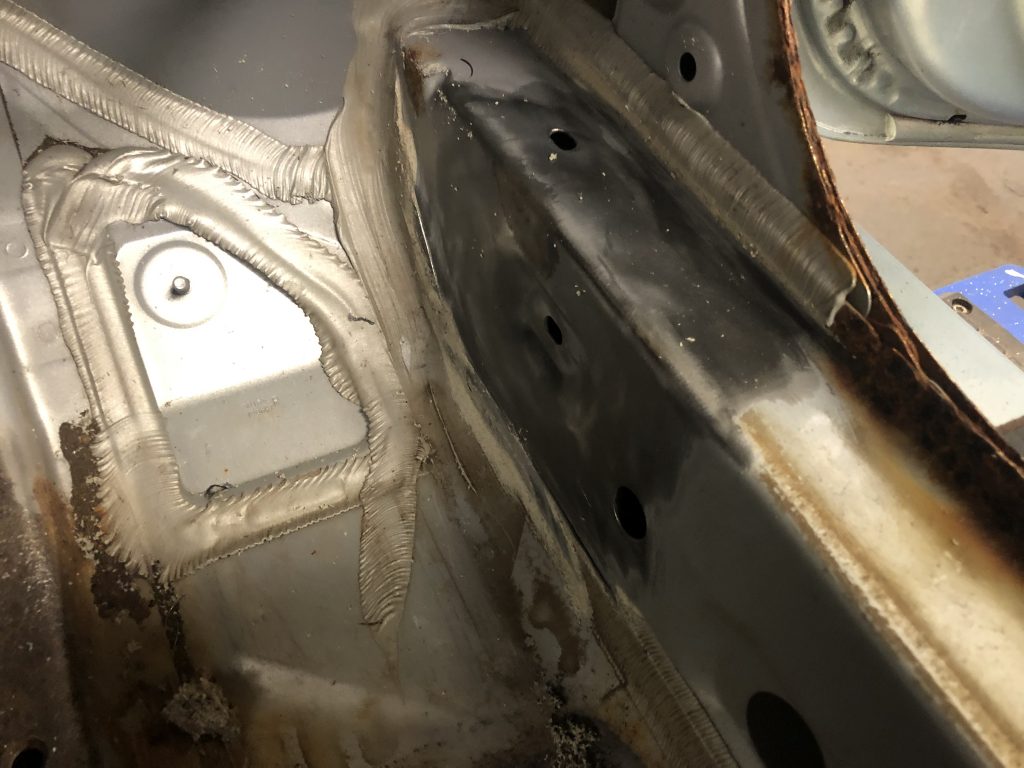
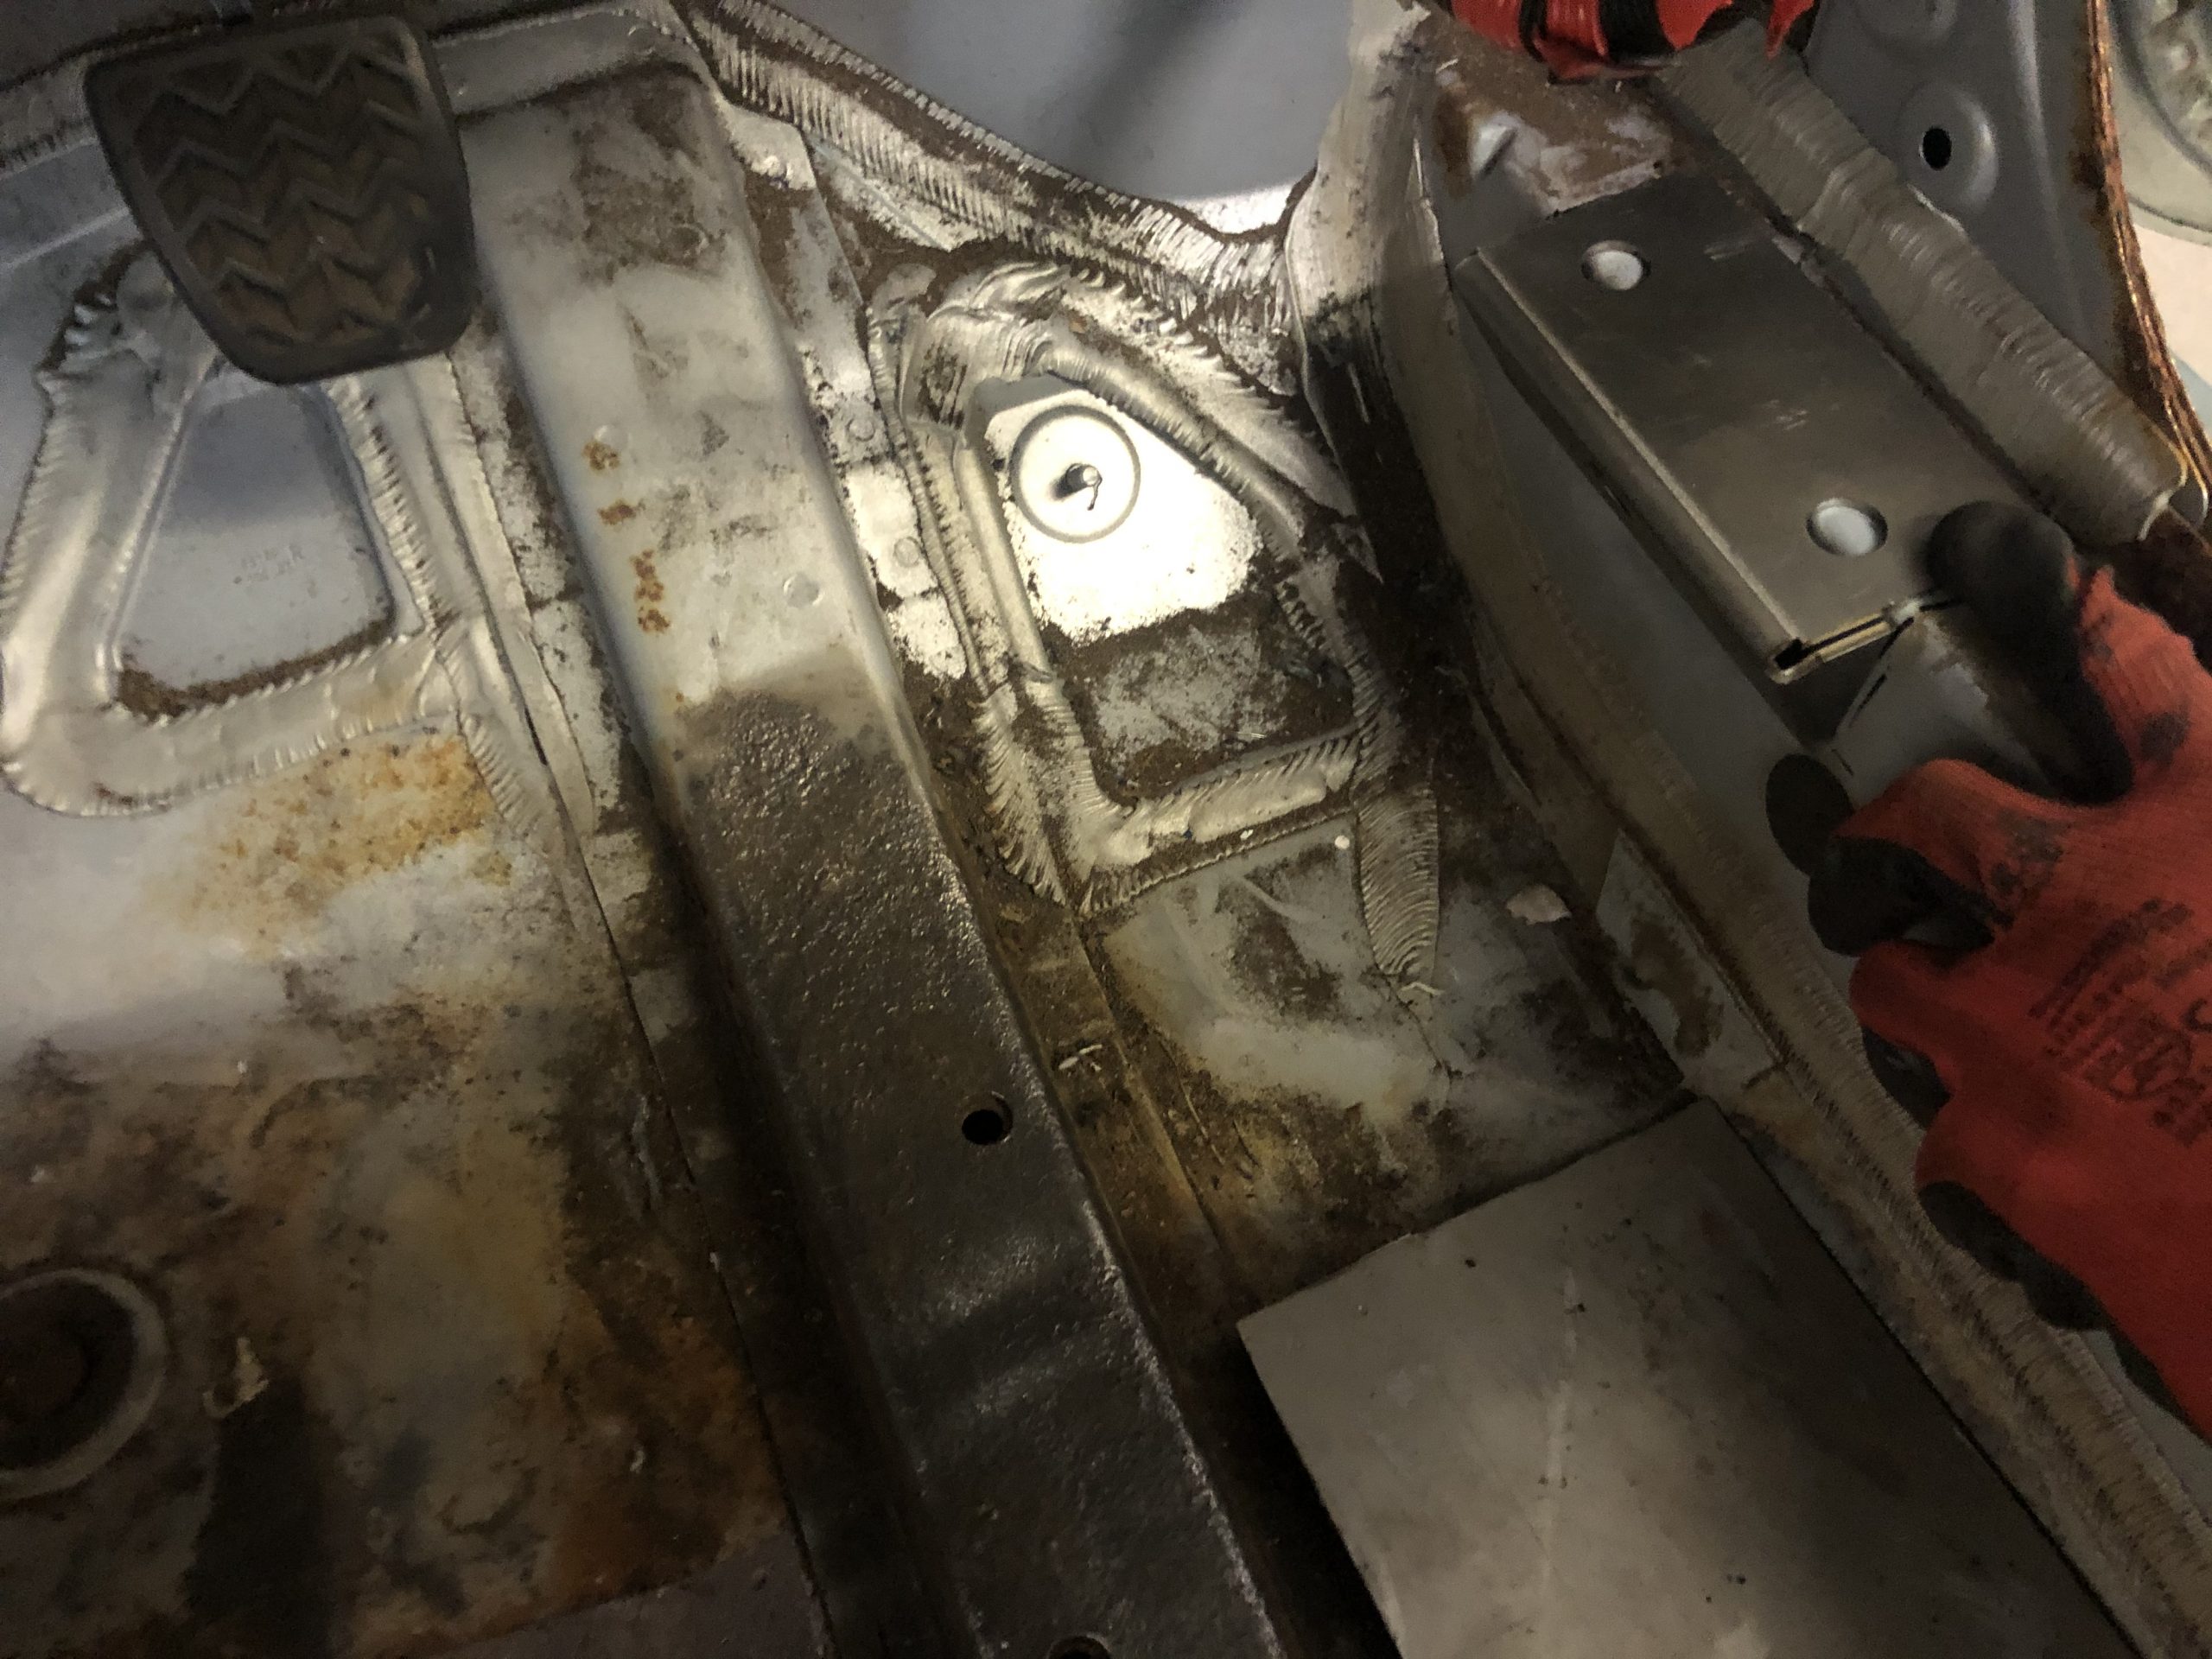
Step 1. In our car preparation, illustrated below it’s not uncommon for vehicles around 10-15 years old to require a moderate amount of cleaning, rust removal and on occasion welding to repair the body shell for respraying, it’s important to do these jobs before any respraying of the interior. In this example, the car that we built, the rust and the rot were particularly bad which gave us the opportunity to carry out some repair work.
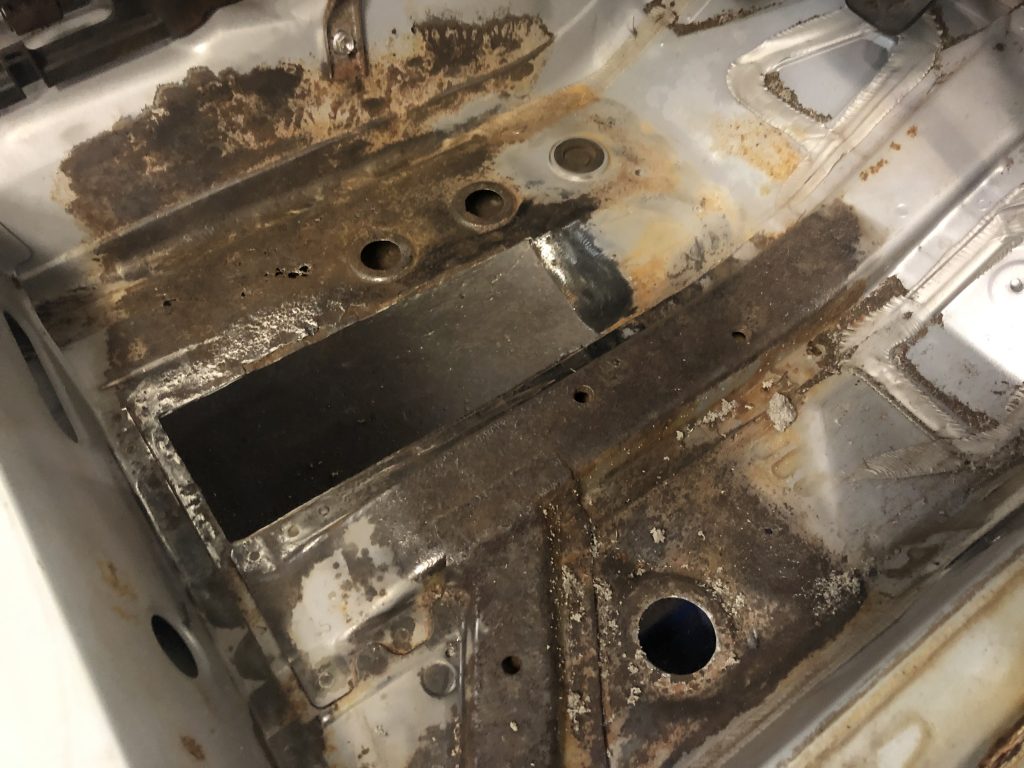
Driver Footwell Rust & Rot 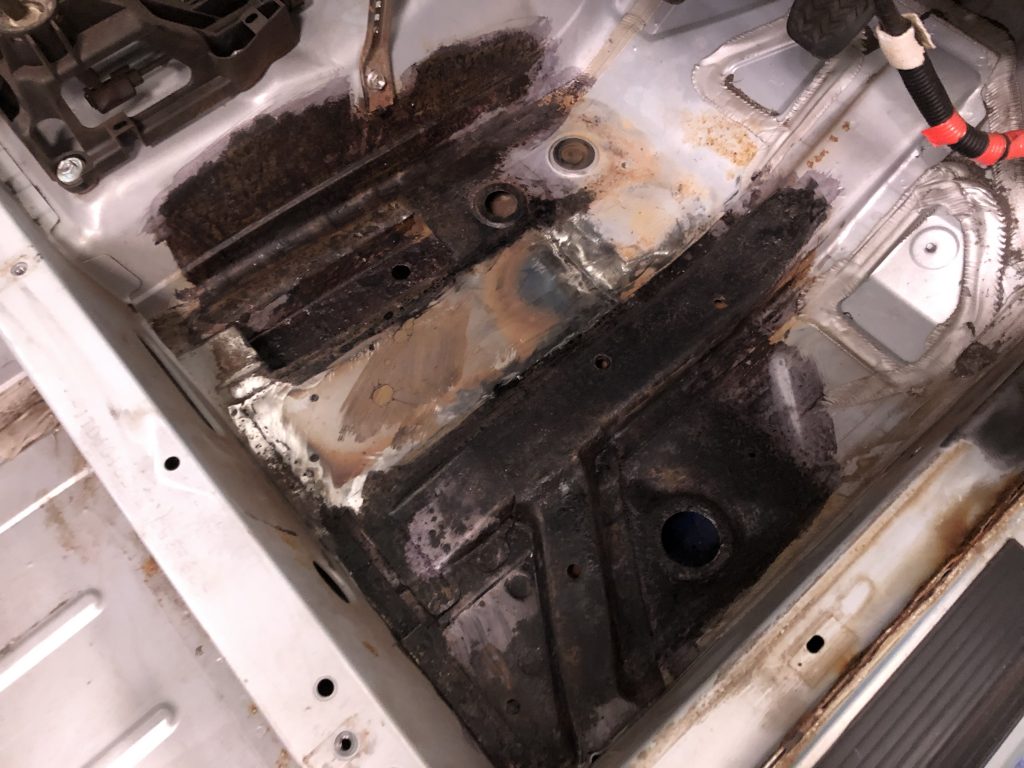
Driver Footwell Repair (Not Uncommon)
Step 2. After any necessary repairs, you’re now ready to prepare the cabin area for the installation of the roll cage securing mounts. First position the front, mid-point and rear mounting plates in the correct position, ensuring you have measured their positioning or have followed the SW Motorsport Cage dimensions. Mark the area around the mounts with a permanent marker. Alternatively, you may wish to install the main section and A-pillar bars of the roll cage and position them on the mounting plates and mark their location to achieve their correct positions.
1. Offside Front Mount 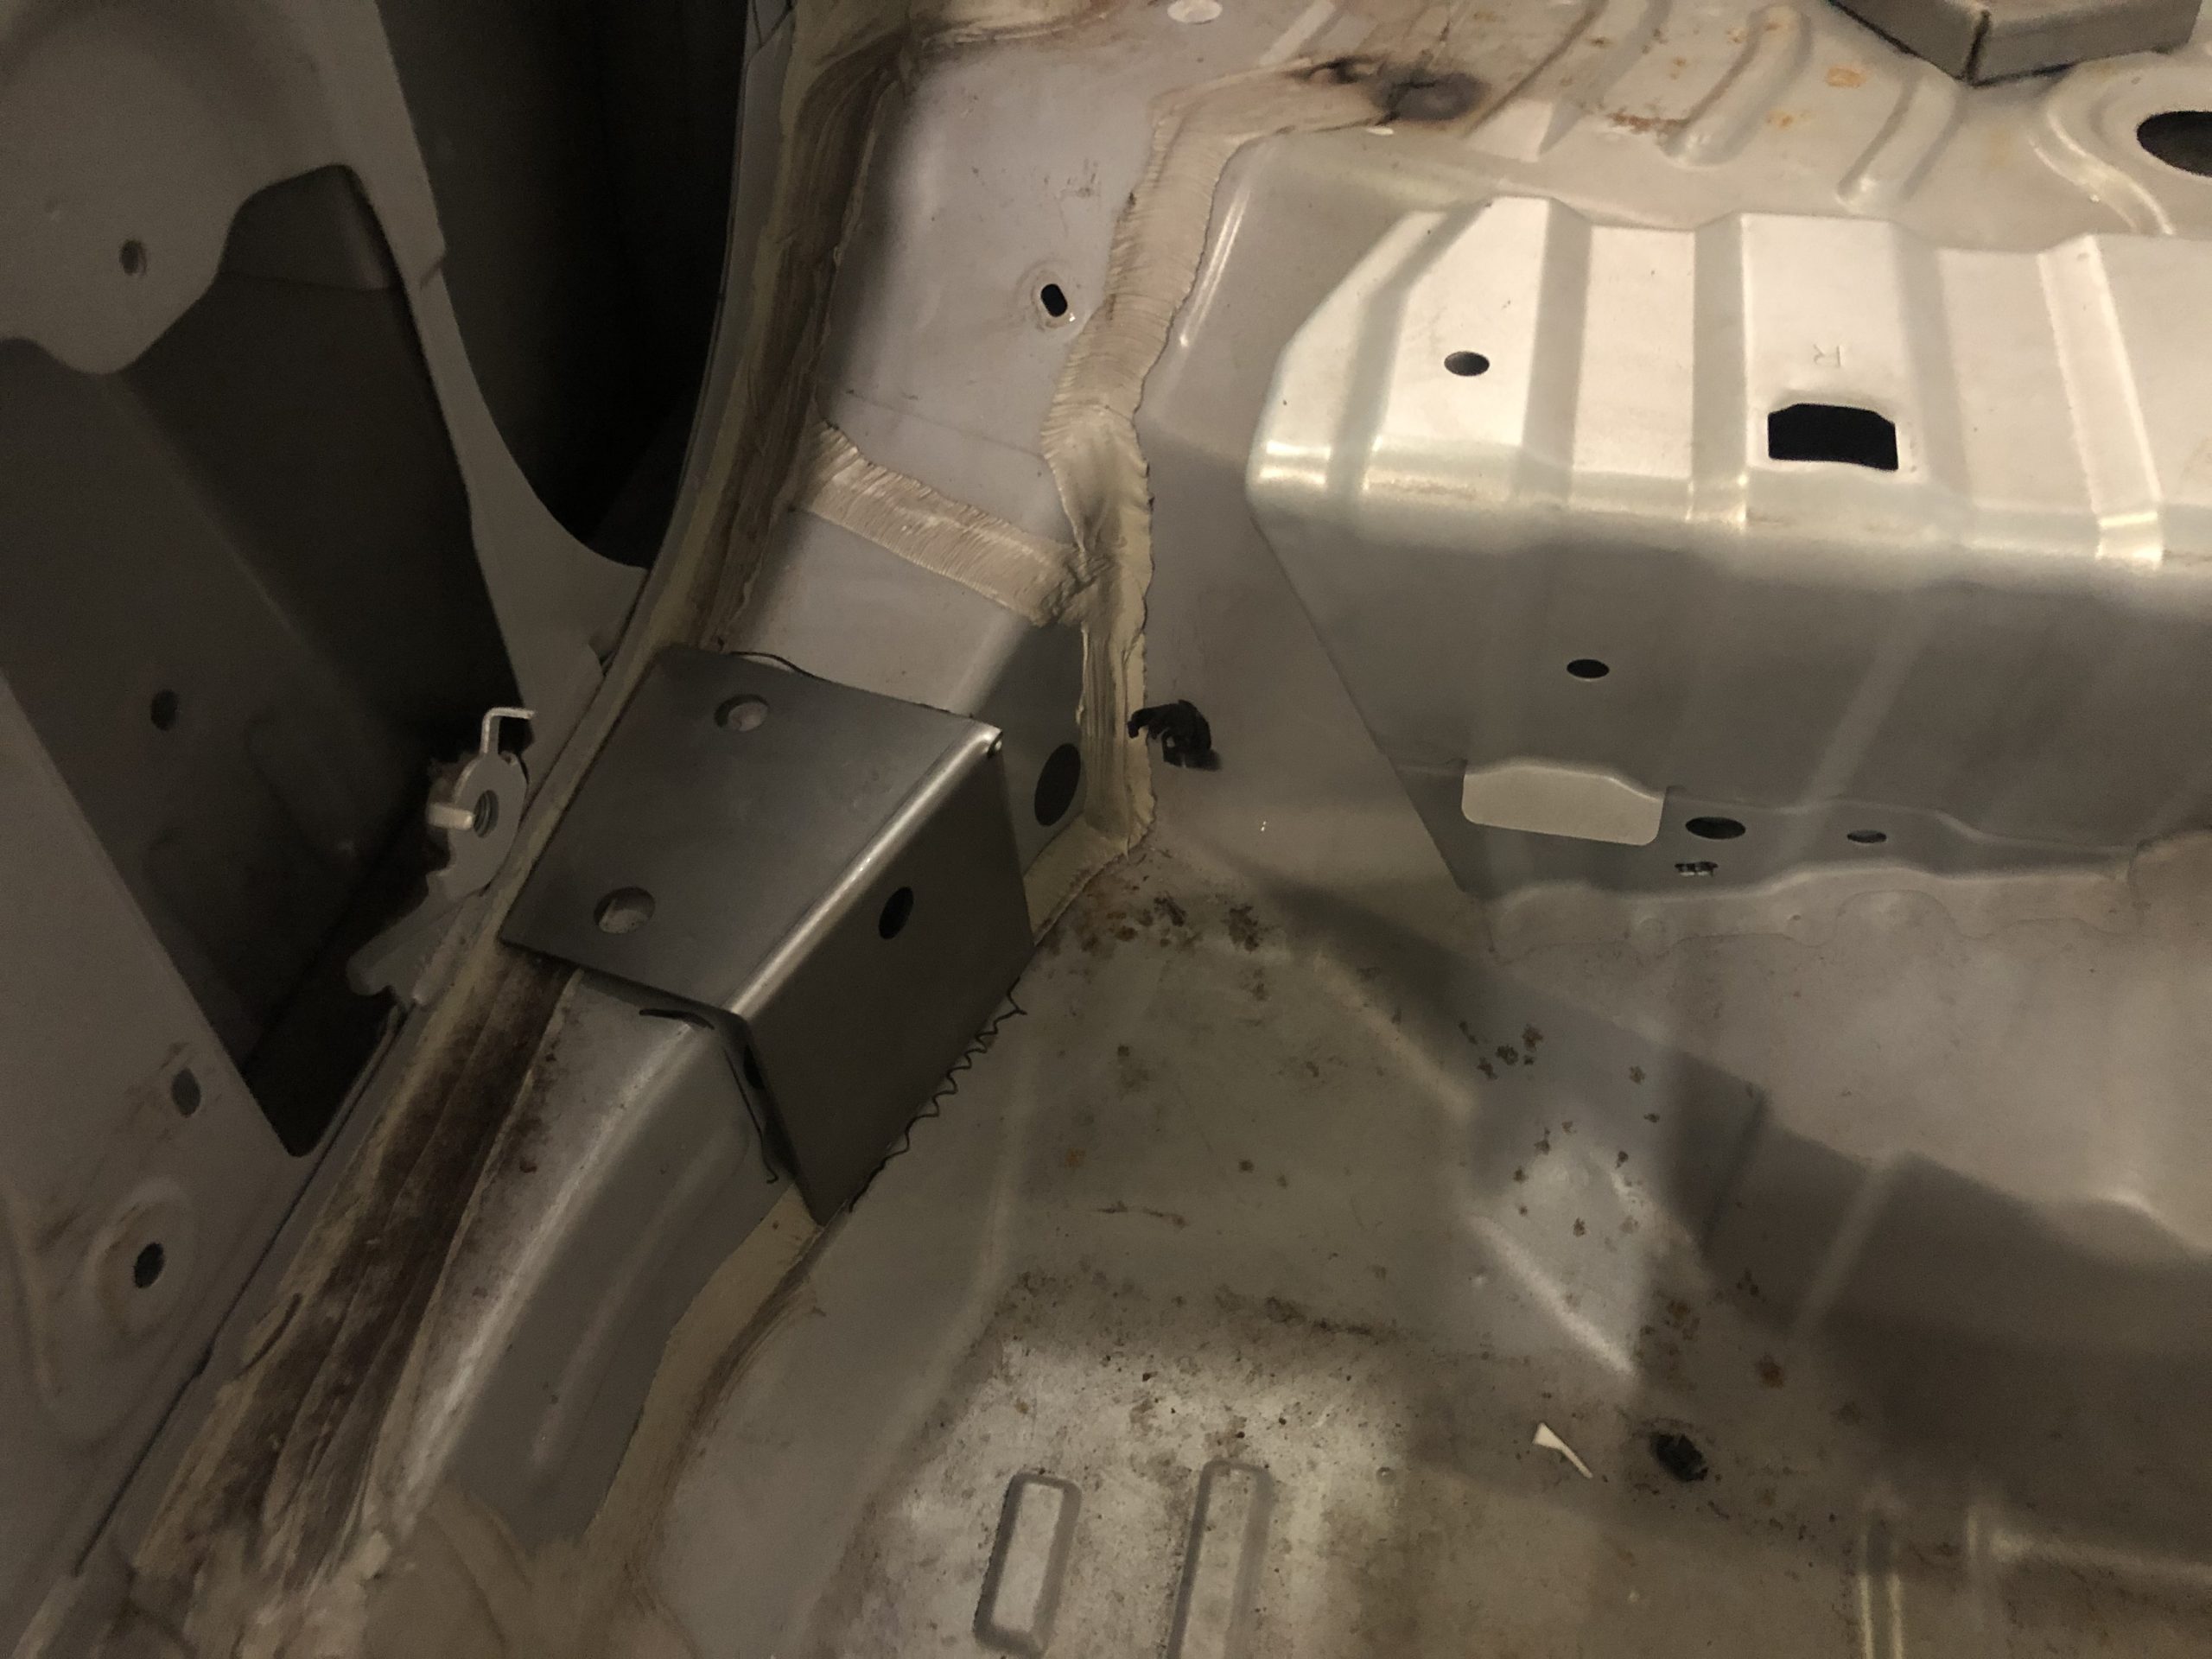
2. Offside Mid-Point Mount 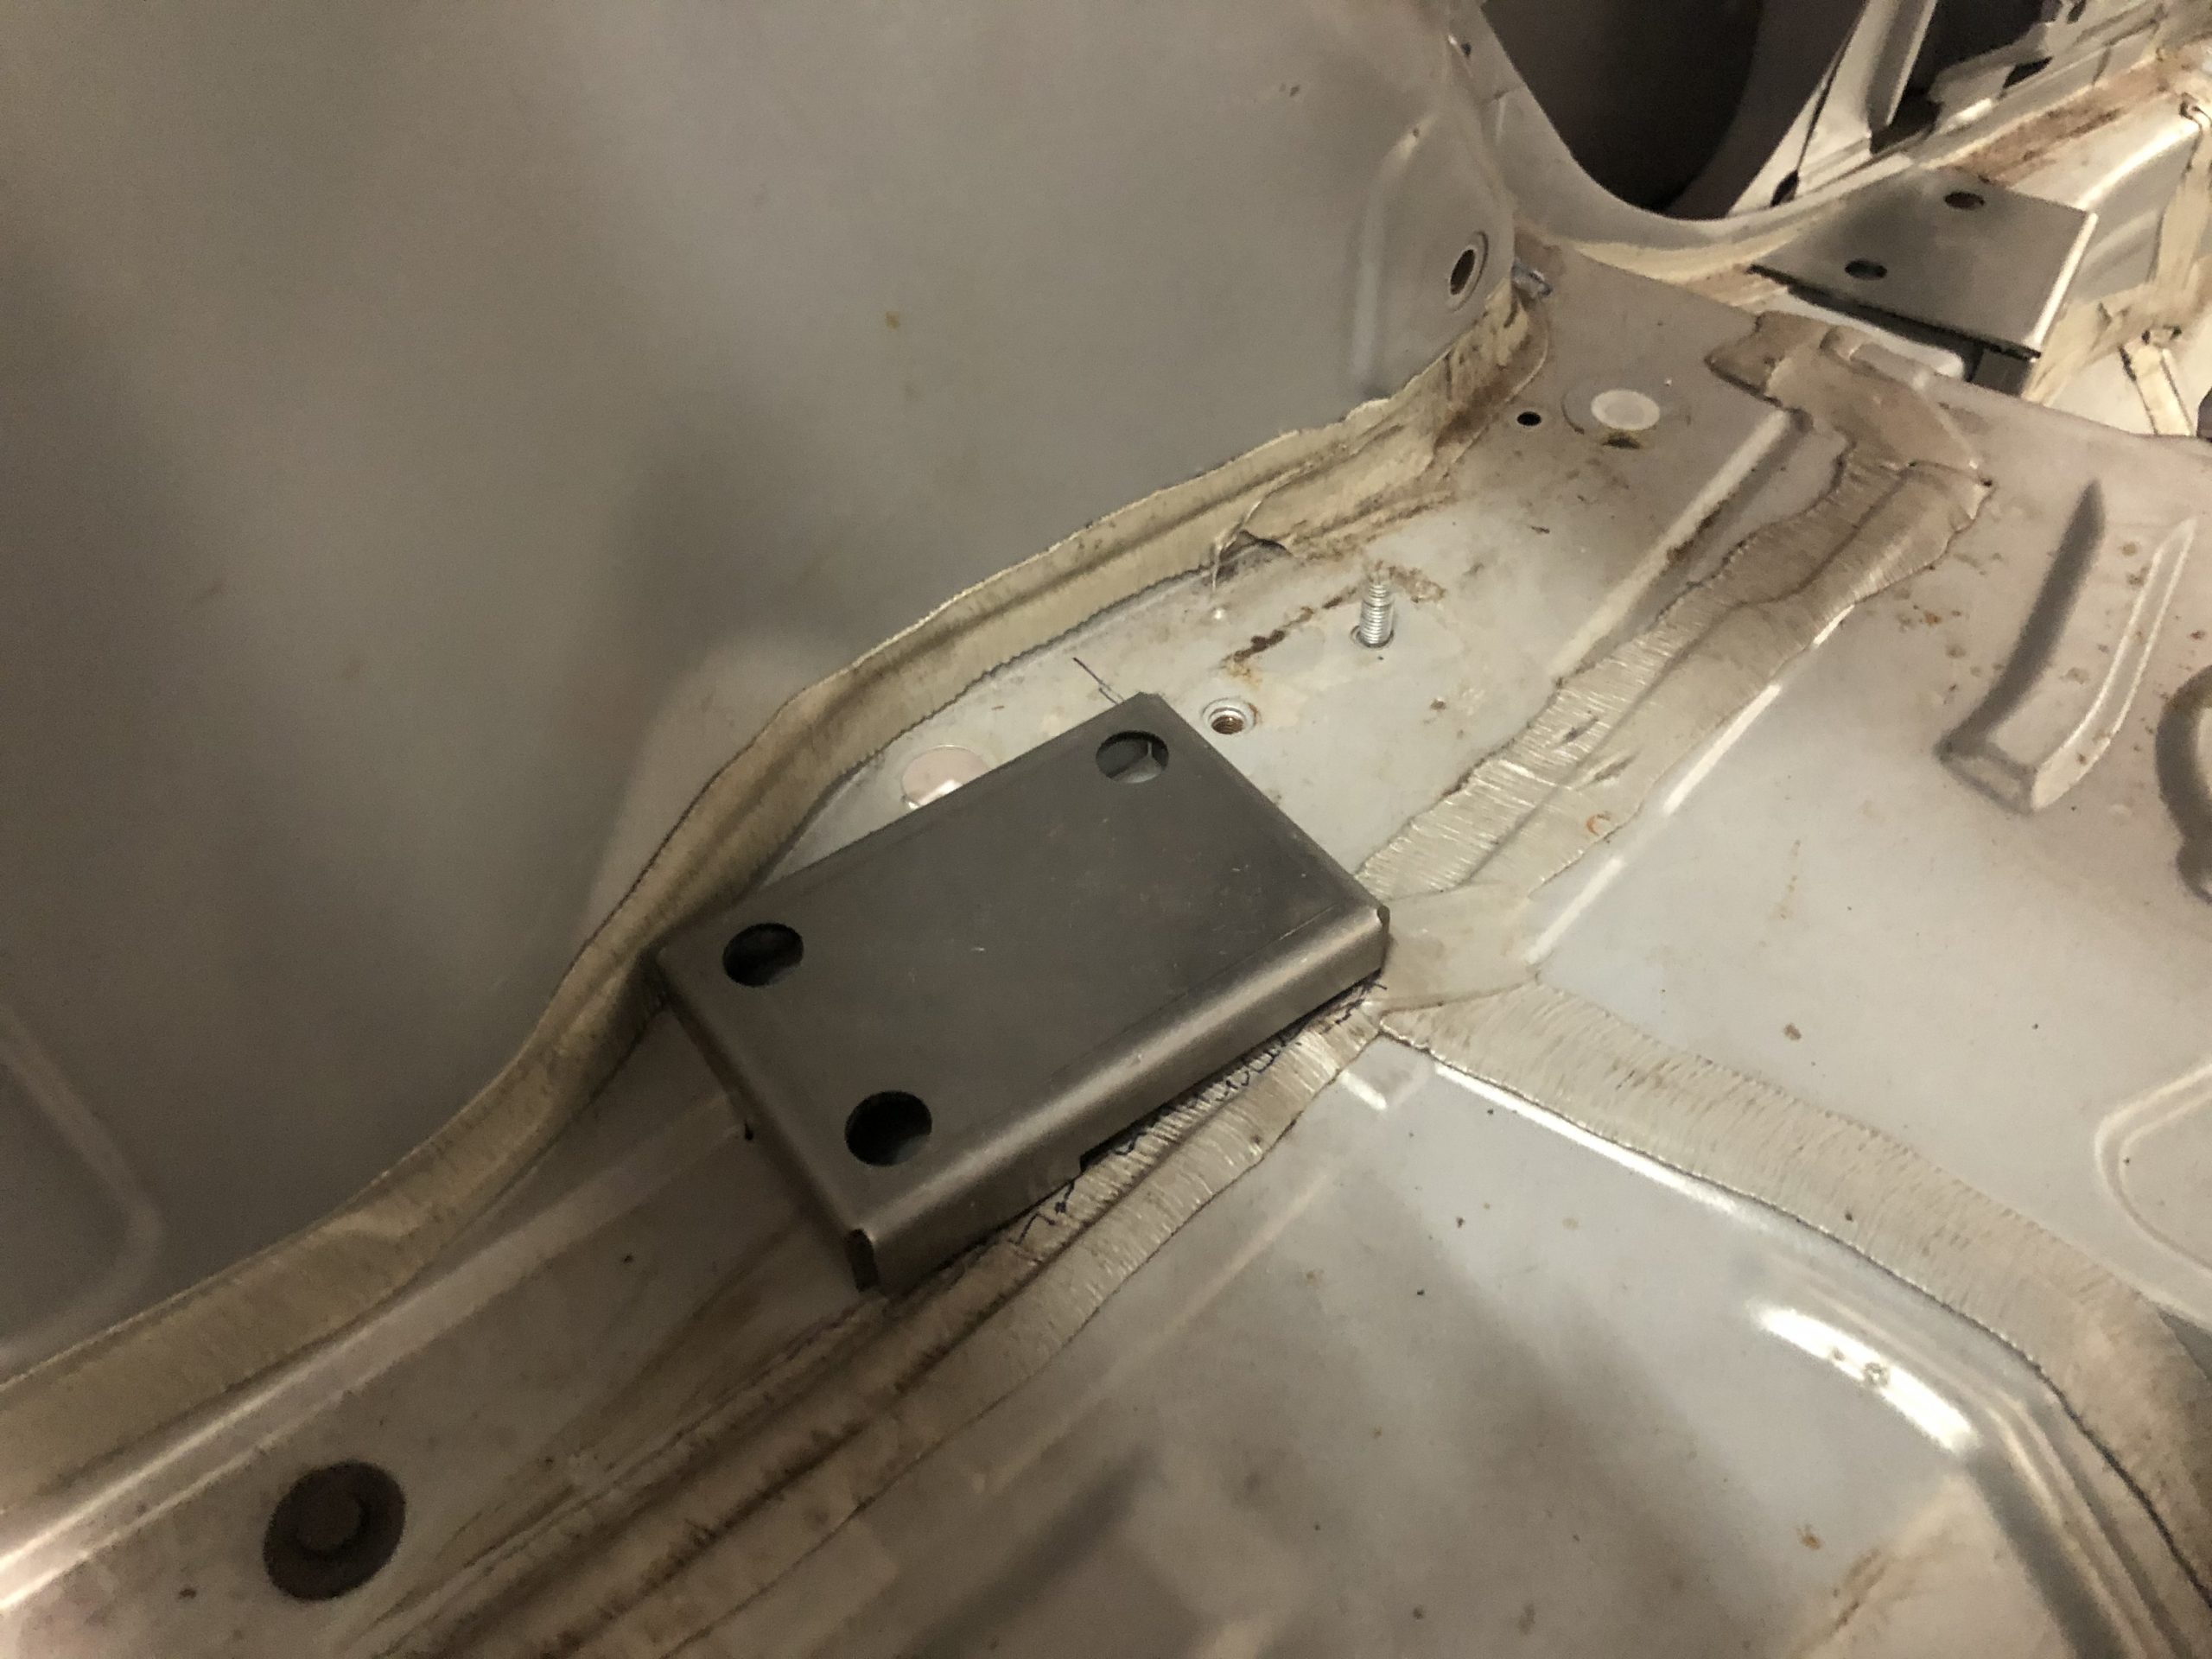
3. Offside Rear Mount
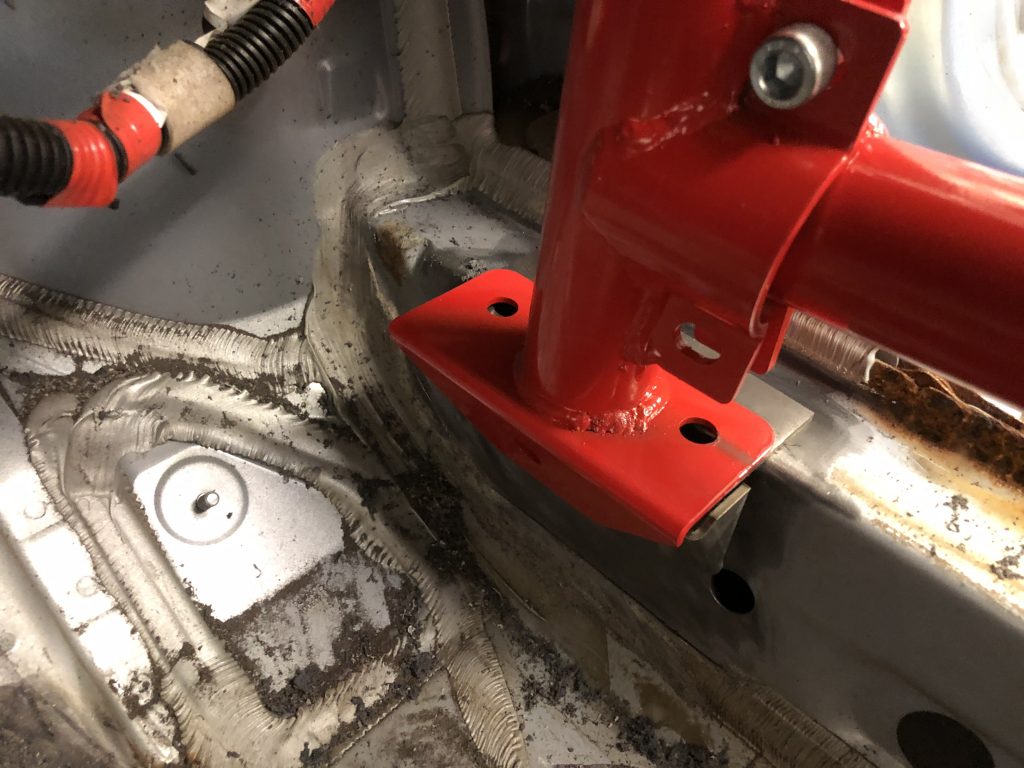
Step 3. After marking the perimeter and the correct position of the nearside and offside roll cage mounts (a total of 6 mounts) you are ready to start preparing the interior shell surface for tack welding the mounts in place. Removing the paint and body adhesive/sealant is vital to ensure you achieve well-placed and sound welded mounts in preparation for the final fitting of the roll cage. Prior to starting this process, it’s important to install the main body of the roll cage and also the A-Pillar bars to ‘marry up’ and check the intended location of your roll cage mounts. You won’t need to fully tighten up bolts yet but do check for correct mating of the A-pillar bars in the main body of the roll cage to ensure your measurements and placement of the mounts and cage are sound.
Don’t be disheartened at this stage, depending on your chosen method this may be the first of three times you effectively install the roll cage to complete the entire process and is good practice for when you complete the final installation in a newly painted interior. You’ll need to install the cage to check the initial placement of your mounts when marked out. Secondly, you will re-install the cage to check your mounts have been tack-welded in the correct positions. Thirdly and finally you will fully install the roll cage when the mounts have been fully welded in and you have a newly painted interior.
1. Nearside Front Mount Marked 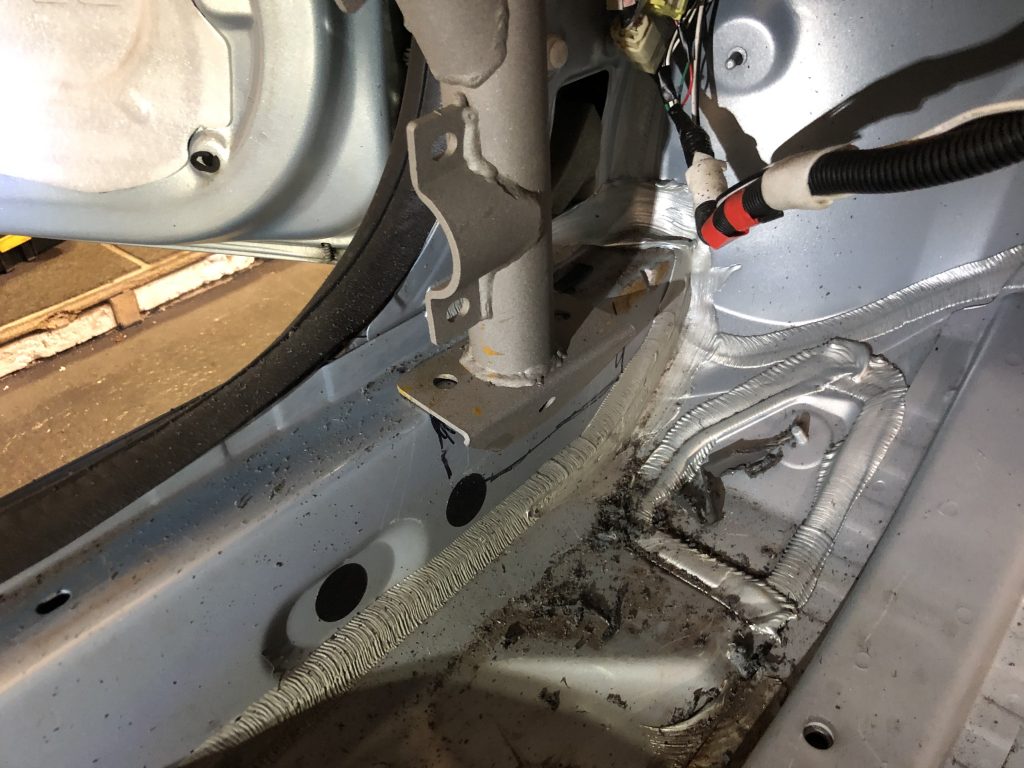
2. Checking Front Mount Location 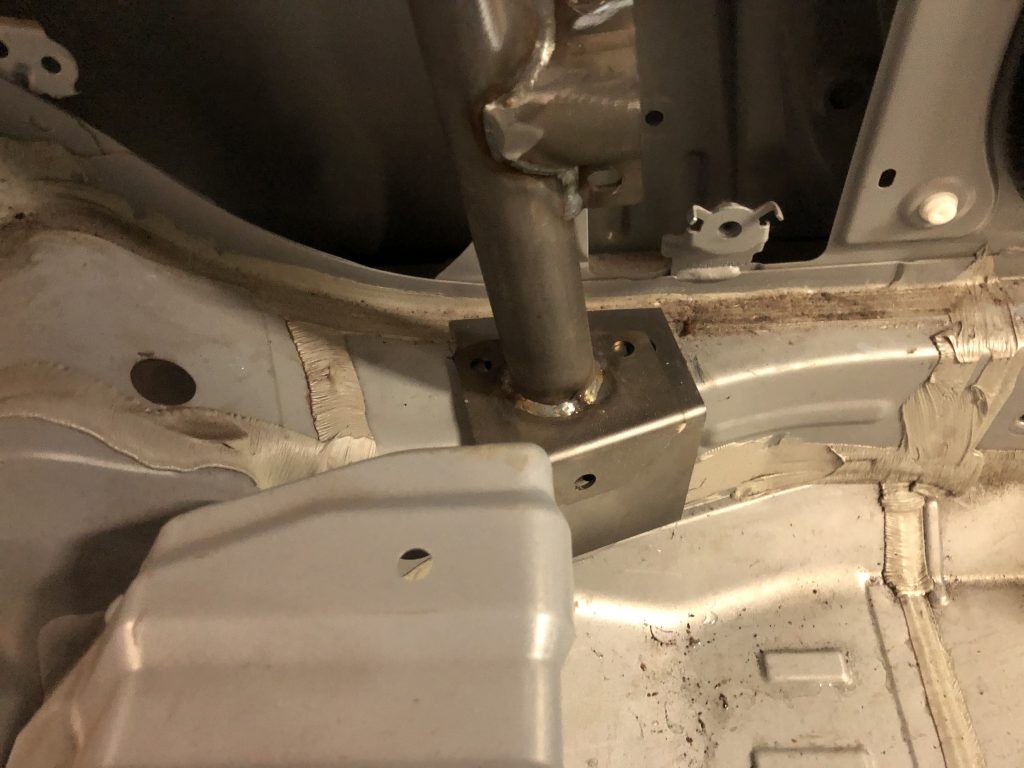
3. Checking Mid-Point Mount Location 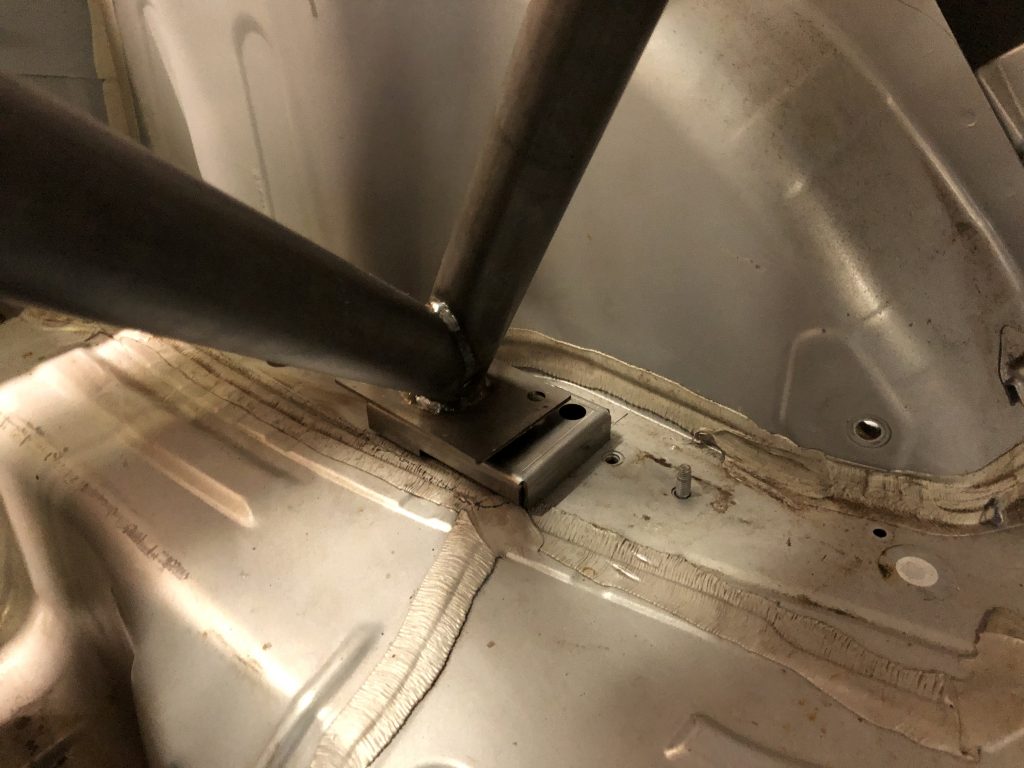
4. Checking Rear Mount Location
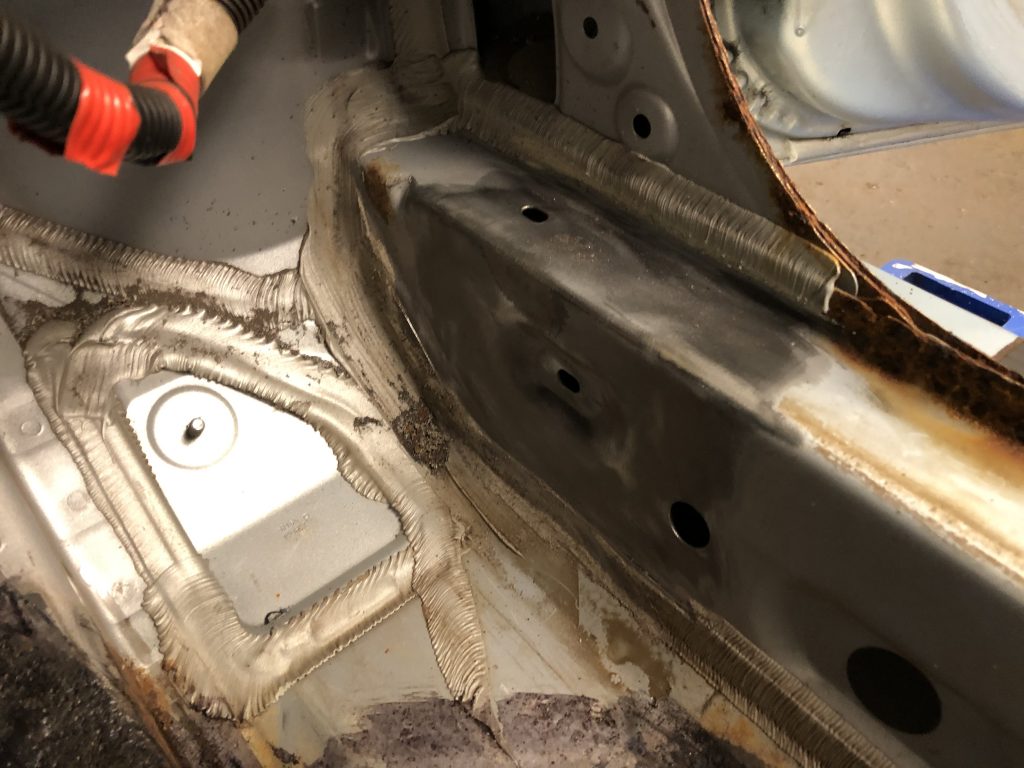
Step 4. Once you’re satisfied you have the mounting plates marked in the correct position you’re ready to remove the paint, body sealant/adhesives and other items in those areas. Make a note of the positions of the mounts with images, and take measurements as you will need to reposition these for another important process in step 5 later.
Tool Tip – In the illustrations below you will see we used a grinder and twisted knot wire wheel which are rated for high-speed applications.
Safety Tip – Please wear the required PPE such as gloves, face mask, goggles and ear defenders for this process.
Front Mount Area Cleaning 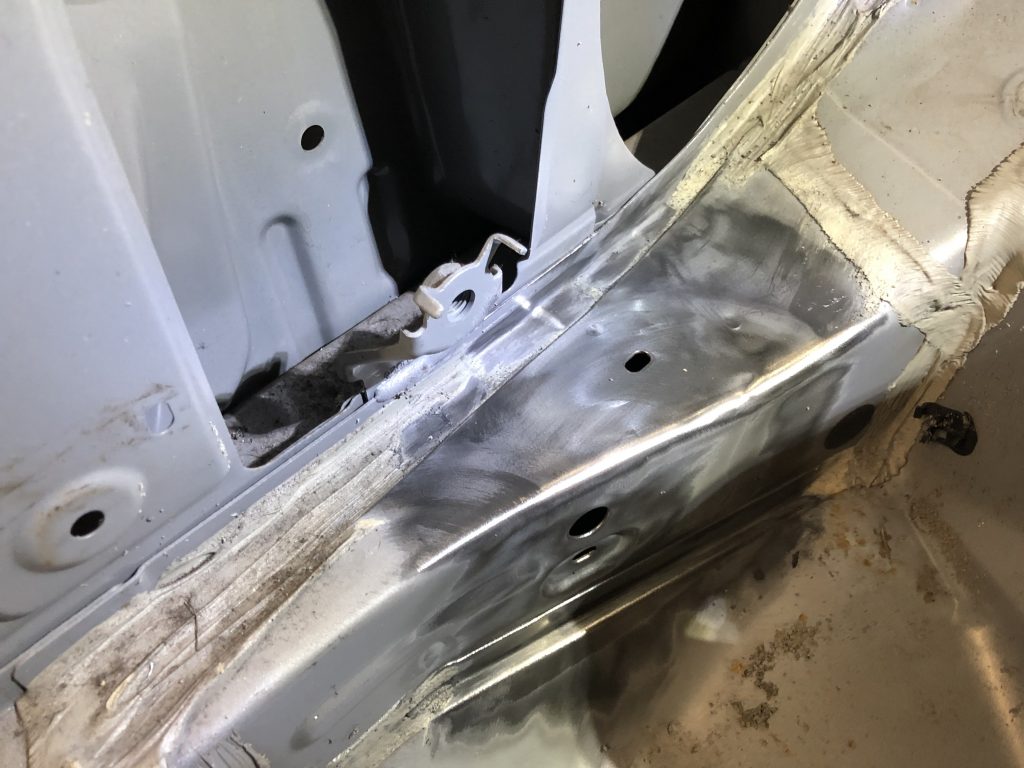
Mid-Point Mount Area Cleaning 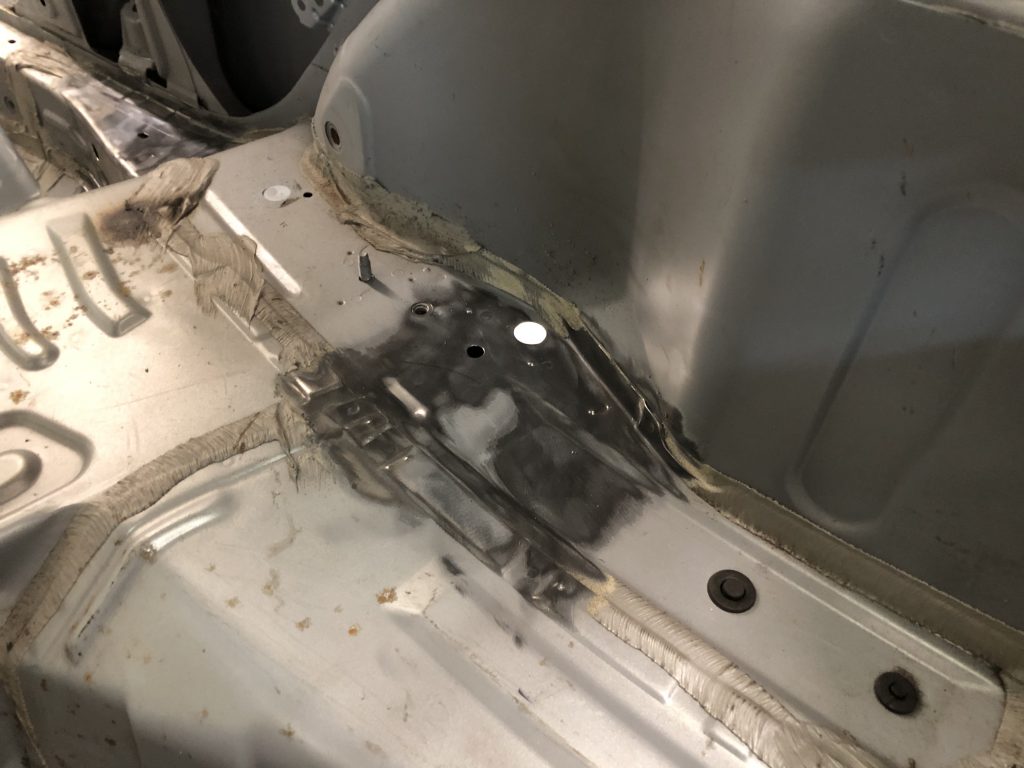
Rear Mount Area Cleaning 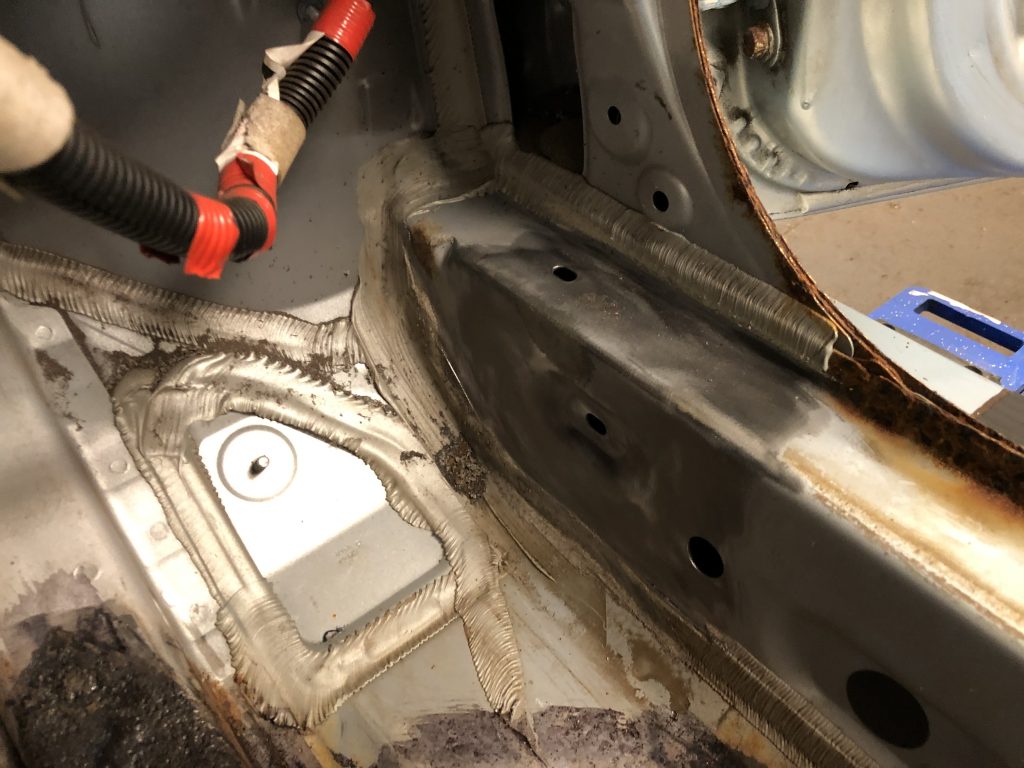
Front Mount Area Cleaning 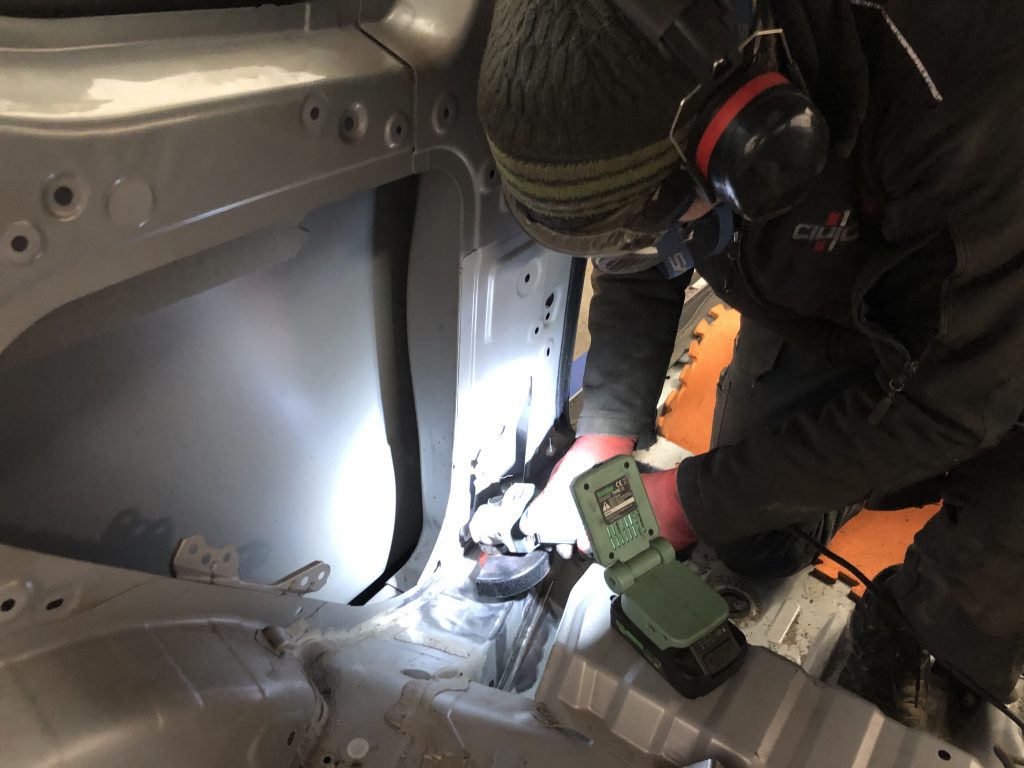
Mid-Point Mount Area Cleaning 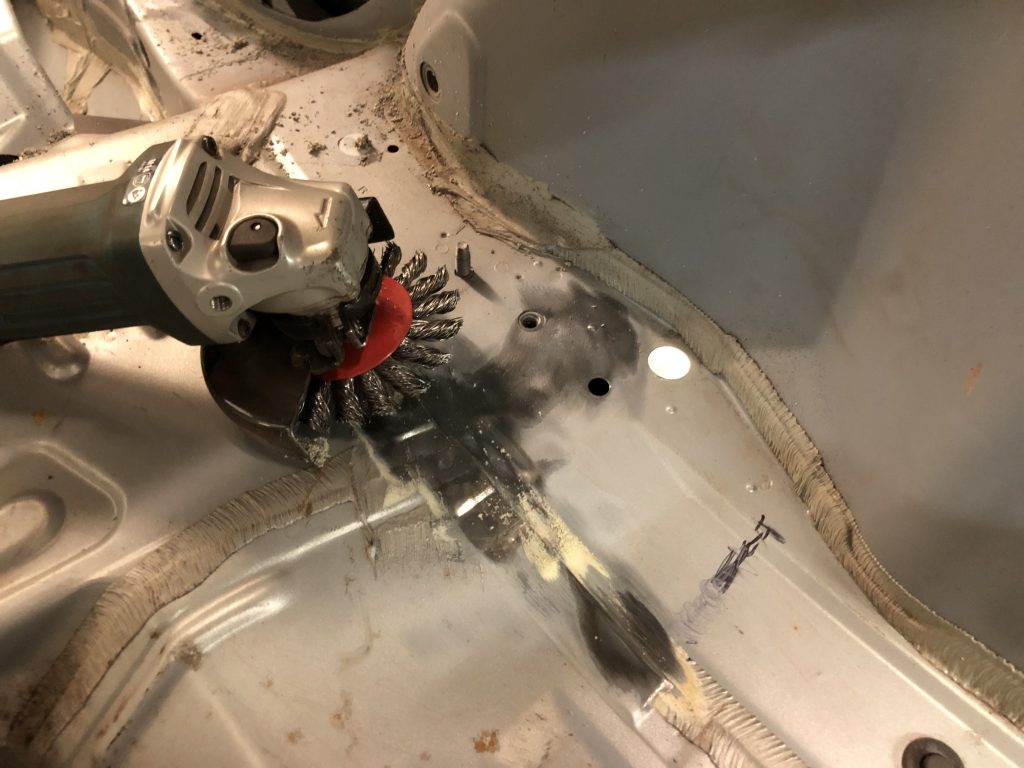
Rear Mount Area Cleaning
Step 5. Once you have cleaned and removed the paint, sealant and other items such as rubber grommets and plastic wire connectors from the mounting plate areas you are ready to drill the shell/body for the spaces/recesses in which the captive nuts located in the mounts will sit in. But first, you must weld the captive nuts to the underside of the roll cage mounts as illustrated below. Note the underside position of the 3 nuts per mount.
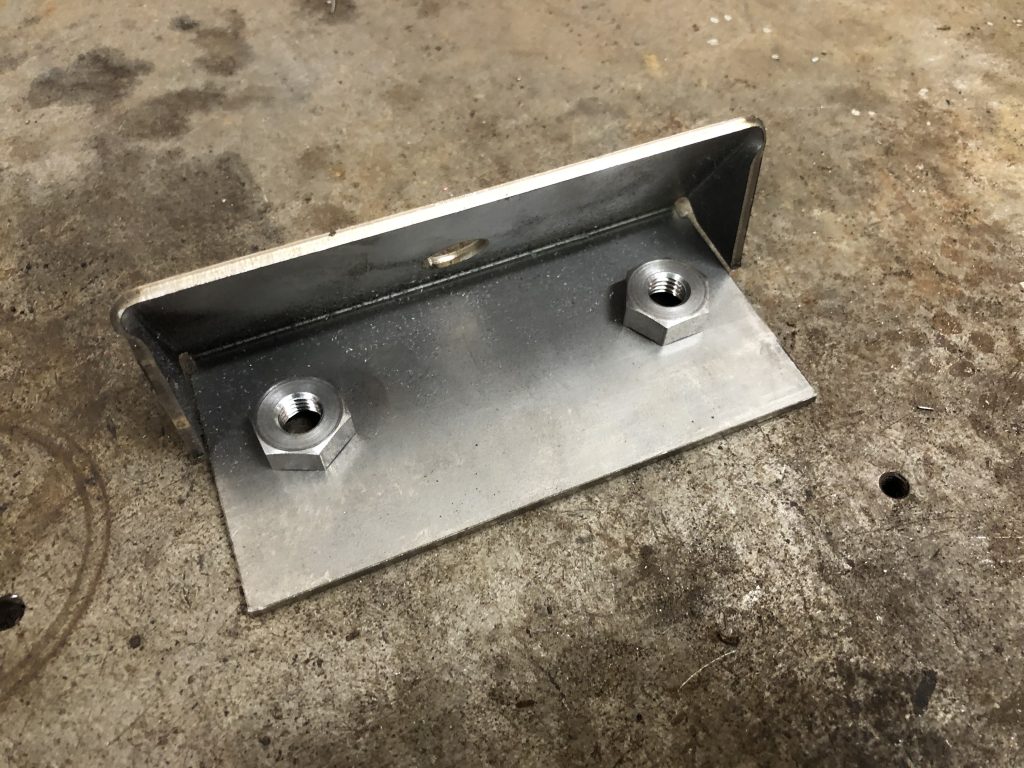
Front Mount Nuts Front & Mid-Point Mount Nuts 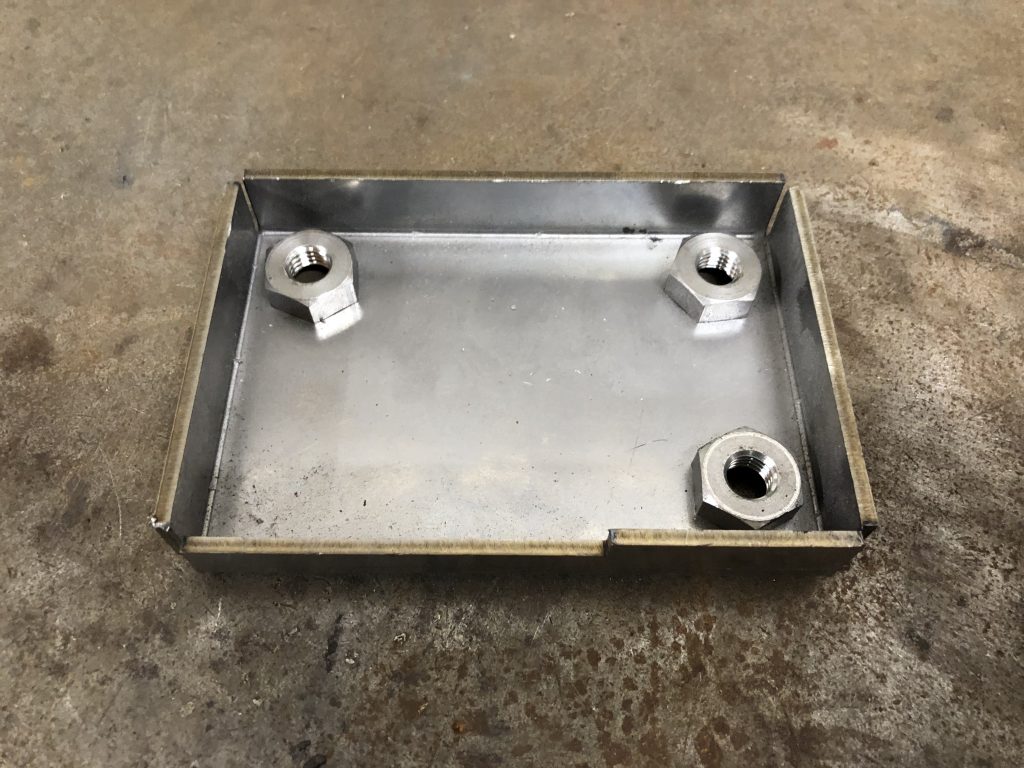
Rear Mount Nuts 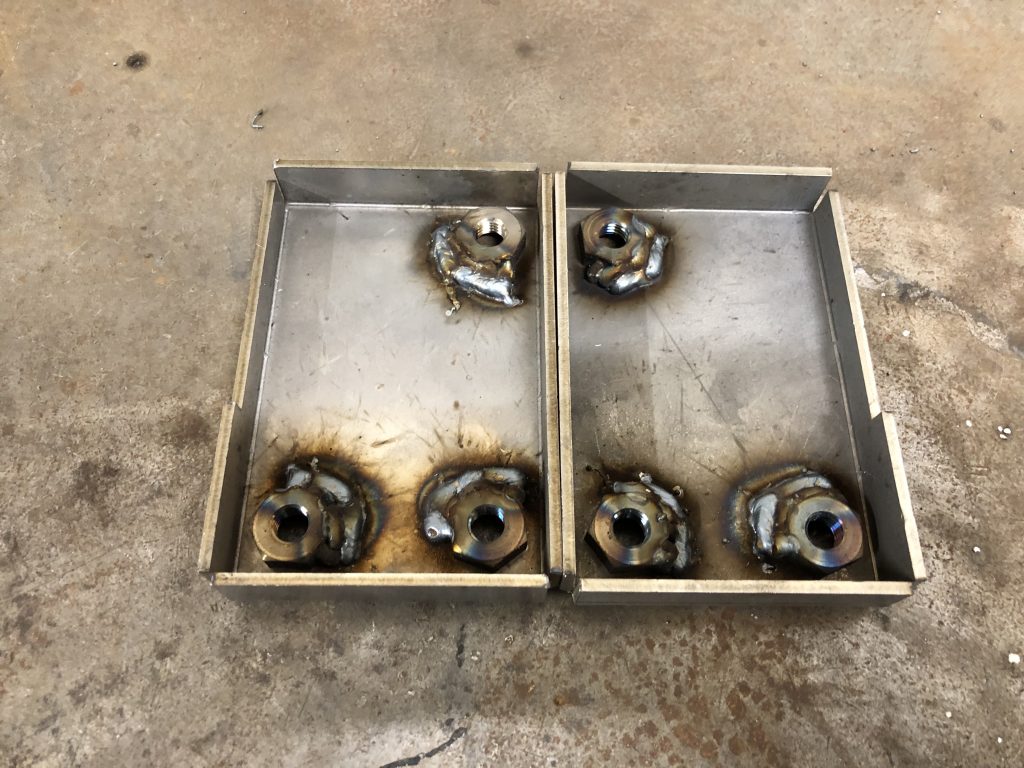
Rear Mount Nuts
Step 6. Now place the mounts back into the measured and marked positions in the vehicle body and now mark through the bolt holes to get the required drilling position for the nut recesses for each mounting area. One marked use dot-punch to make drilling easier and more accurate and drill/step drill each of the holes/nut recess areas.
Note that on the front and mid-point mounts the plates must ‘butt up’ to the shell sill so the mount plate nuts are able to sit recessed in the shell/body (the nut recesses are larger as per the images). The rear mount only needs to accommodate the thread area of the bolt as the mount is raised above the shell/body.
Tool Tip – Use a step drill bit for acquiring the correct side nut recess holes to reduce the risk of damaging other components by drilling too deeply. Remember to file/de-burr the holes for safety and accuracy.
1. Prepared Front Mount Area 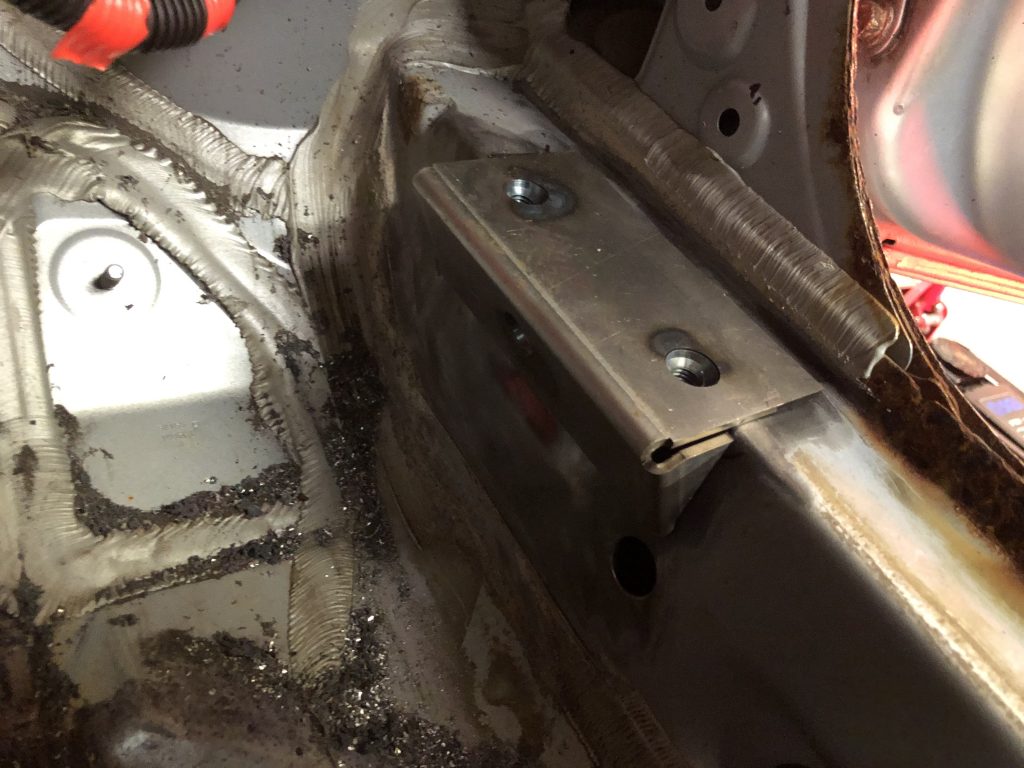
2. Re-positioned Front Mount 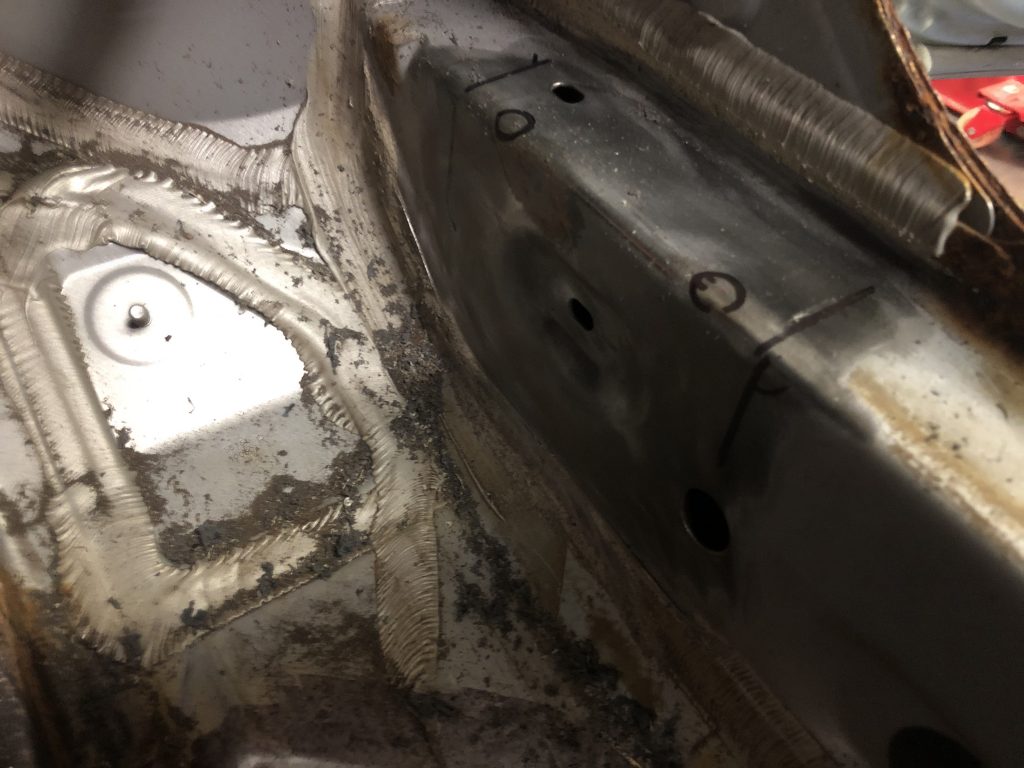
3. Marked Nut Recess Holes 
4. Dot Punch for Drilling 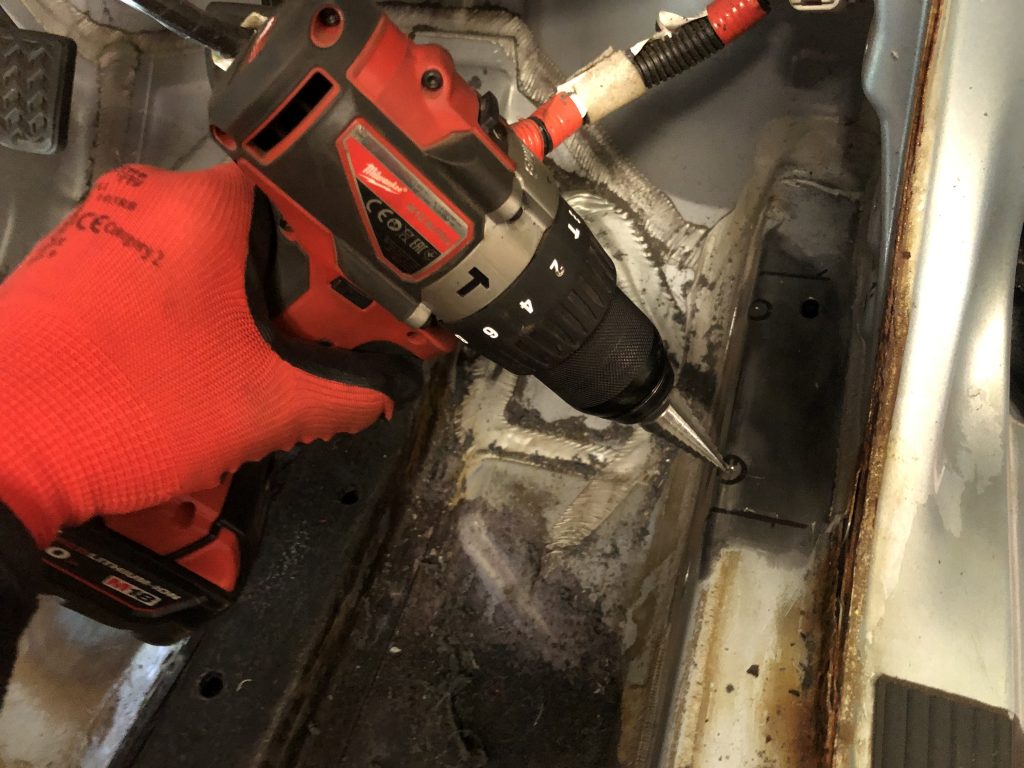
5. Drill Out Front Mount Nut Recesses 
6. Bend Seat Belt Inertial Inwards (Allow for better access to mid-point area) 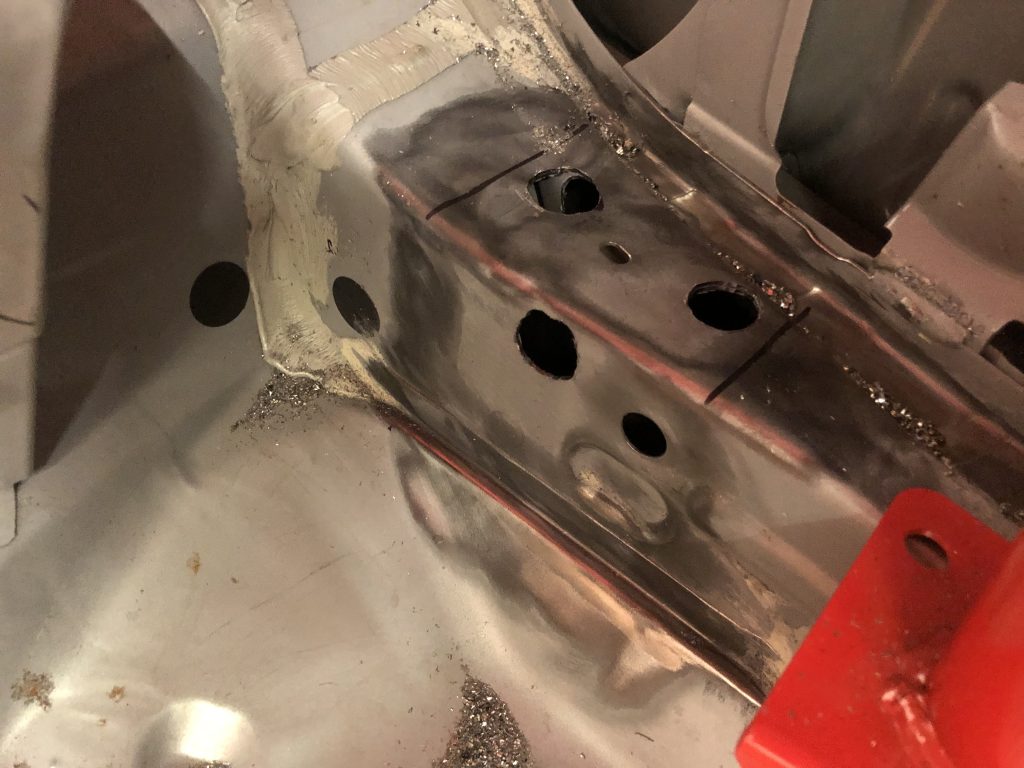
7. Mid-Point Nut Recesses Drilled 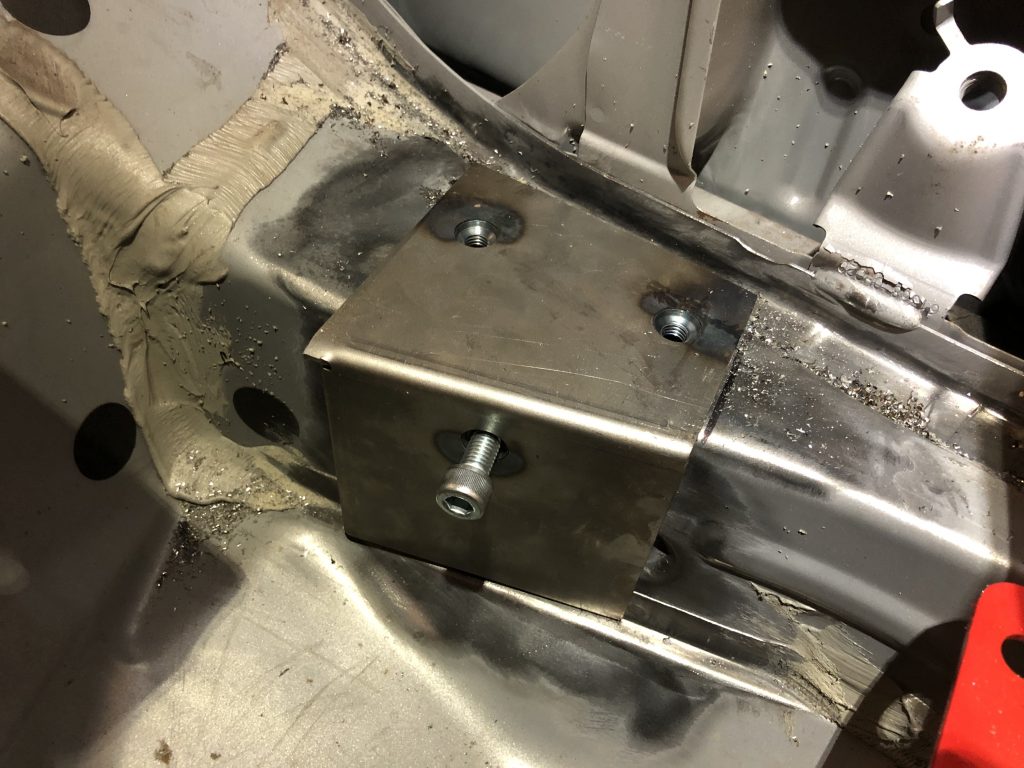
8. Final Mid-Point Mount Position 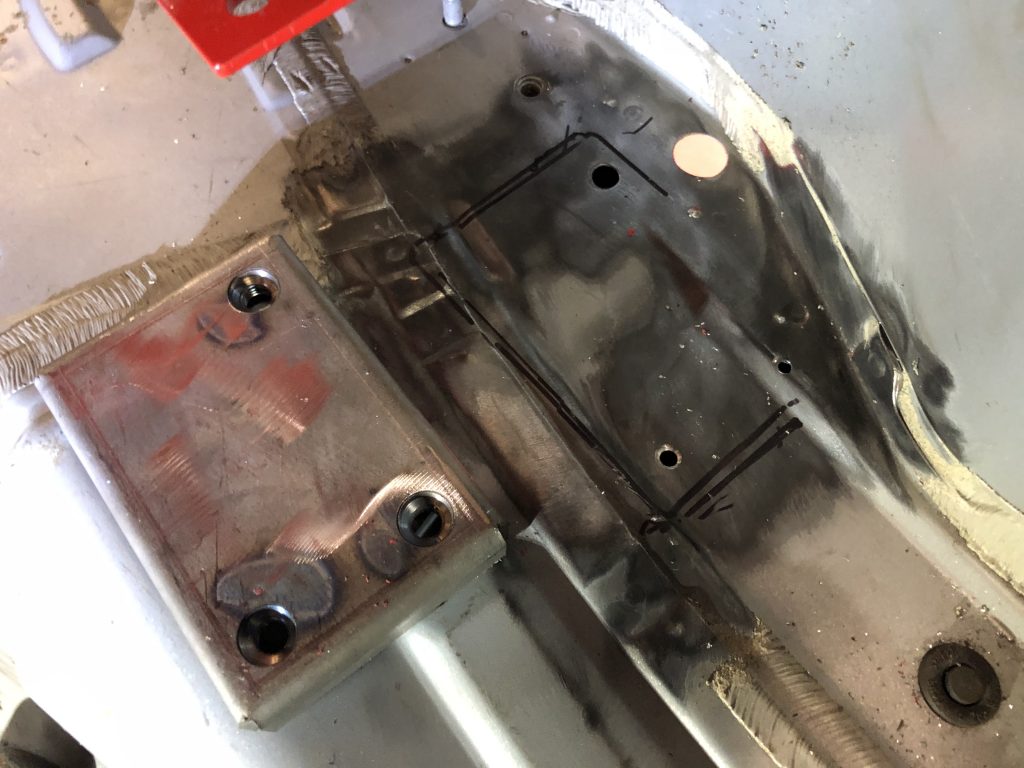
9. Rear Mount Nut Recesses 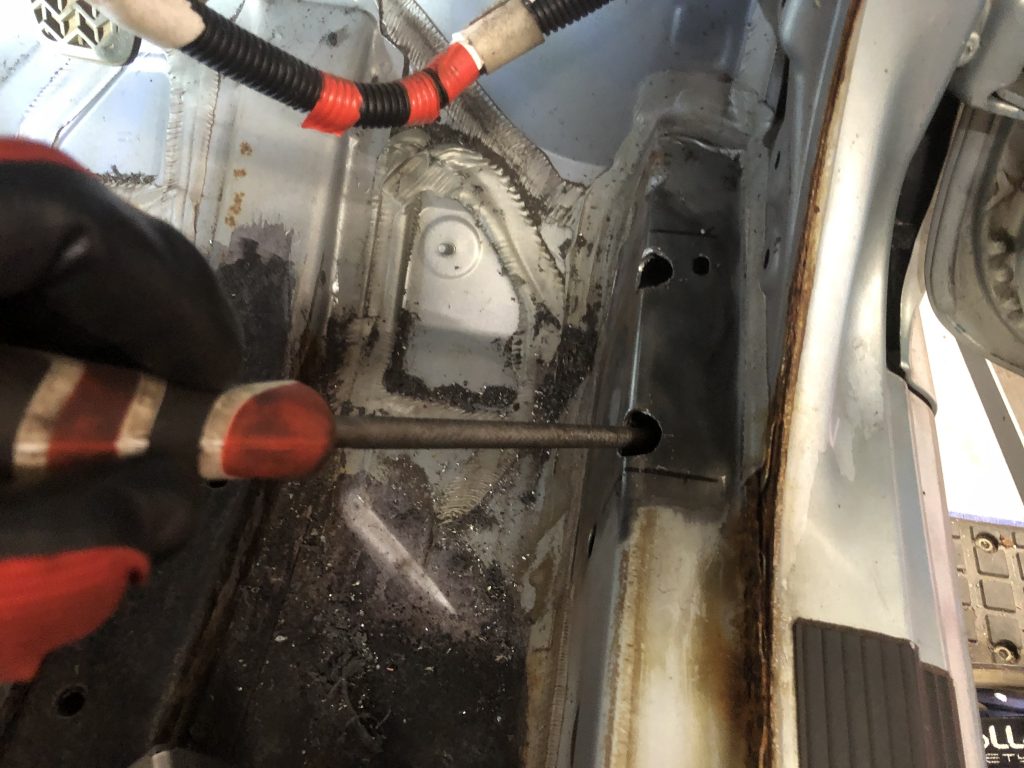
10. Filing/De-burring
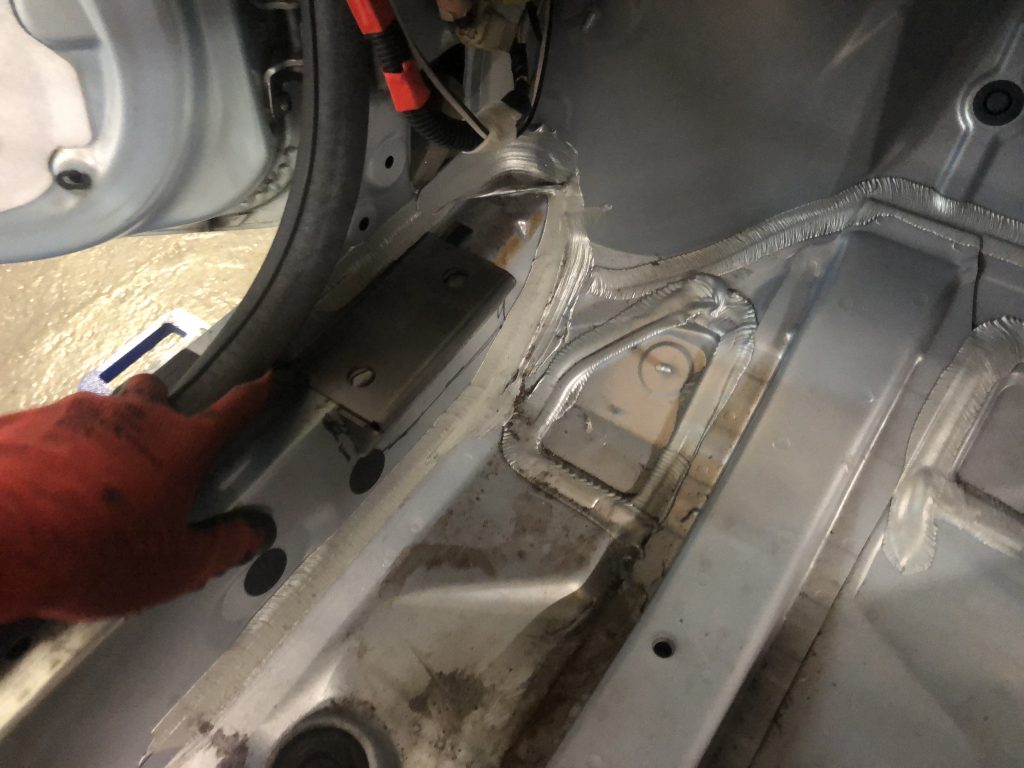
Step 7. Now you are ready to tack weld the roll cage mounts into place. First place all roll cage mount in place and reinstall the roll cage main section and A-pillar bars for the second time to double-check the position of your mounting plates. This time bolt the roll cage to the mounting plates but only finger tight to allow for some adjustment. You are now ready to give the roll cage a final inspection and when satisfied with its position tack weld the mounting plates in position in readiness for full welding.
1. Front Mount 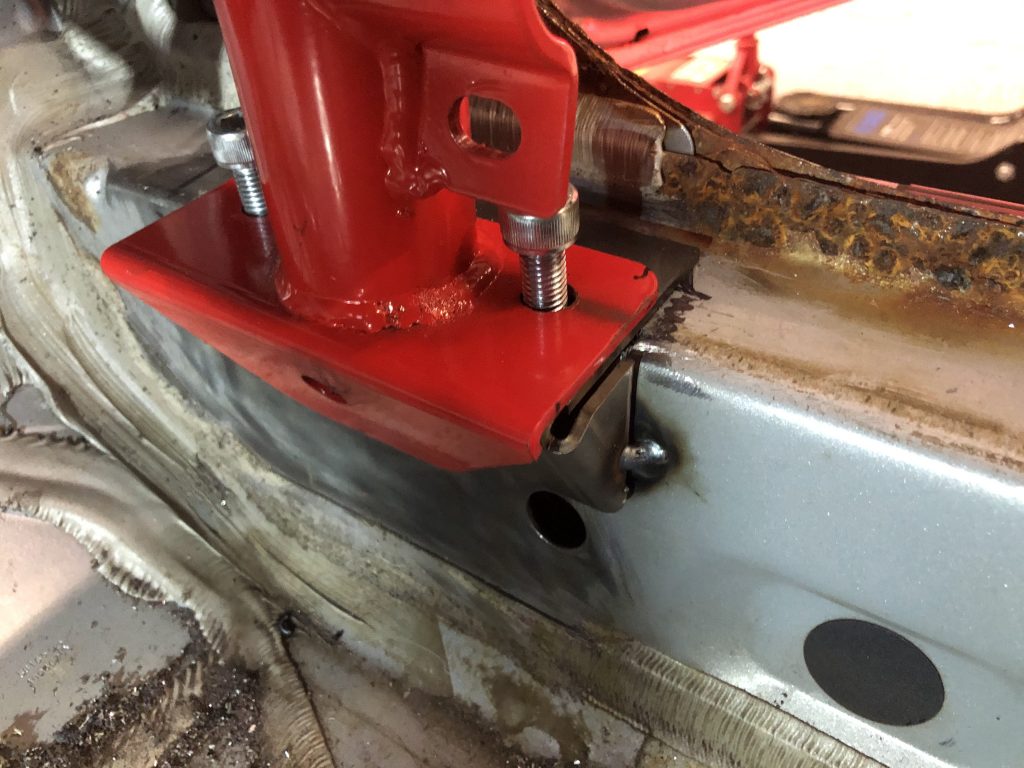
2. Front Mount Tacking 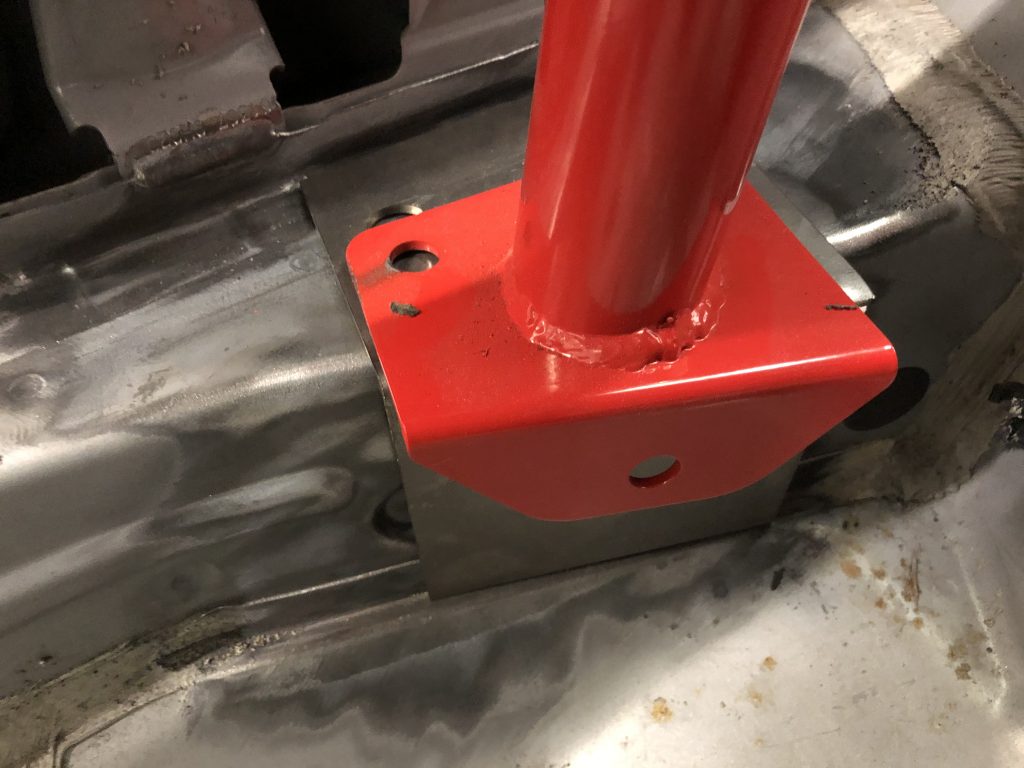
3. Mid-Point Mount 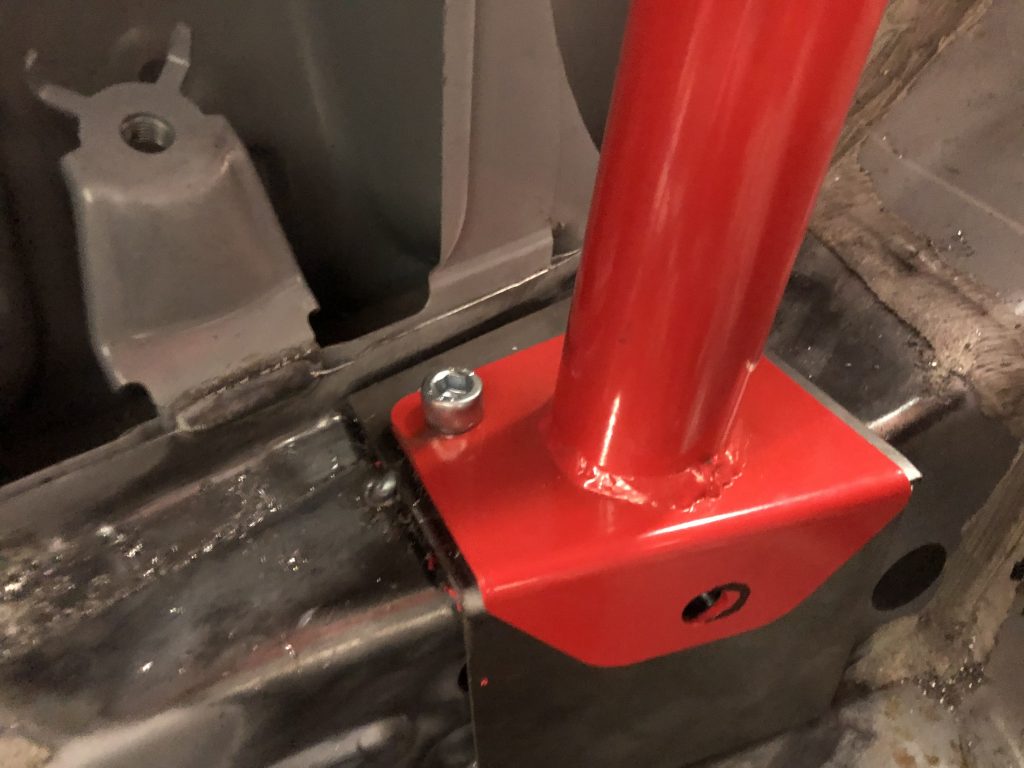
4. Mid-Point Mount Tacking 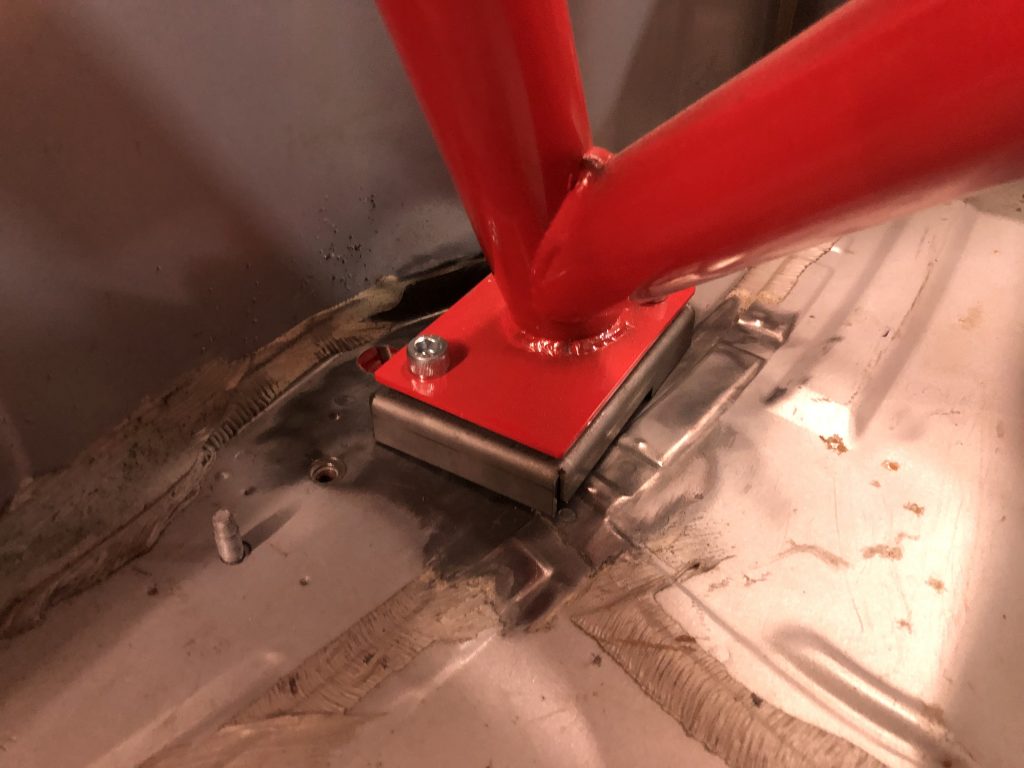
5. Rear Mount 6. Rear Mount Tacking
Step 8. Once you have tack welded the 6 mounting plates in place it is recommended that you tighten up all roll cage bots to check the positioning of the main section and A-pillar roll cage bars prior to final mounting plate welding. Once satisfied you can now remove the roll cage ready for shell/body paint and can now return to the next disassembly activities.
Final Position Checks