

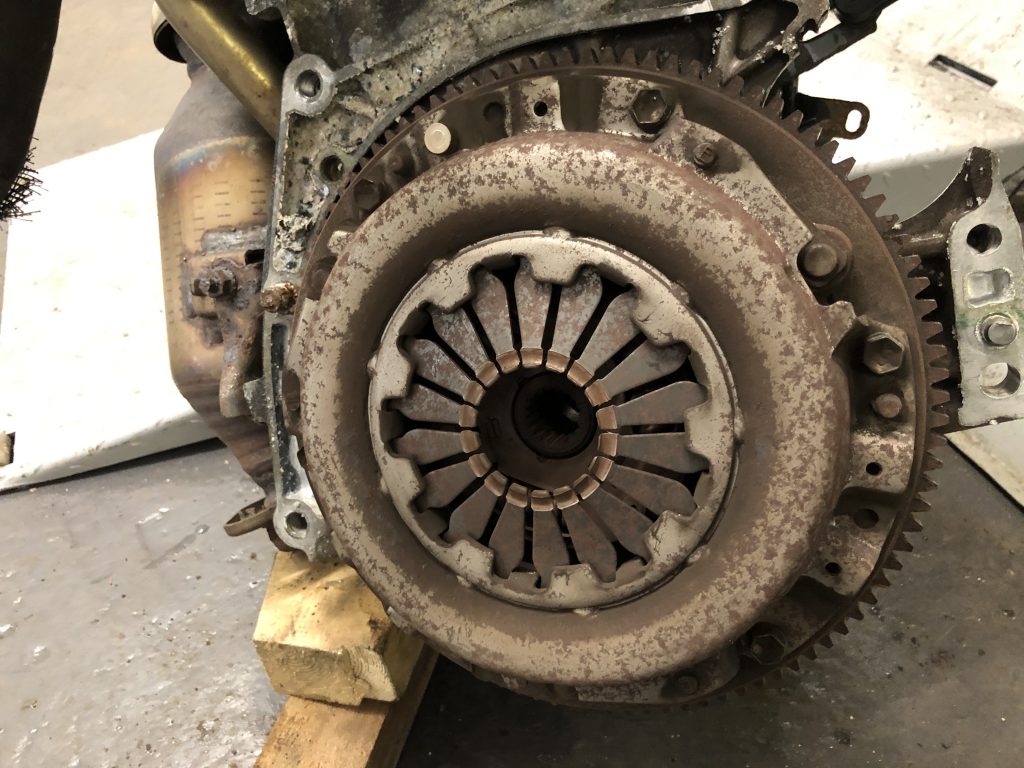
Old Clutch Assembly (In situ) 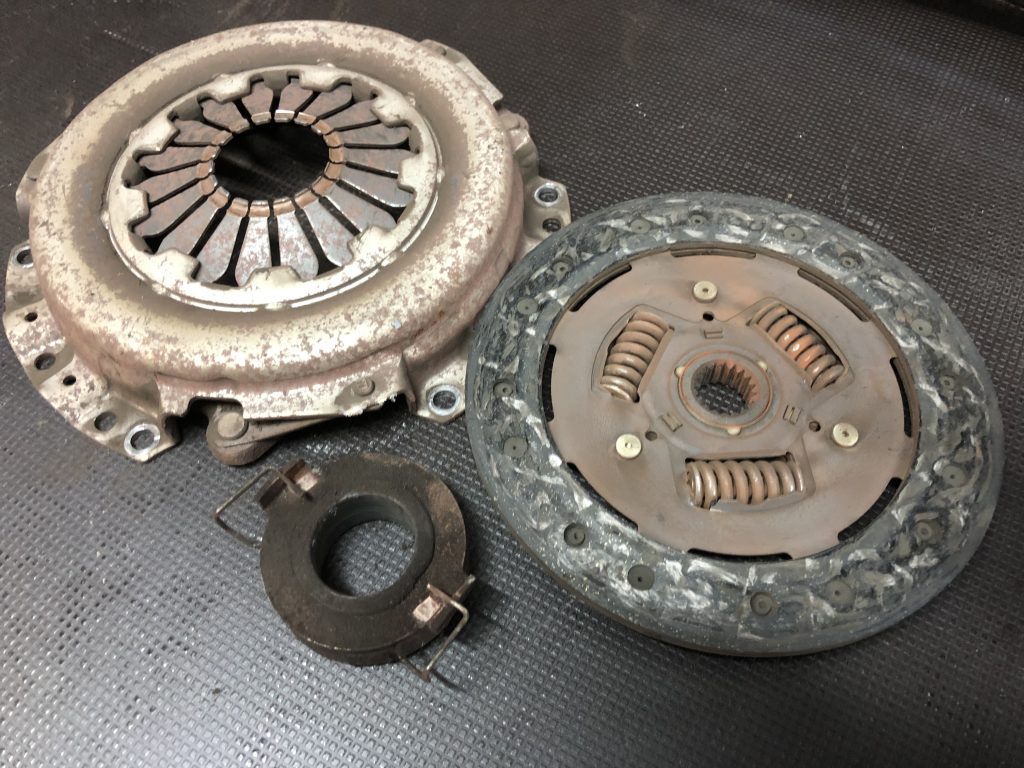
Old Clutch Assembly Disassembled 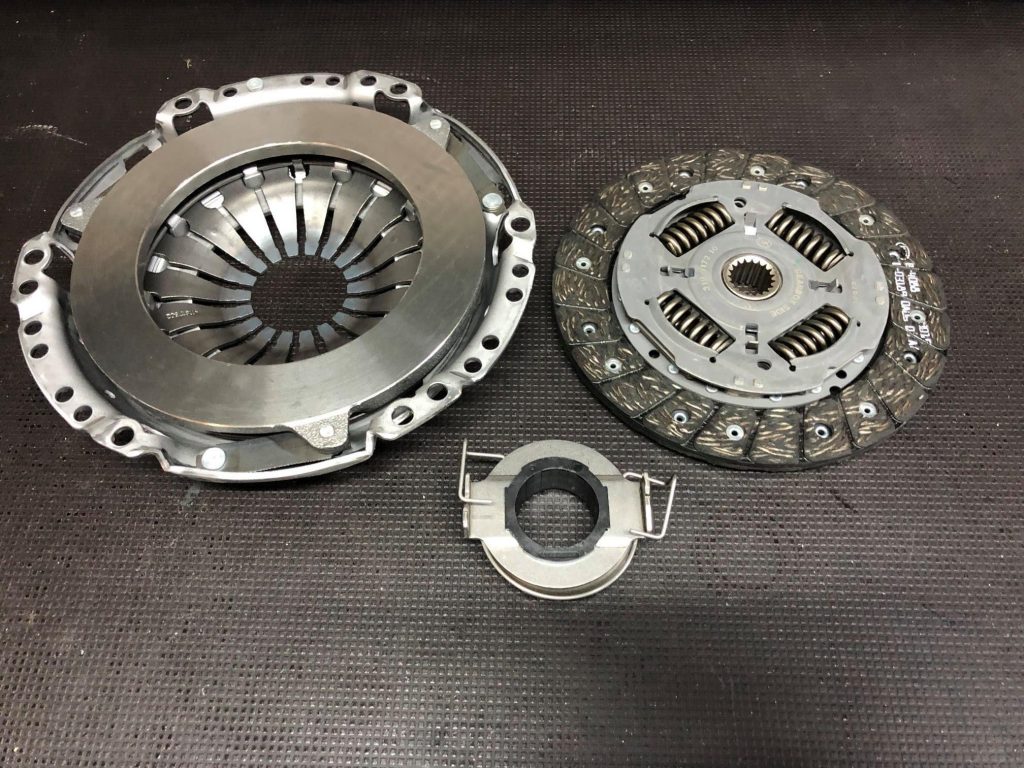
New Clutch Assembly Disassembled 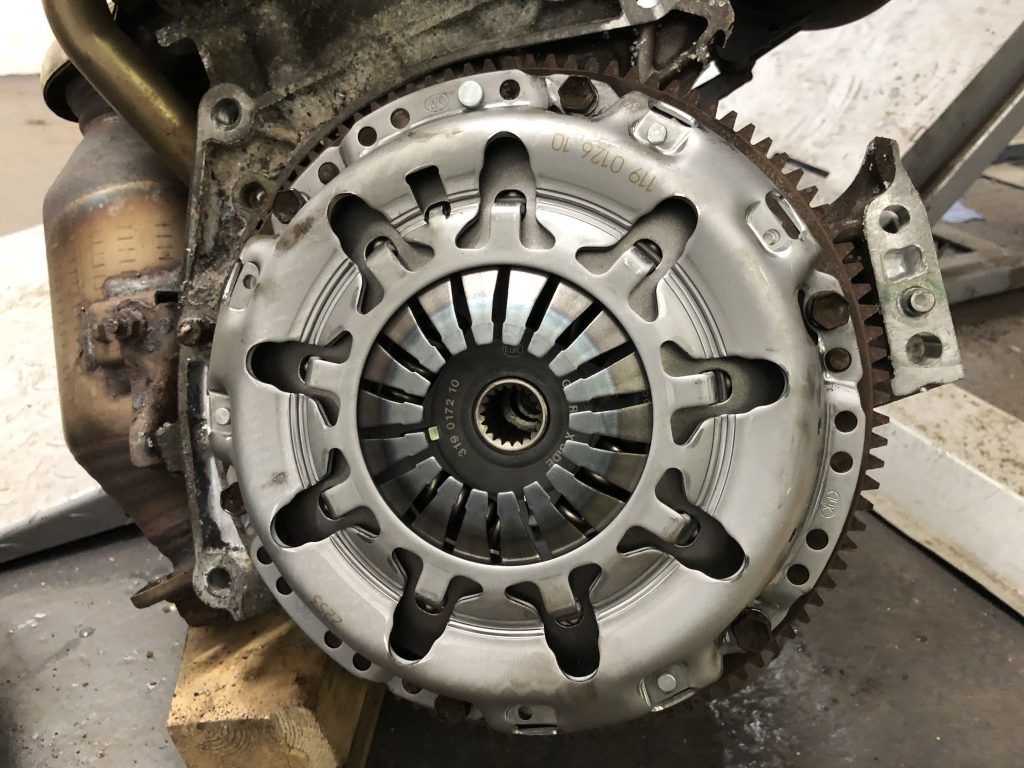
New Clutch Assembly (In situ)
| Location | The clutch is located within the transmission housing, often referred to as the ‘bell housing’ and is directly attached to the flywheel. The flywheel is located behind the clutch assembly and is directly connected to the engine crankshaft. |
| 2021 Regulations Reference | – 5.7.2 – 5.9 – 5.11.1.1 |
| Original Parts to Discard | – Fasteners (optional) – Clutch Assembly (optional) – Clutch Release Bearing (optional) |
| Parts to Add | – Fasteners (optional) – Clutch Assembly (optional) – Clutch Release Bearing (optional) – Flywheel |
| Important Checks | It is recommended to check the condition of the clutch assembly for worn or damaged components, fasteners in order to make the car safe and as reliable as possible. |
Requirements
The removal and replacement of the transmission and clutch systems are purely optional, no modifications are permitted or required in order to conform to the championship regulations. The transmission system must be removed if you wish to inspect and access the condition of the clutch and flywheel systems for additional (optional) inspection or part replacement. In the car we built, we chose to remove the engine and transmission in order to carry out a number of checks and to gain better access when making modifications to other systems and parts.
The only permitted gearboxes are the standard 5-speed manual versions as fitted as OEMto pre-2014 Toyota Aygo, Peugeot 107 and Citroen C1 models. It is permissible to use any manual gearbox, from any eligible year, in any model. All gear linkages, gearstick, clutch cable, pivots, pedals and mechanisms are to remain as standard OEM in their fitment and operation. Clutches must be standard road specification items.
Suggested Assembly Method (xxx Steps)
Step 1. Before starting any work, ensure the car or engine (if removed) is at a workable height and secure to work on before installing the clutch assembly to the flywheel. The first step is to ensure you have cleaned and repaired the face of the flywheel as discussed (in the clutch removal and inspection topic) and check the bolts are torqued in a diagonal sequence to the correct setting.
Torque Setting: 78NM
Safety Tip – Before starting work on the clutch (or at any point when working under the vehicle) ensure that it is cool and you are wearing suitable protective eyewear as debris often falls from the underside of the car when assembling the transmission and related systems.
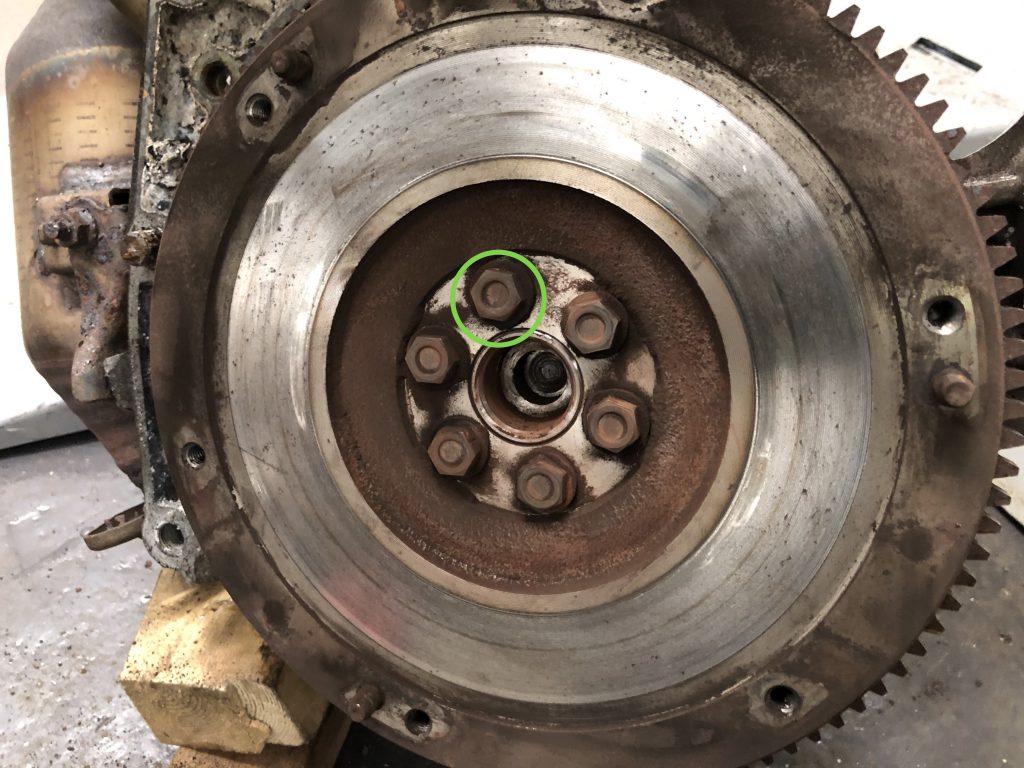
1. Flywheel Bolt Tension Check 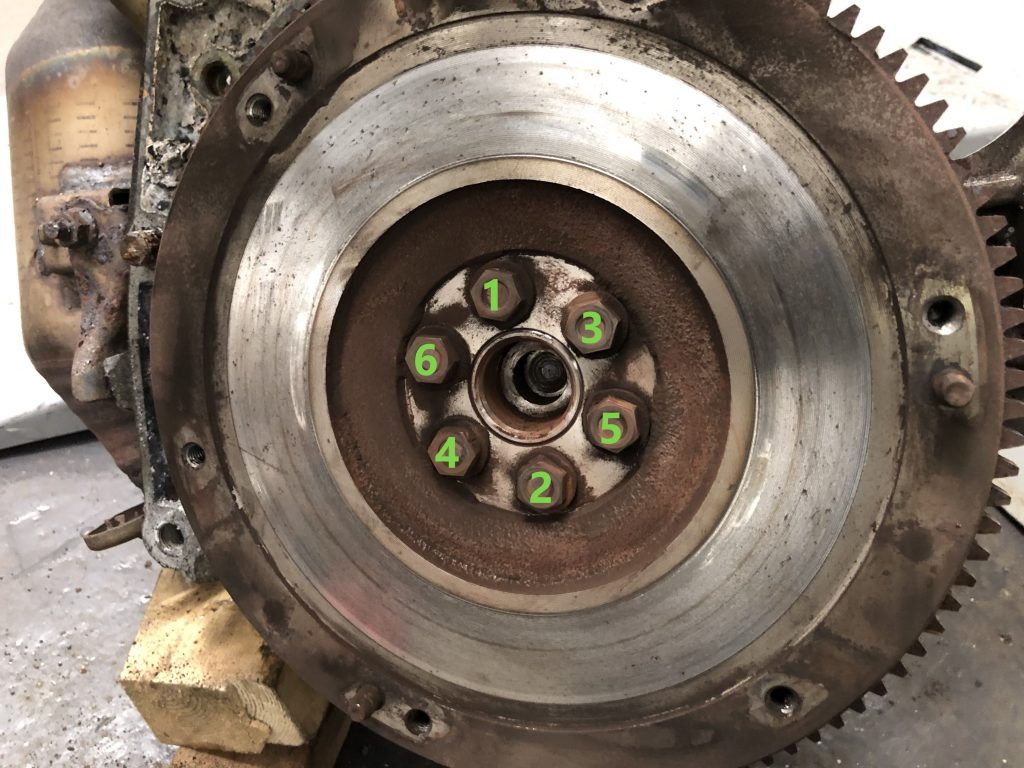
2. Bolt Tension Sequence
Step 2. Now you’re ready to assemble the clutch parts and add them to the flywheel, starting with the friction plate. You can either offer up the friction plate to the flywheel (with the widest projecting part of the friction hub pointing away from the flywheel) and hold it in place whilst you secure it with the pressure plate assembly, or you can assemble the two parts with an alignment tool and then add the whole assembly to the flywheel.
We opted for the latter and assembled the clutch friction plate and pressure plate together with the use of an alignment tool and then added it to the flywheel locating dowels. You can see two differing alignment tools in images 5 and 6 below. Often there will be a label to indicate which side to place onto the flywheel or towards the gearbox as in the example in image 3 below.
Tool Tip – Apply a small amount of molybdenum disulphide grease or a suitable substitute to the input shaft and the splines on the inside of the friction plate. (Molybdenum disulfide (Moly) is a solid additive, most commonly used in extreme-pressure applications).
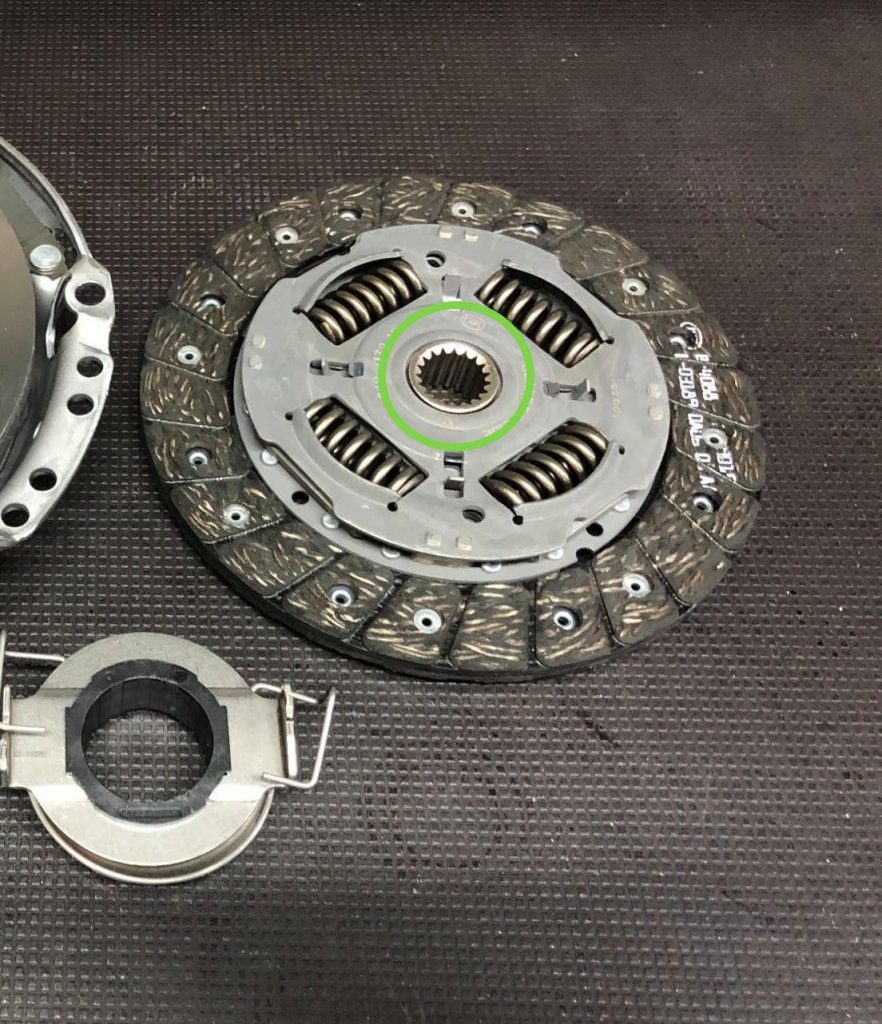
1. Apply Grease (Hub splines) 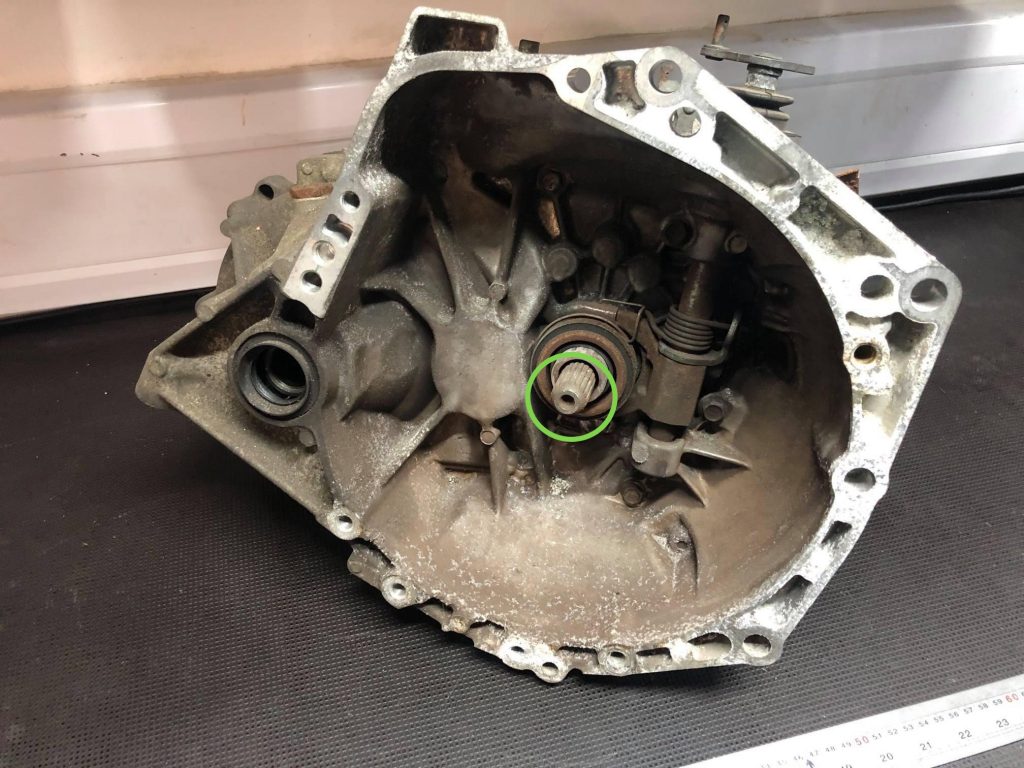
2. Apply Grease (Input shaft) 
3. Orientation Lable 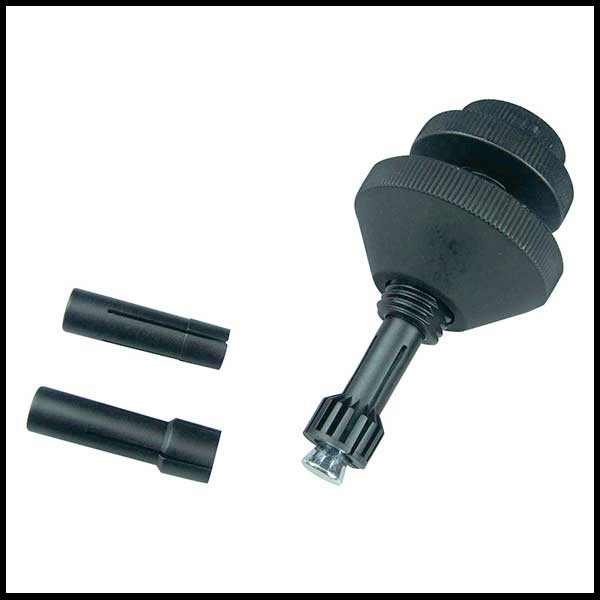
4. Clutch Alignment Tool 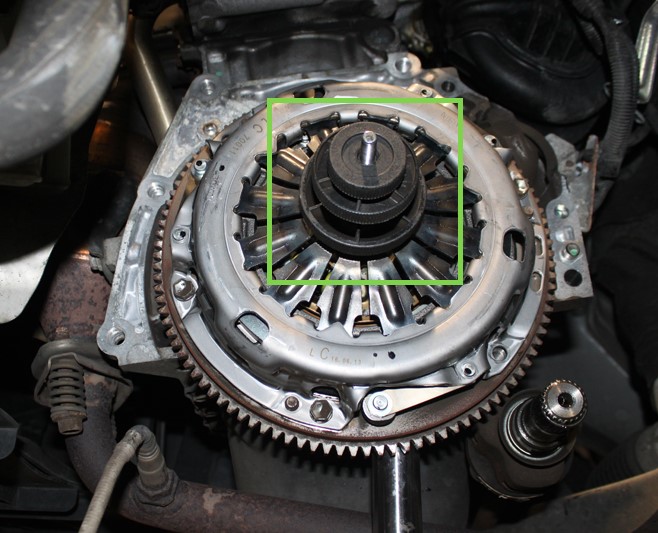
5. Clutch Alignment Tool (On car) 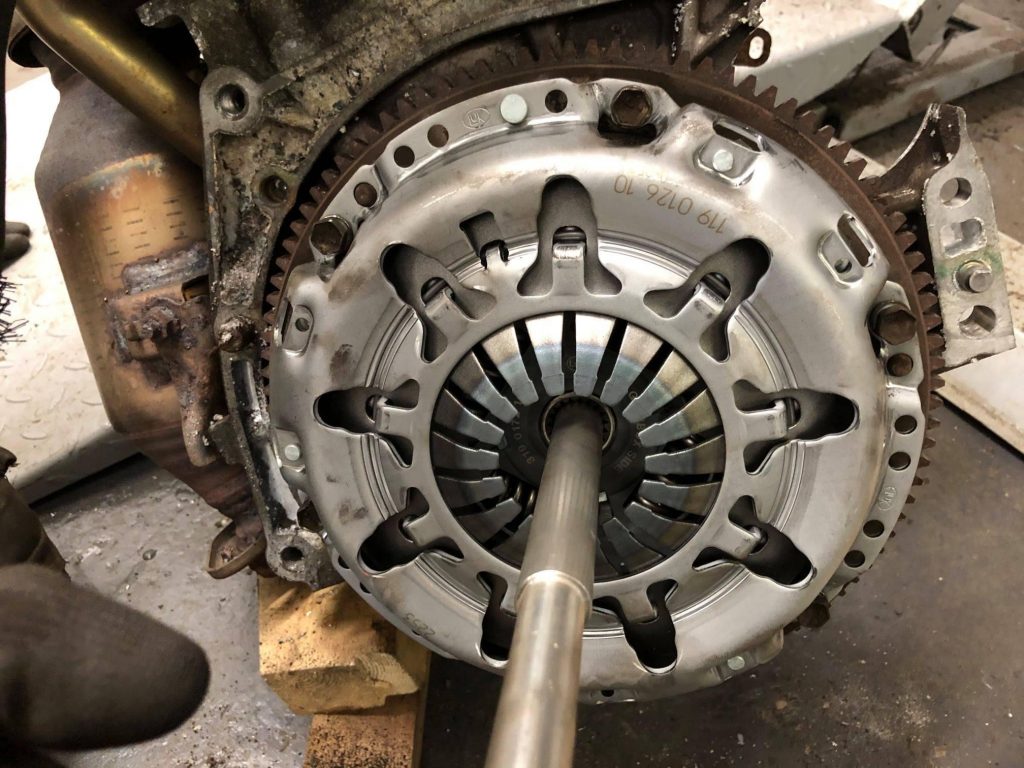
6. Clutch Alignment Tool (Engine removed) 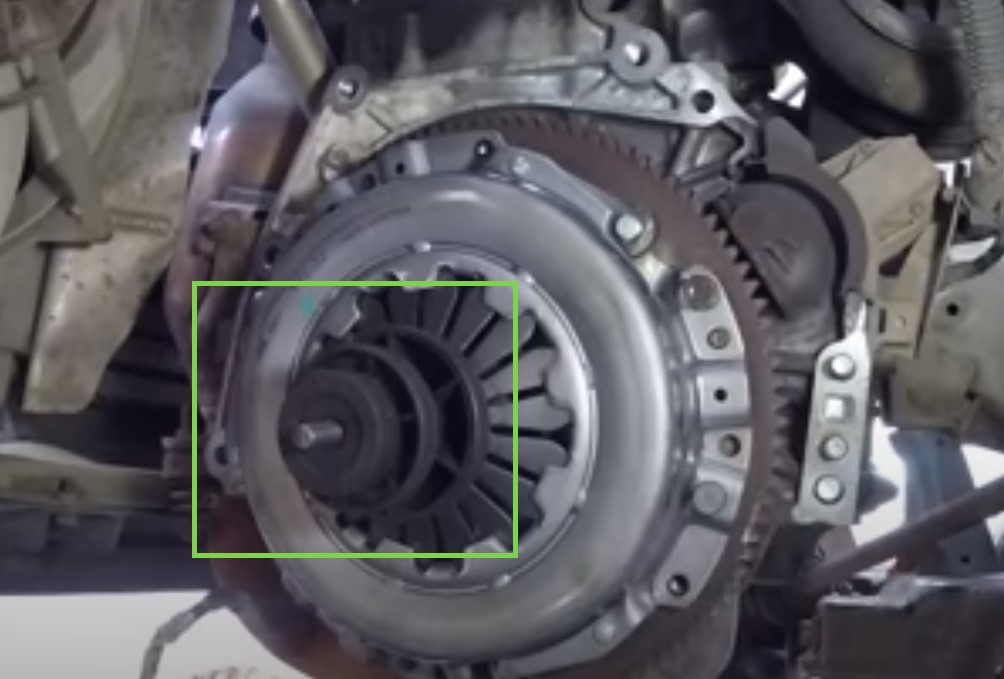
7. Clutch Alignment Tool (Example 3)
Step 3. Once you have removed the transmission you will be able to remove the clutch and release bearing and check for wear and damage. Start by removing the clutch basket/pressure assembly bolts in a cross or diagonal like pattern and at a few turns at a time to slowly and evenly release the pressure on the clutch friction plate to flywheel surfaces. Once you have removed the bolts prise the clutch pressure plate assembly from the 3 dowels located on the flywheel. Finally, remove the release bearing from the clutch forks within the transmission bell housing by releasing the clip and simply rotating the bearing from the input shaft guide.
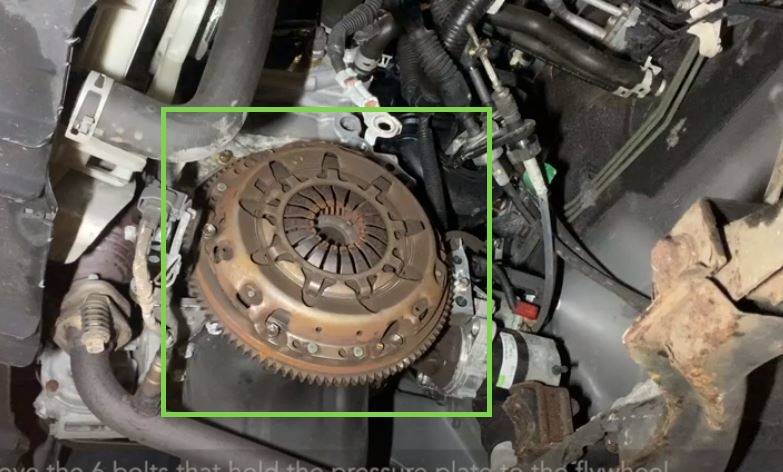
1. Clutch (In situ) 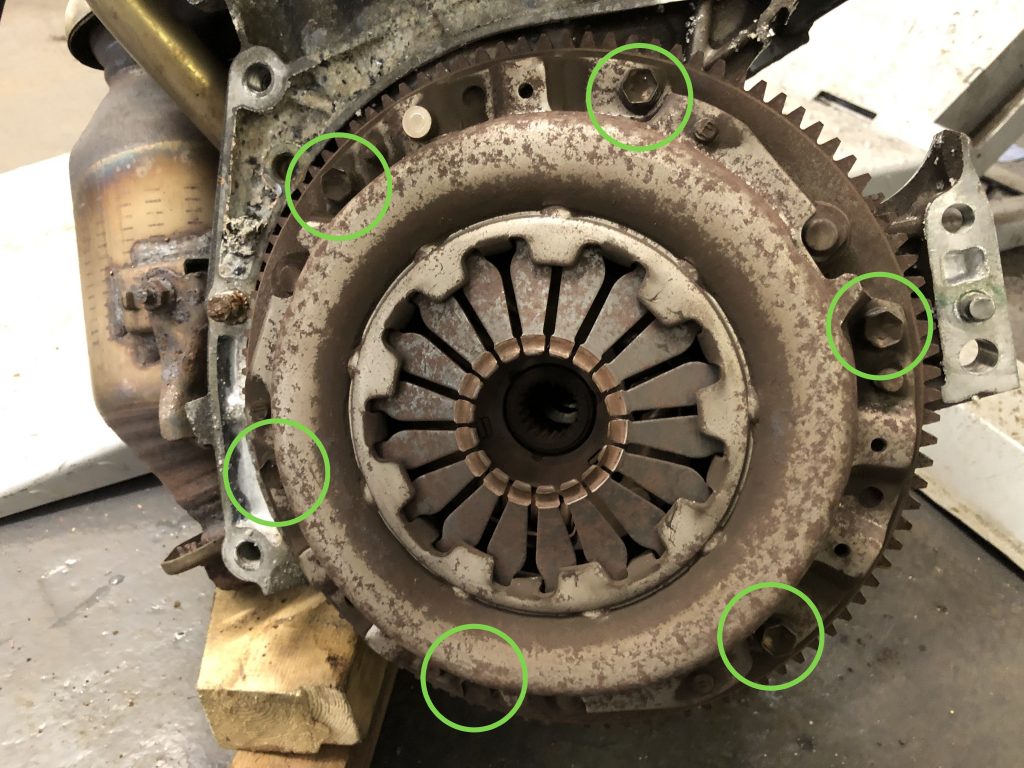
2., Clutch Bolt Location 
3. Clutch Bolt Removal 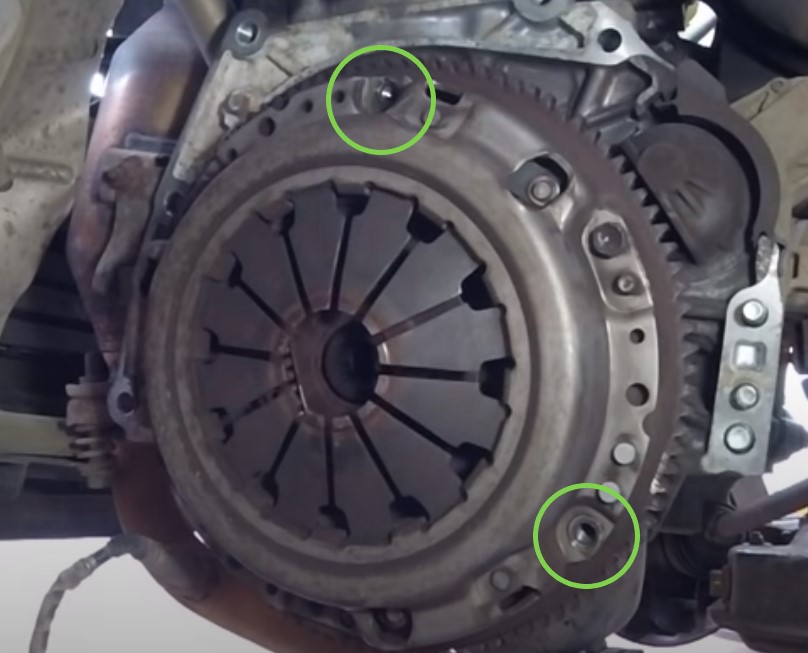
4. Bolts Removed 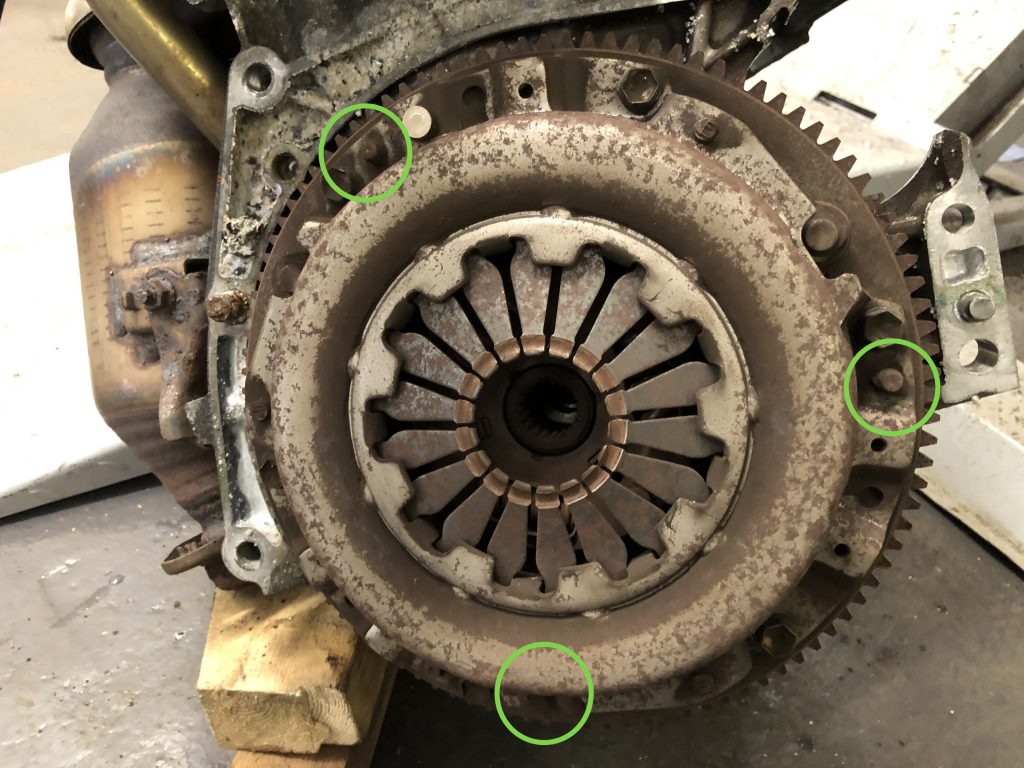
5. Dowel Locations 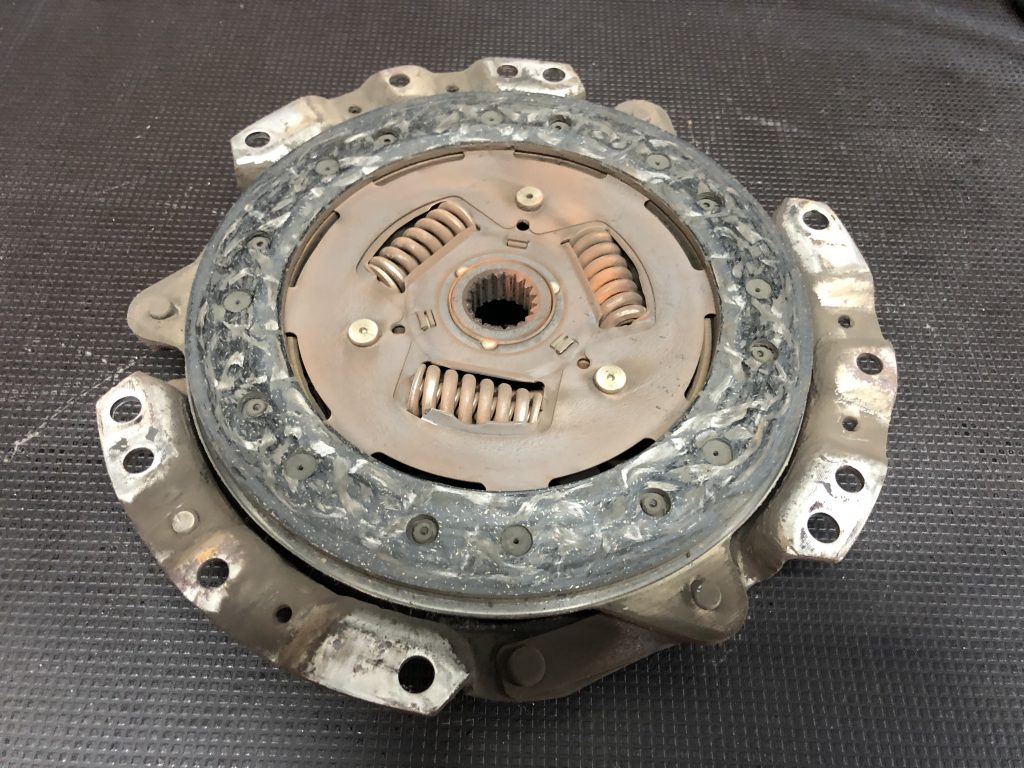
6. Clutch Assembly Removed 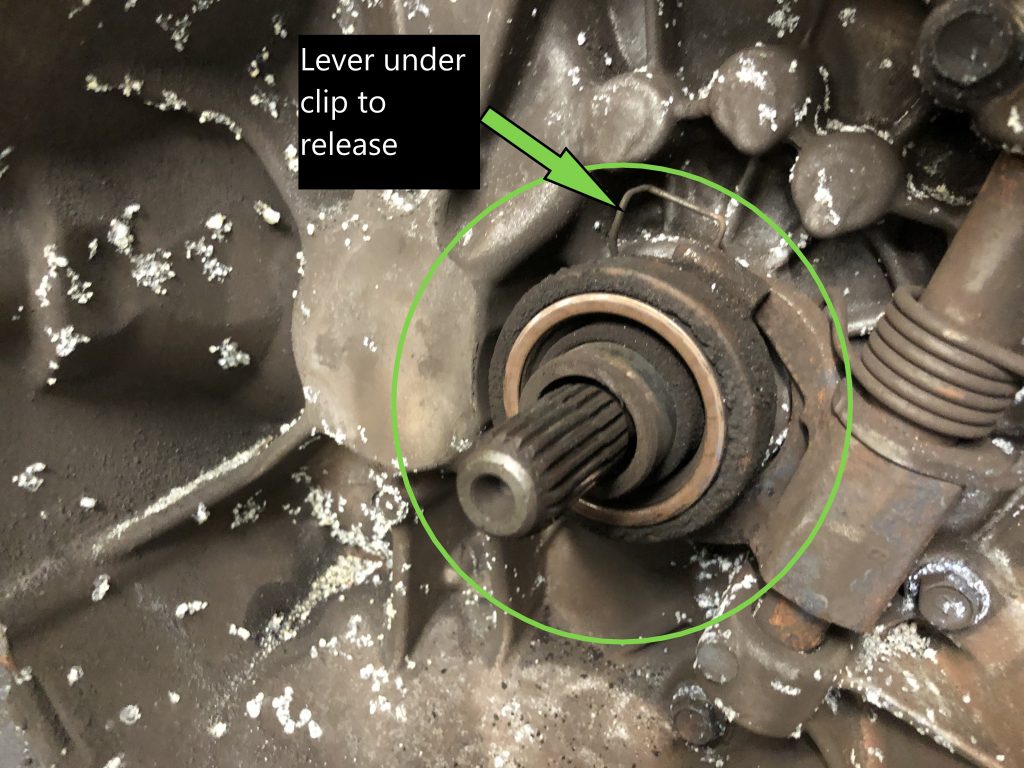
7. Release Bearing 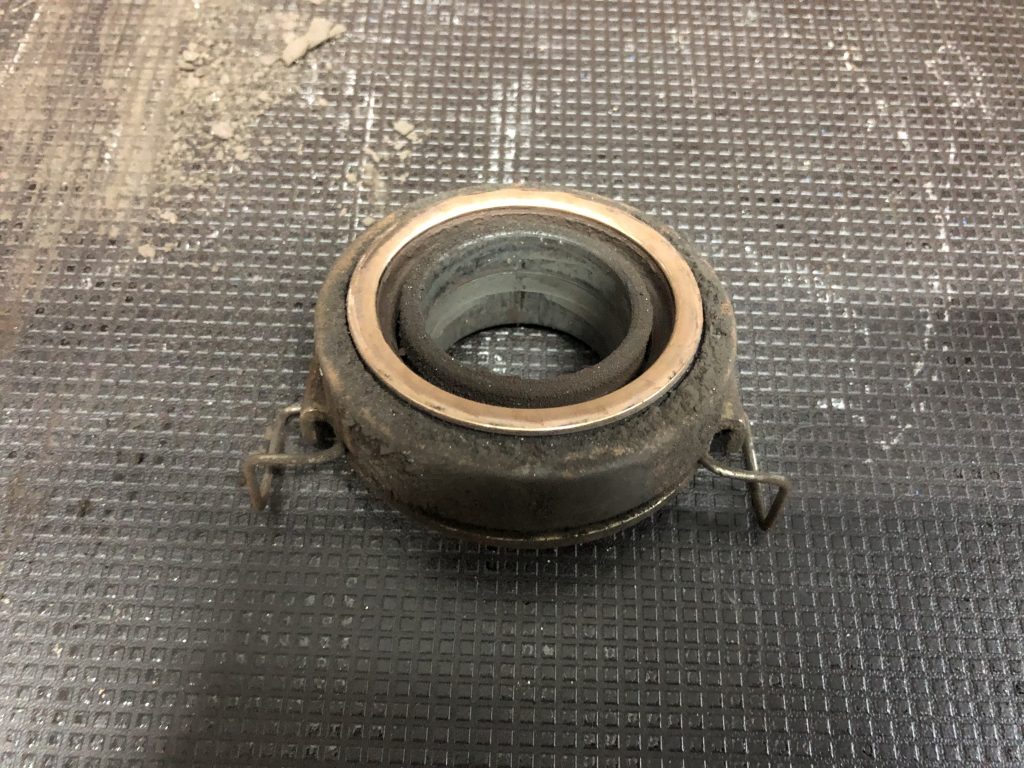
8. Release Bearing Removed
Step 4. Once you have removed the clutch from the flywheel you will be able to inspect it for wear and damage and carry out any cleaning if you intend to replace it. Pay particular attention to the following areas and parts and replace as necessary:
| Part/Area | Important Checks |
|---|---|
| Clutch/Pressure Release Bearing | Check the bearing face is clean, smooth and rotates freely and smoothly on the input shaft. Check for cracks and damage. |
| Clutch Forks (On transmission) | Check the area is clean and the for ends do not have any wear or a ‘step’ where the press against the bearing. |
| Clutch Linkages | Check the condition of the linkage, clean the area and look for signs of corrosion, or cracks. |
| Clutch Friction Lining/Plate | Check the plate is clean, free for oil and signs of cracks or burns. If the plate is worn sufficiently or near to the rivets it is in need of replacement. If the plate is useable check the condition of the splines, springs and rivets. |
| Clutch Pressure Plate | Check for contamination and obvious signs of damage and cracks. Inspect the fulcrum and diaphragm springs for wear. |
| Pressure Plate & Flywheel Face | Check for signs of wear, scoring, pitting, cracks and discolouration (a sign of excessive heat). Light pitting for scores can be polished out with emery paper. |
Clutch Parts: Inspection of the clutch internal components is a straightforward process, but at the same time is timely. Whilst we encourage the inspection of all systems of the car, and in particular, those with moving components, if the clutch is not relatively new we recommend you change it for optimal performance during the race season. If you are in any doubt of the condition of the parts we recommend you replace them. If you intend to change the clutch we also recommend you change all three parts, namely the friction plate, pressure plate and release bearing.
In the case of our clutch illustrated below, we found the clutch at 80k miles to be extremely worn and chose to replace all parts. We found heavy wear on the friction plate, the release bearing was very loose, the diaphragm springs heavily worn and the pressure plate to have signs of ‘pitting’. We also found light damage on the flywheel, as a result, we cleaned and smoothed the scratched away with emery paper. As a side note, it is a good time to check the tension on the flywheel bolts as illustrated in image 7 below.
1. Removed Clutch Assembly 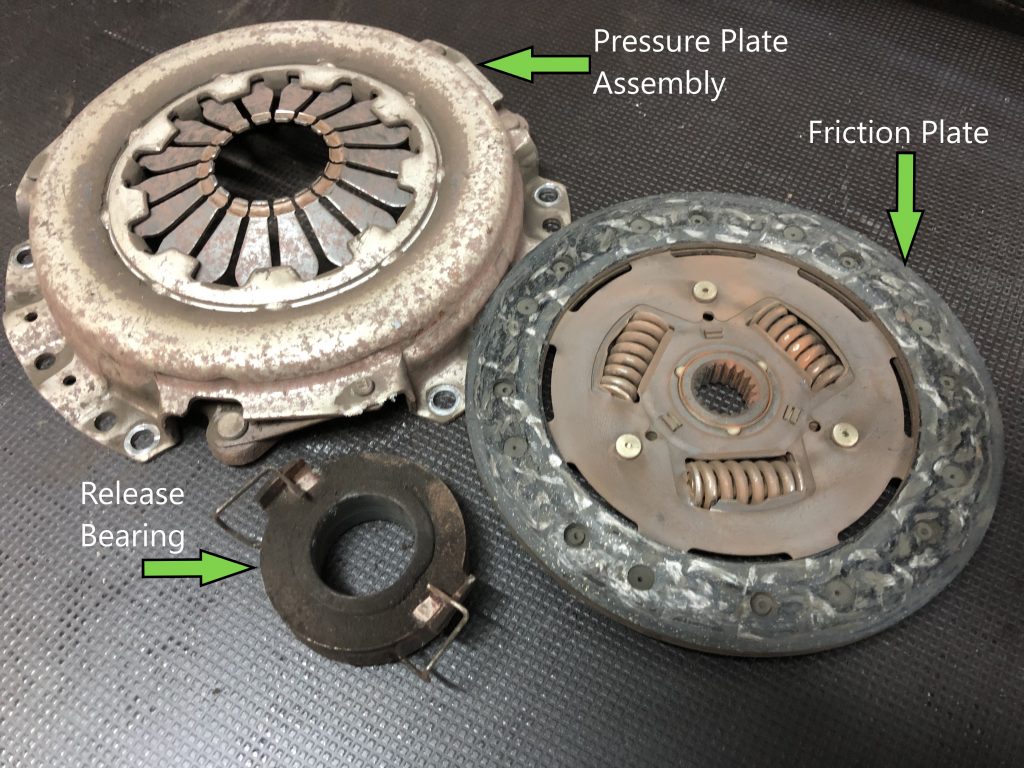
2. Clutch Parts 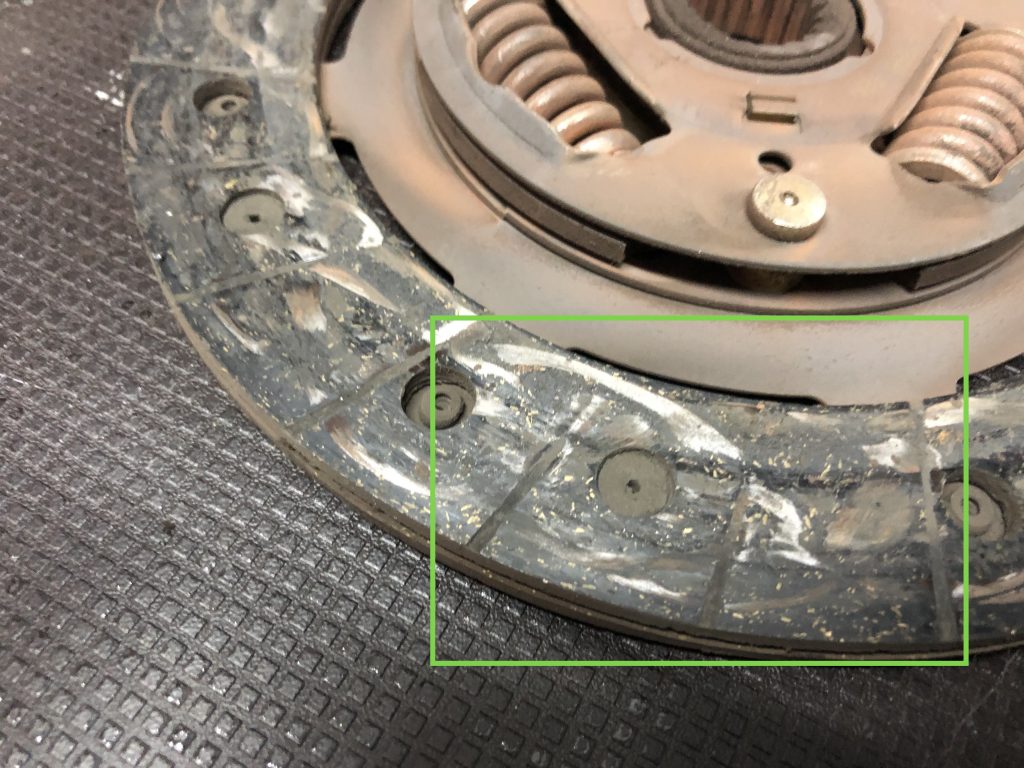
3. Friction Plate Damage & Wear 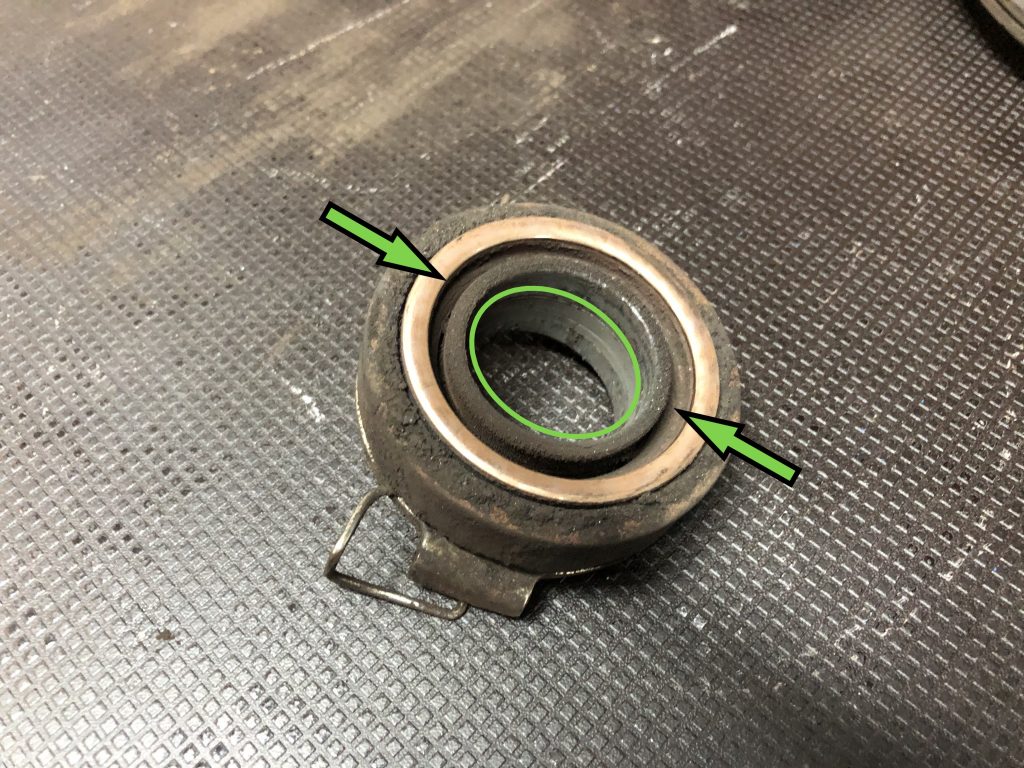
4. Release Bearing Wear 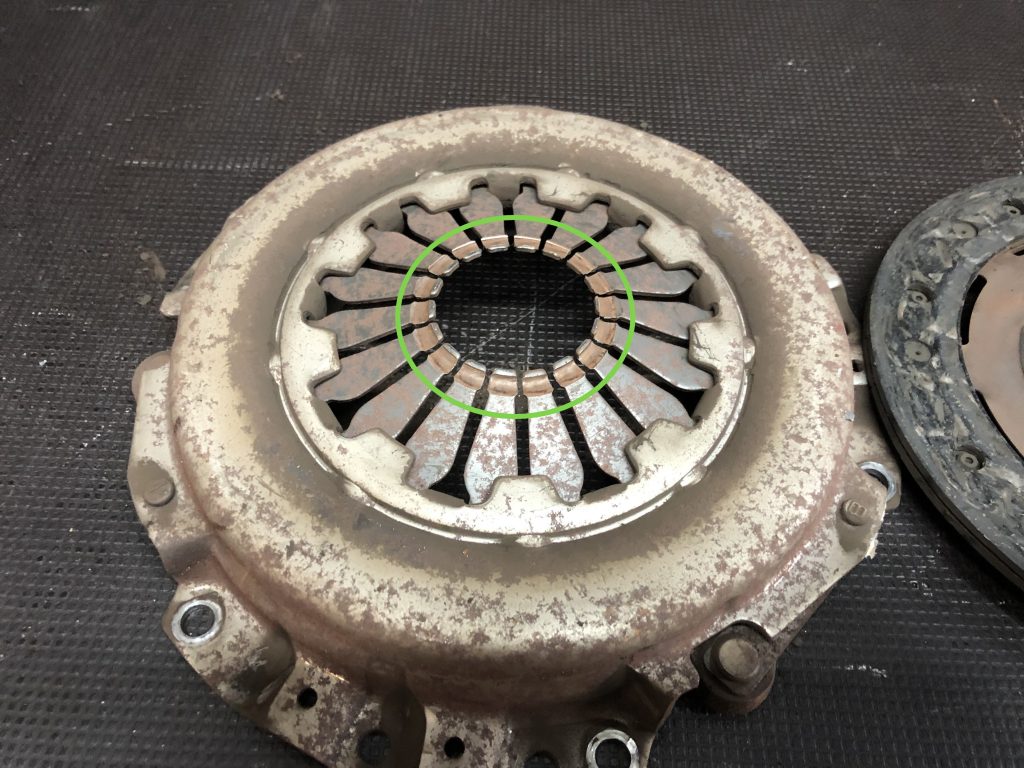
5. Diaphragm Springs Wear 
6. Pressure Plate Damage 7. Check Flywheel Bolt Tension 
8. Light Damage