Manifold (More Images)
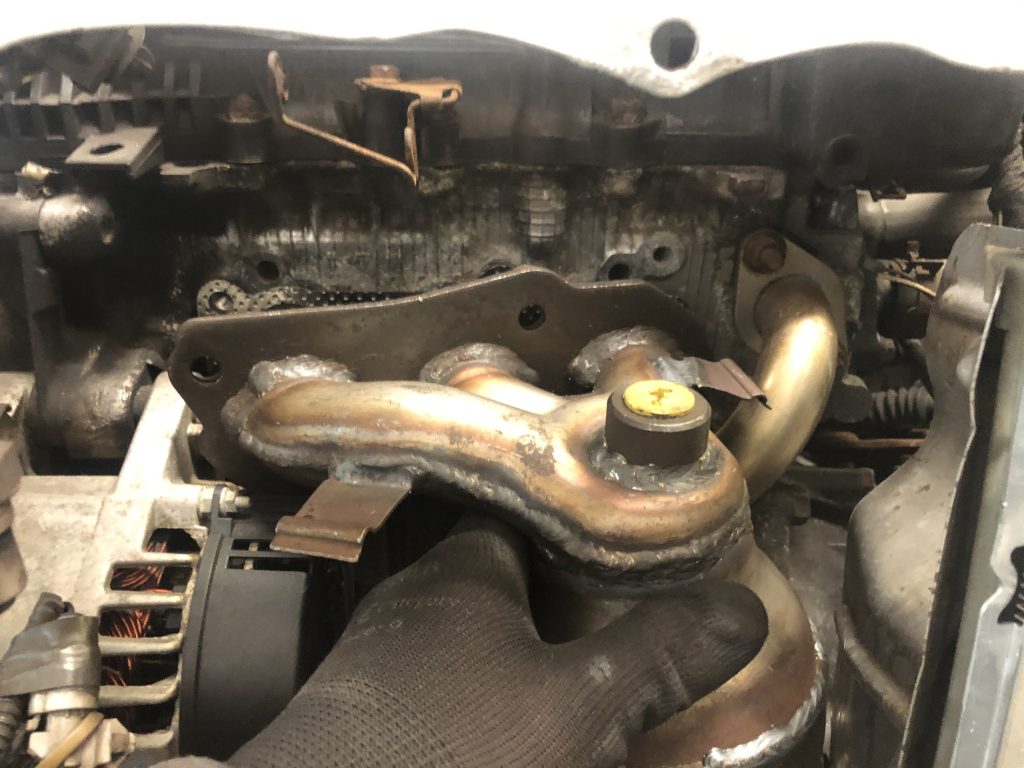
Exhaust Manifold/Cat (Engine view) 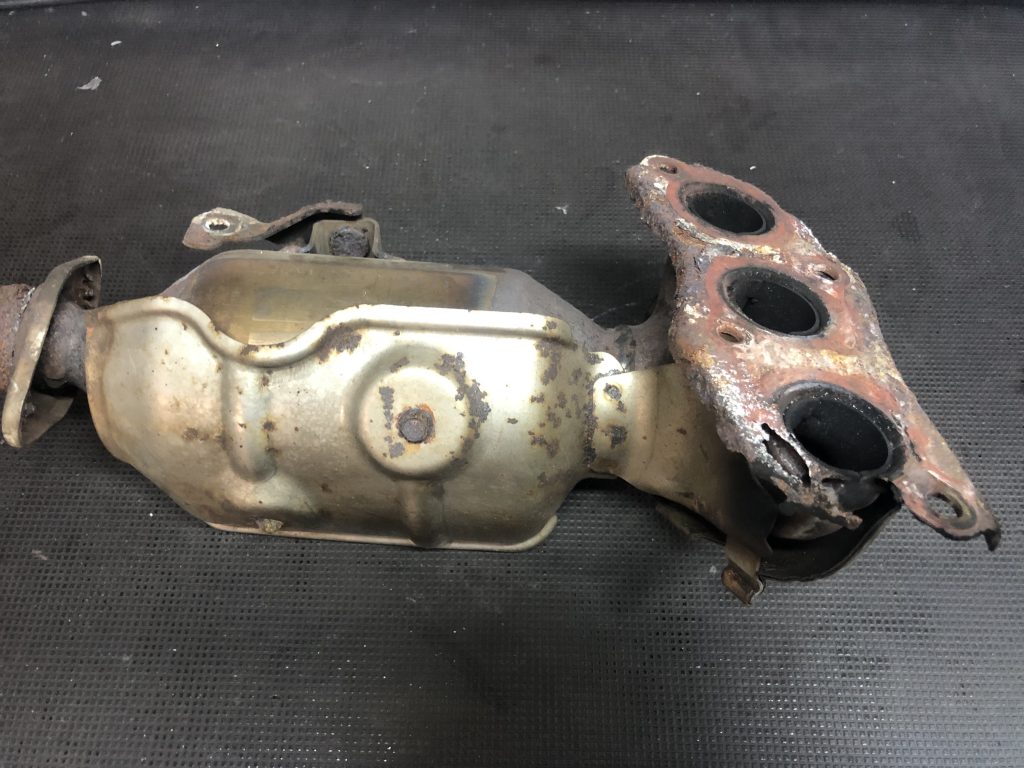
Exhaust Manifold/Cat (Removed)
| Location | The exhaust manifold is located centrally in the engine bay, behind the radiator cowling and is directly connected to the engine. |
| 2021 Regulations Reference | – 5.7.6 – 5.7.8 |
| Parts to Discard | – Manifold (where required) – Manifold Gasket – Lambda Sensor (where required) – Manifold to Mid-Pipe Sealing Ring – Fasteners |
| Important Checks | It is recommended to replace worn or damaged exhaust fasteners/mounts/gaskets in order to make the car safe and as reliable as possible. |
Requirements
The entire exhaust system must be removed for inspection, the manifold can be replaced where necessary and can be supplied by the City Car Cup or a reputable parts supplier, but must be a standard part as per the regulations set by the BRSCC.
The exhaust manifold, fully operational catalytic convertor, and front pipe must be standard or standard pattern parts and must remain unmodified in any way. Standard Lambda sensors must be fitted in their original position, connected and operational at all times. Exhaust rubber mountings may be upgraded or reinforced.
Suggested Disassembly Method (8 Steps)
Step 1. First, ensure that the car is at a good workable height and if not already carried out remove the exhaust silencer and mid-pipe as advised in the previous topics. BETTER IMAGE HERE
Safety Tip – Before starting work on the exhaust system (or at any point when working under the vehicle) ensure that it is cool and that you are wearing suitable protective eyewear as debris often falls from the underside of the car when removing the exhaust system.
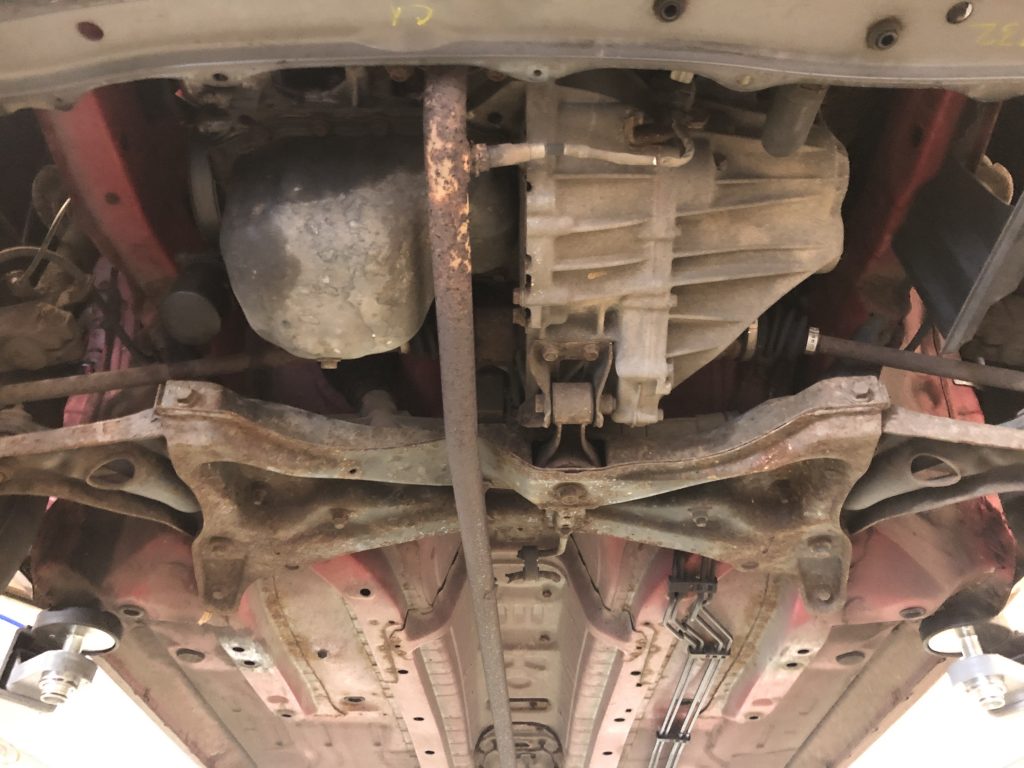
Step 2. With the silencer and mid-pipe/centre sections removed you are now free to focus on removing the manifold. It is possible to remove the manifold with the car fully assembled but obviously, space in the engine bay is limited. Throughout the disassembly process, you will be required to inspect and modifying various areas within the engine bay it makes sense to remove some parts to allow better access and thus making removing this part far easier. So to gain better access we recommend removing the front bumper and crash bar/cross-member.
First, remove the front bumper by removing the three retaining bolts and any clips from the top edge of the bumper. The number of bolts and clips will vary depending on the car model. Now remove the 5 screws on the underside of the bumper edge. Next, prise out the plastic clips within the wheel arches and ensure you disconnect any wiring to possible light fixtures within the bumper. Finally, pull the ends of the bumper from the securing clips in the wheel arch and unclip the bumper from the top of the engine area. BETTER IMAGES HERE
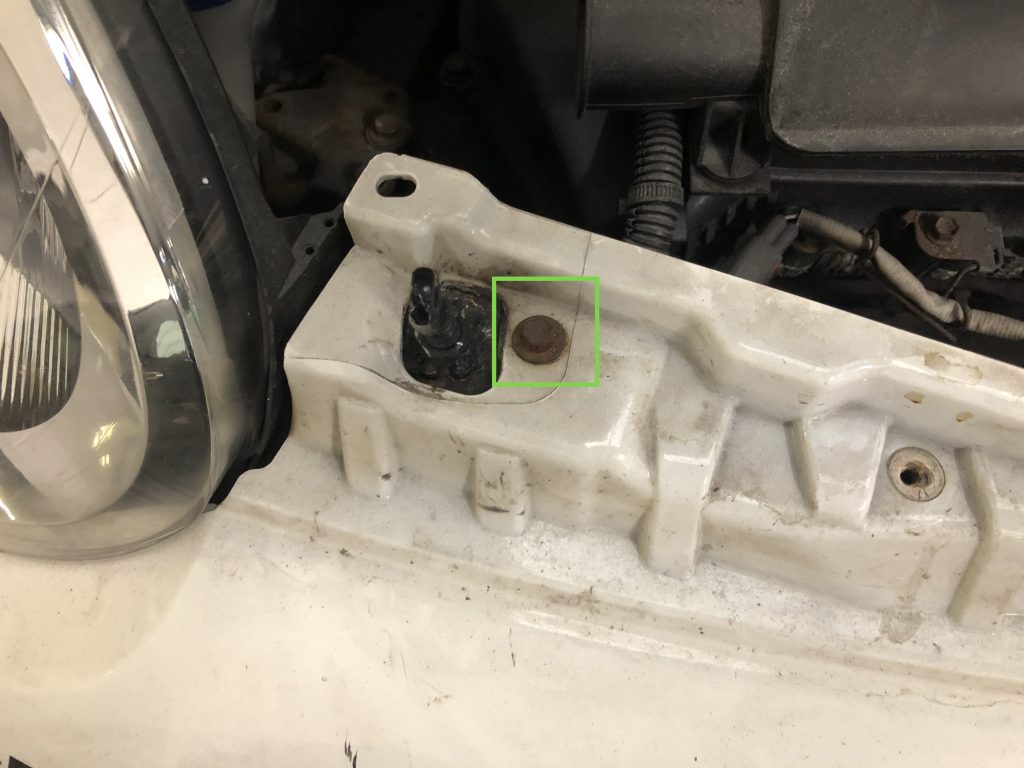
1. Right-Hand Bolts (1 already removed) 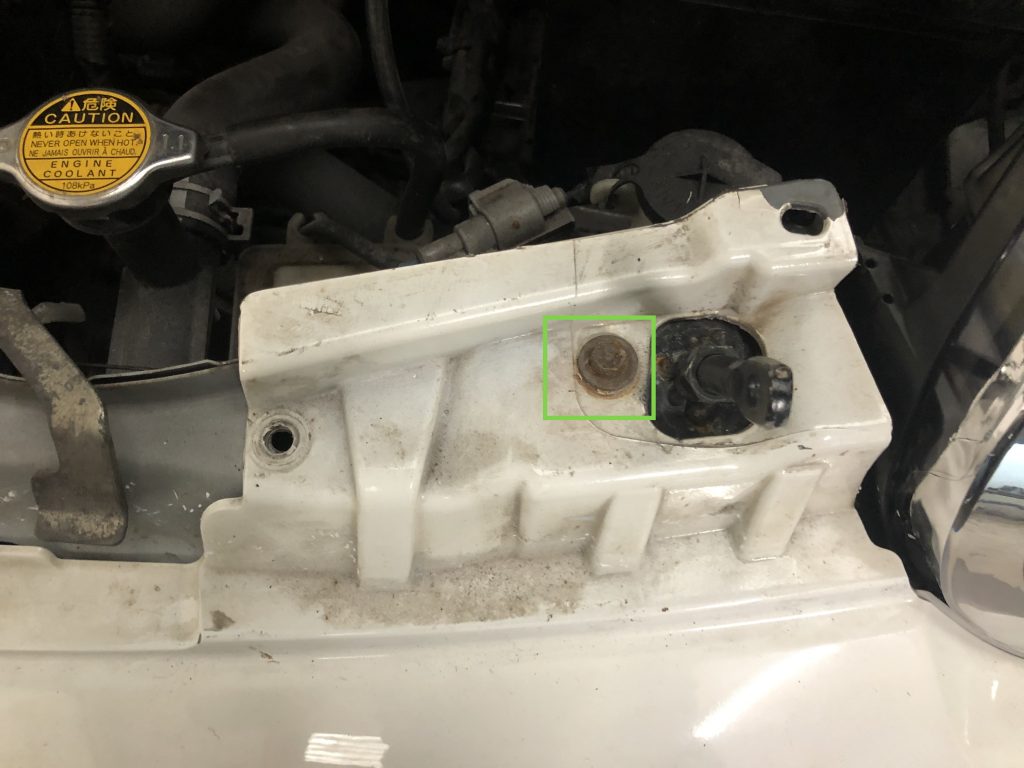
2. Left-Hand Bolts (1 already removed)
Step 3. Remove the crash bar/engine cross-member by simply removing the bolts on either side. Note there are 2 bolts top and bottom on either side of the cross-member.
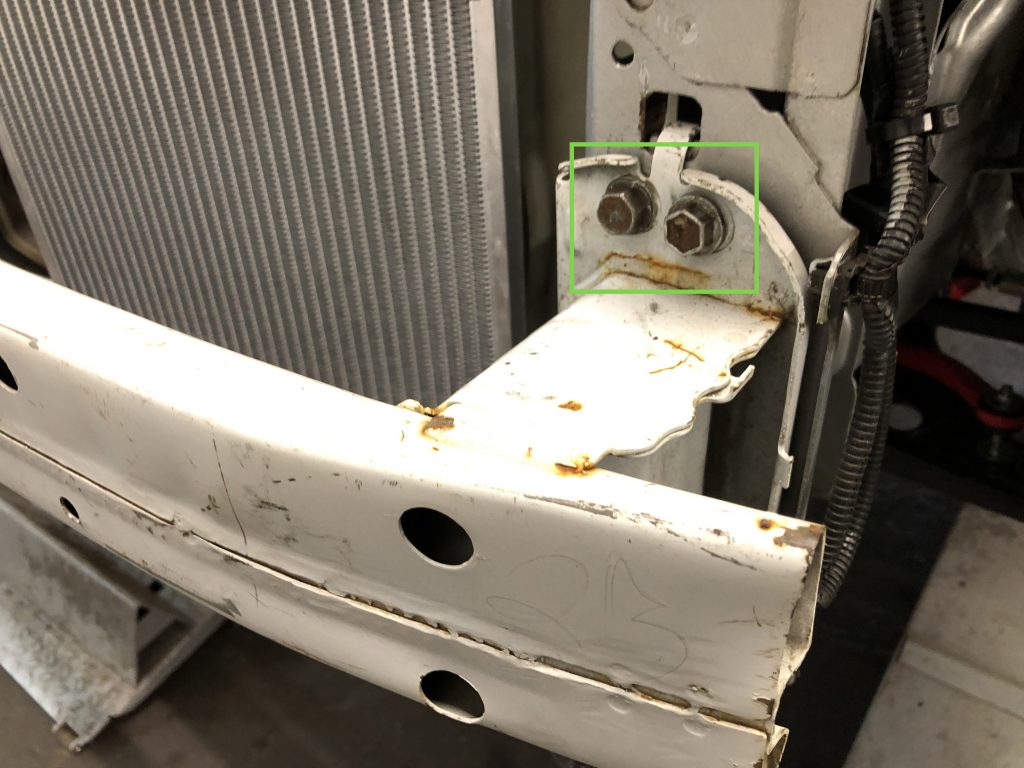
1. Upper Right-Hand Bolts 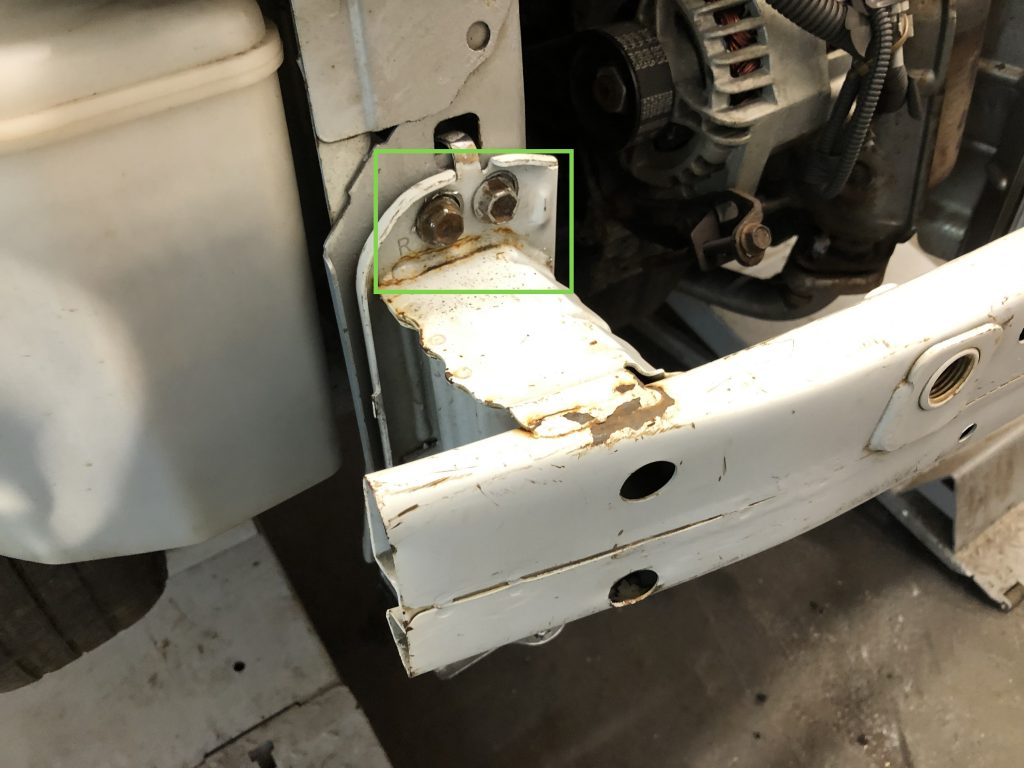
2. Upper Left-Hand Bolts
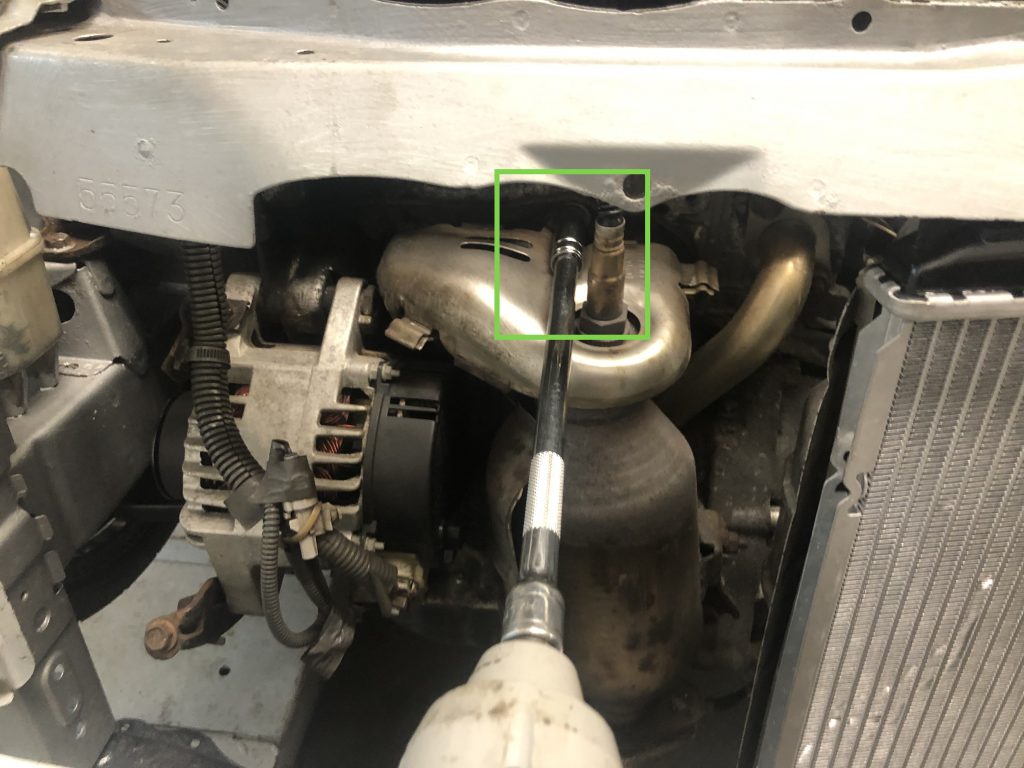
Step 4. Disconnect the upper O2/Lambda sensor either from the top of the manifold or via the wiring connector.
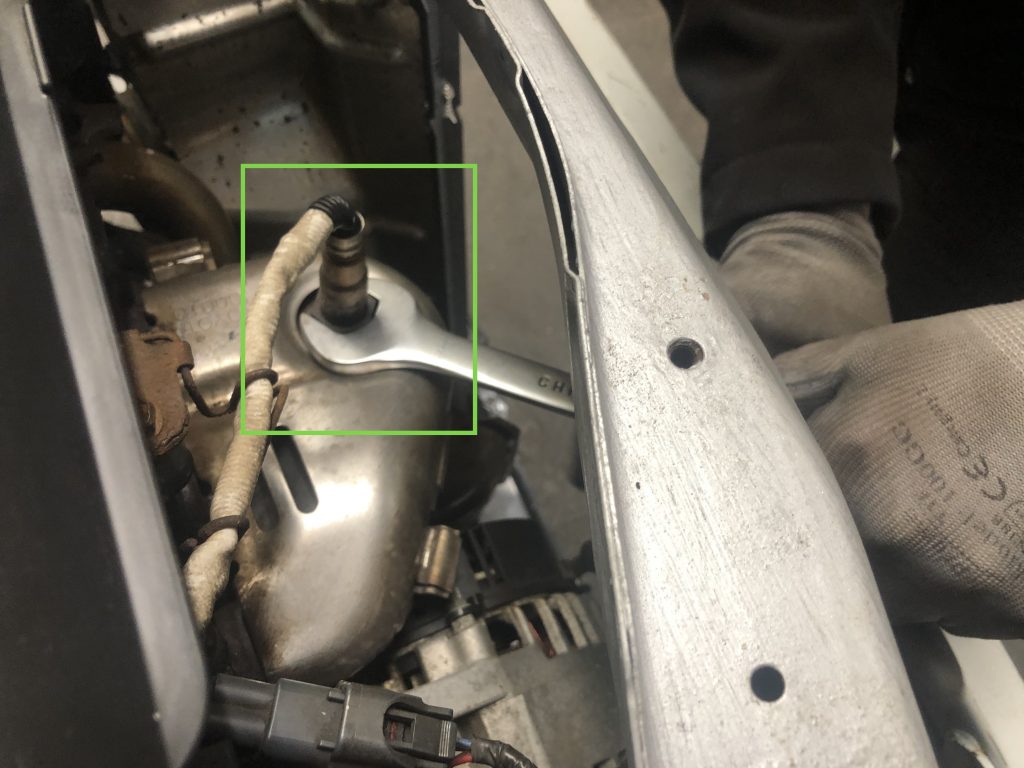
1. O2/Lambda Sensor (To manifold) 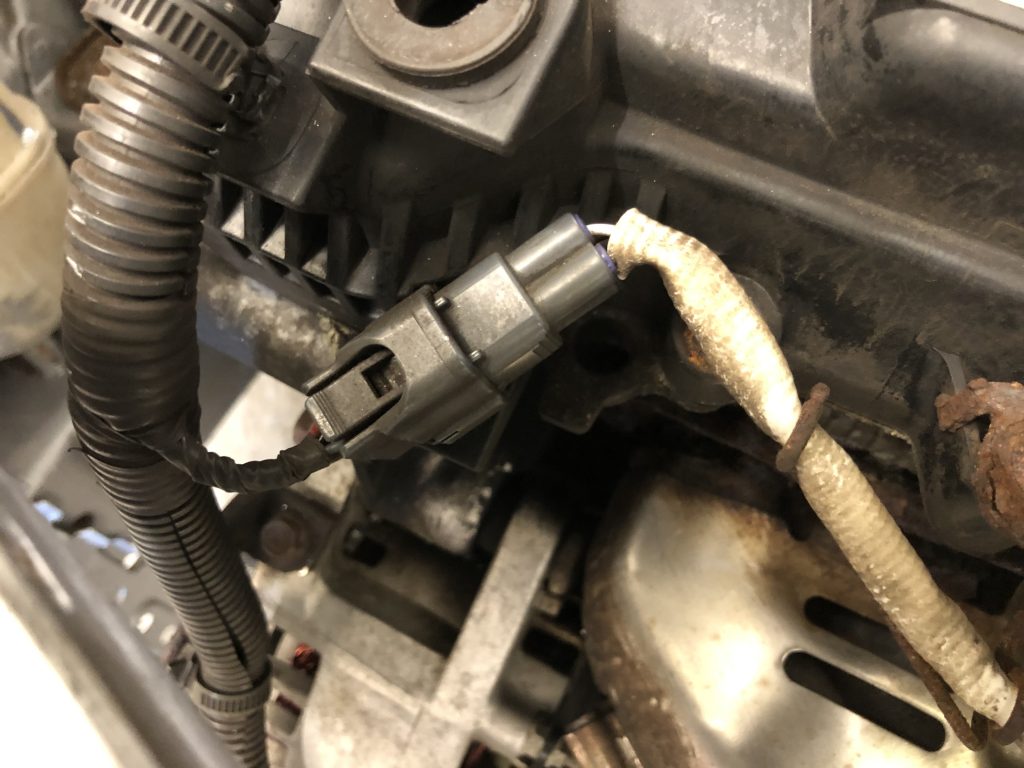
2. O2/Lambda Sensor (To wiring loom)
Step 5. Disconnect the lower mounting nut, you can also choose to remove the bracket from the catalytic converter which makes manoeuvring the manifold easier on removal.
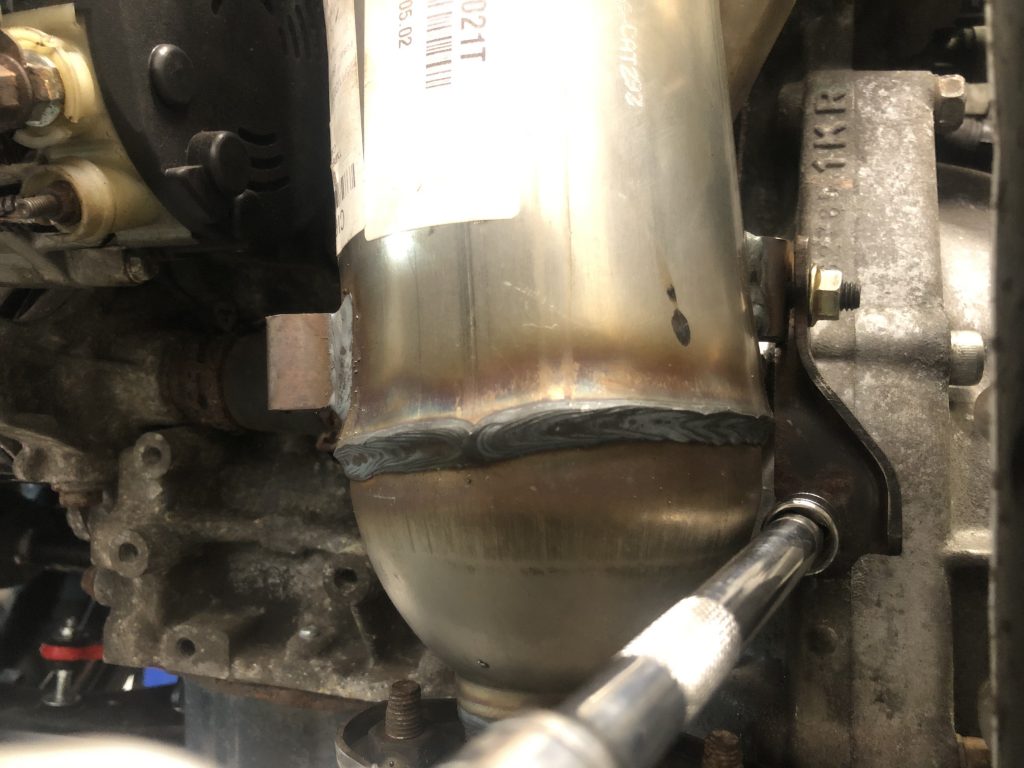
1. Manifold Bracket 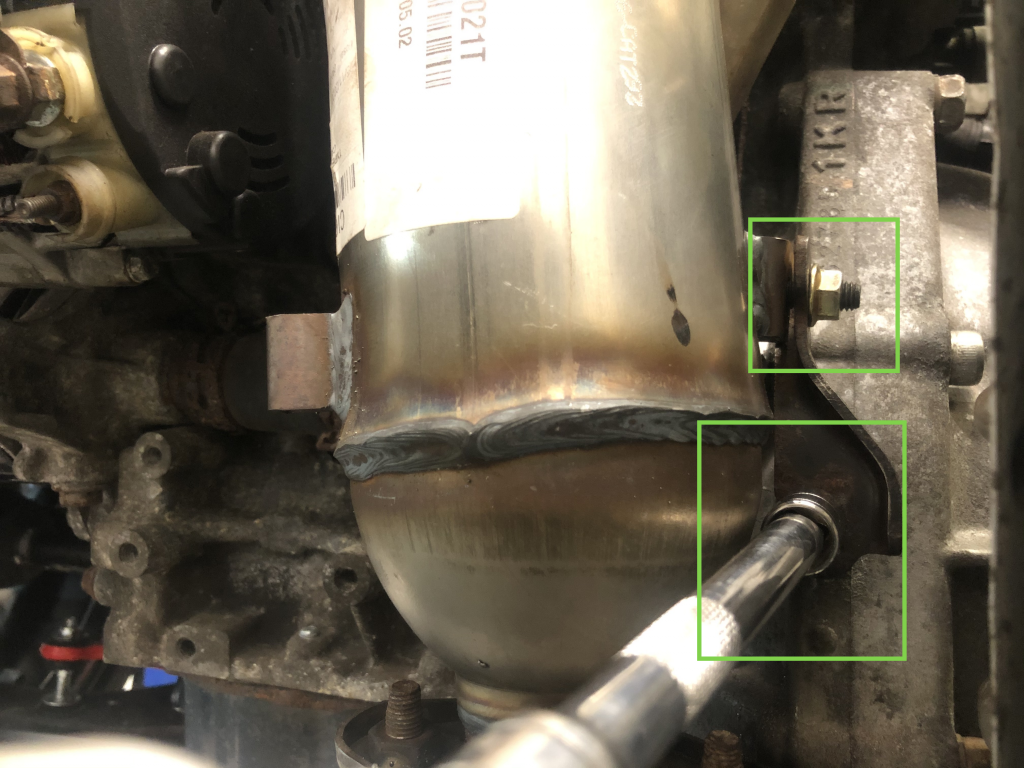
2. Manifold Bracket Bolt
Step 6. Remove the two upper bolts and two lower nuts securing the manifold to the cyclinder head.
1. Manifold Removal 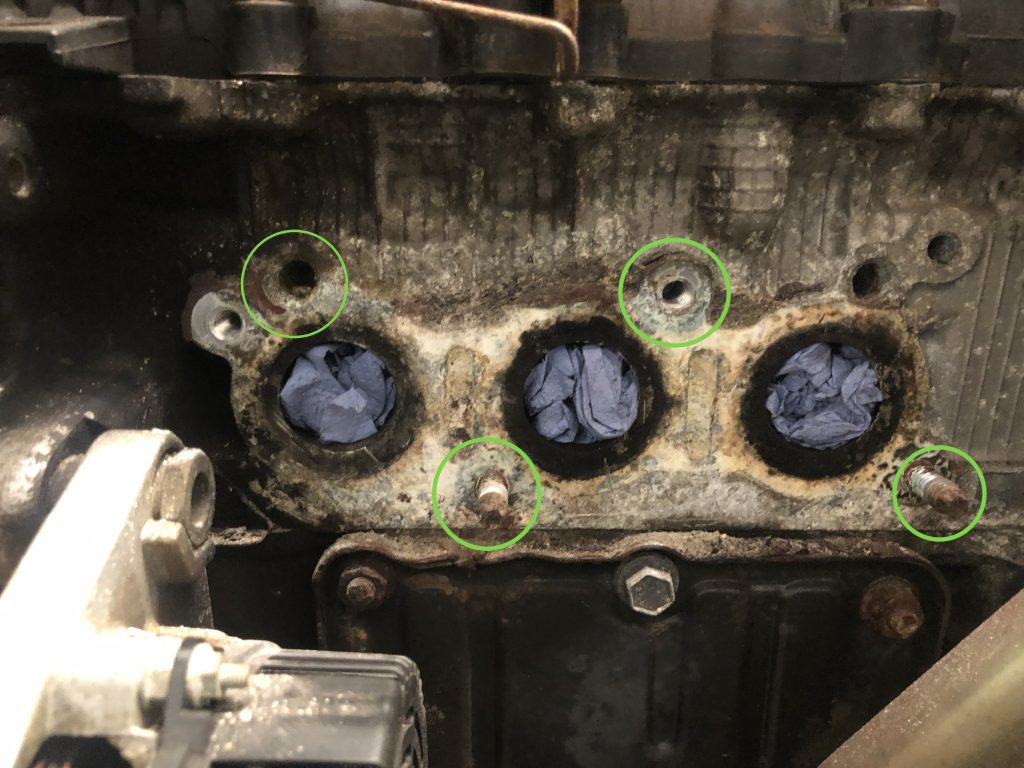
2. Manifold Fastener Locations
Step 7. Now carefully remove the manifold from the lower cylinder head studs and inspect it accordingly, in our case the exhaust manifold gasket and manifold itself has suffered a fair amount of rust and deterioration and required replacement. The face of the cylinder head also required cleaning and old gasket removal.
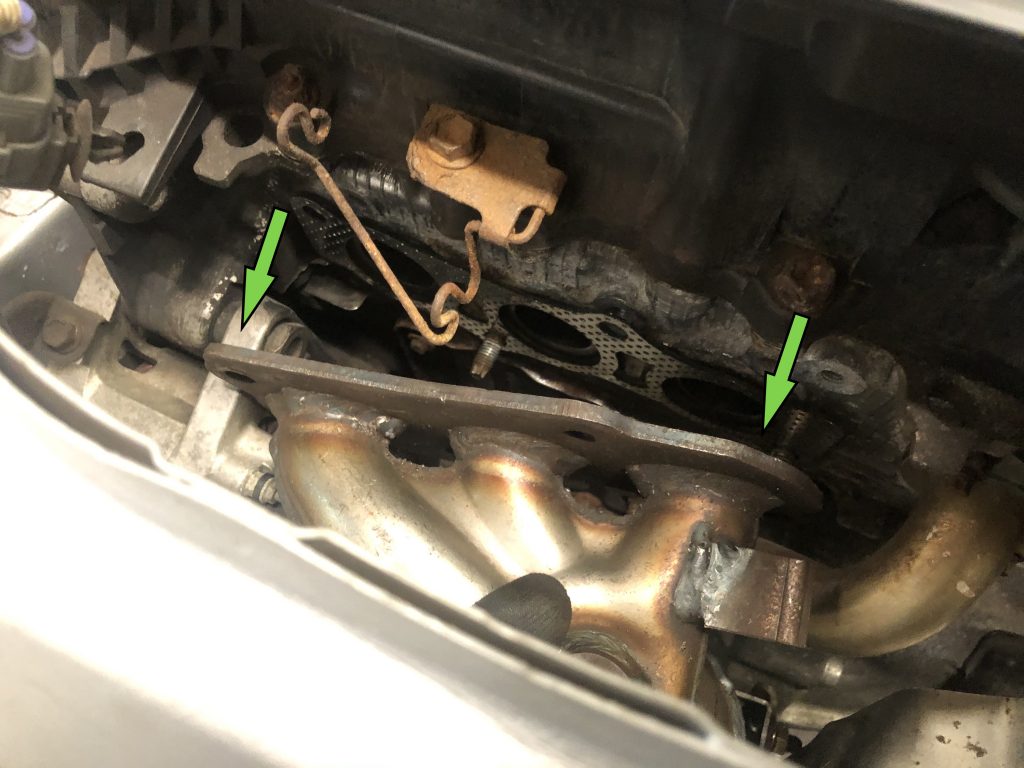
1. Remove Manifold 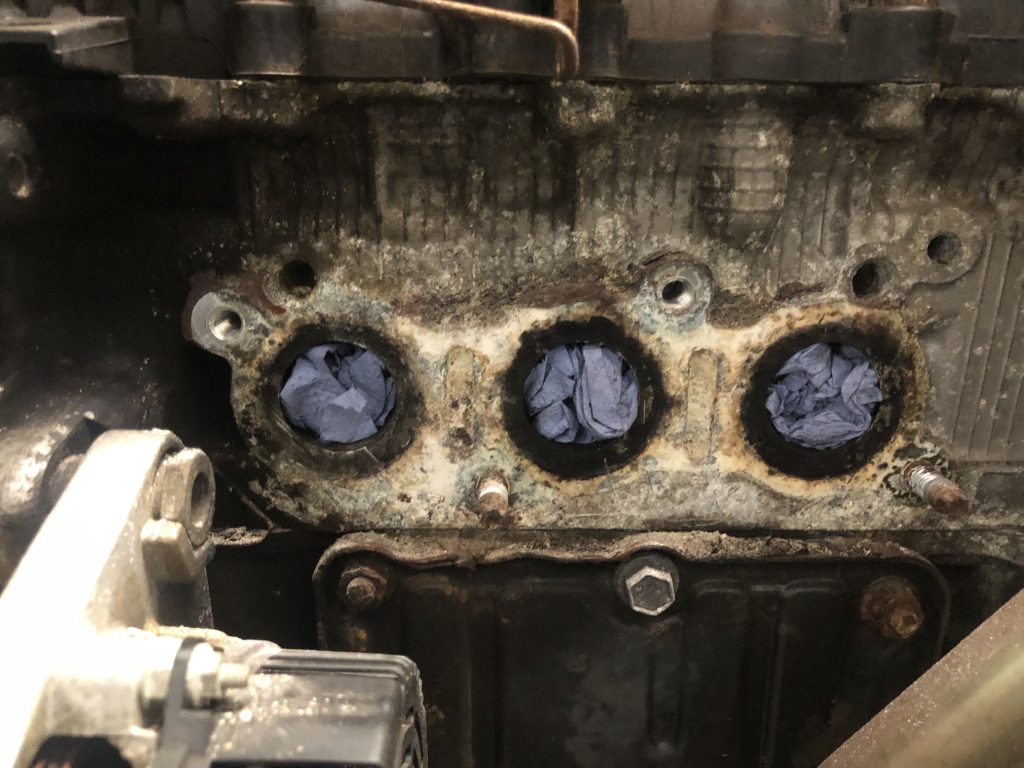
2. Manifold Removed (Protect the exhaust ports) 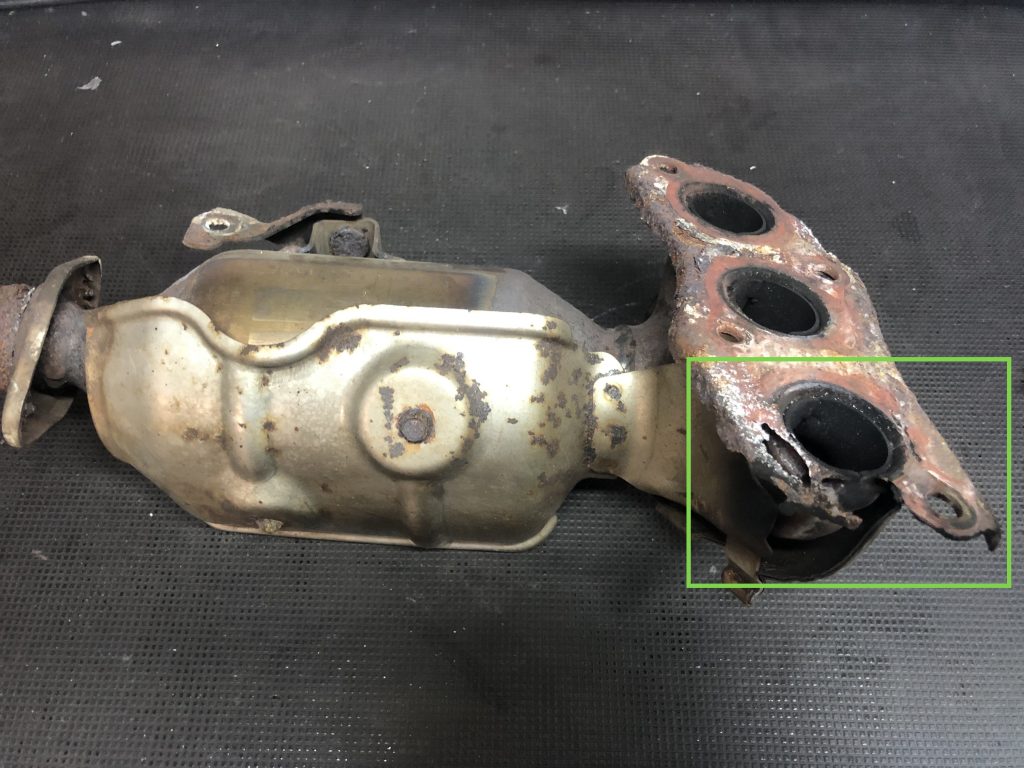
3. Manifold Damage 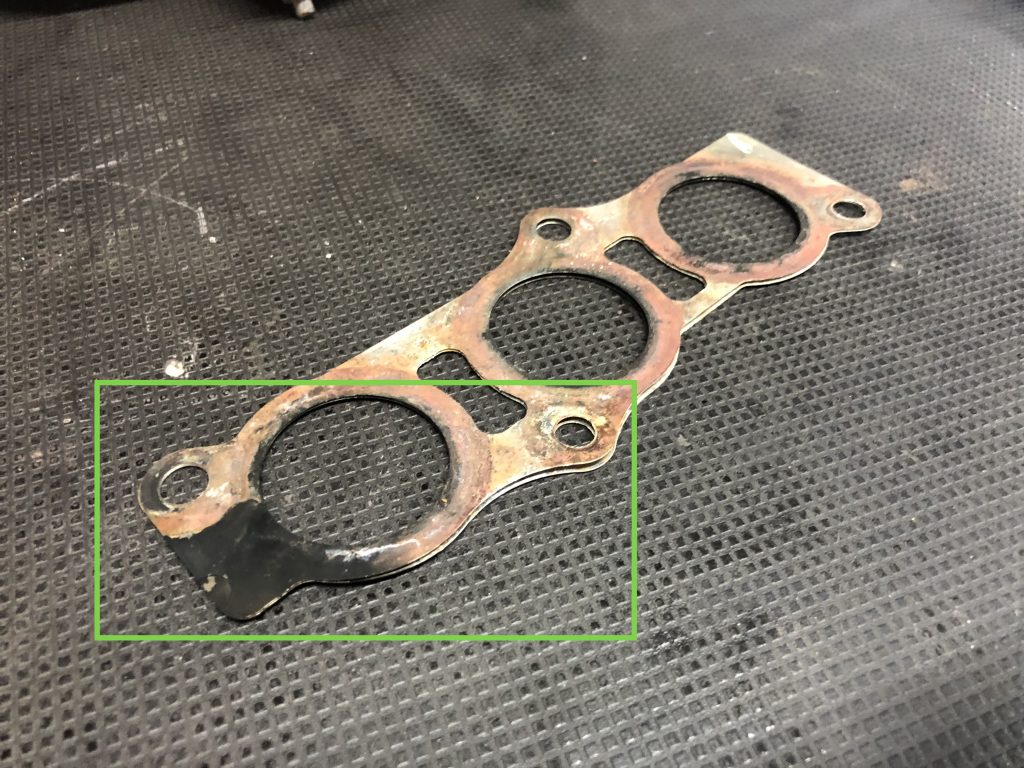
4. Gasket Damage
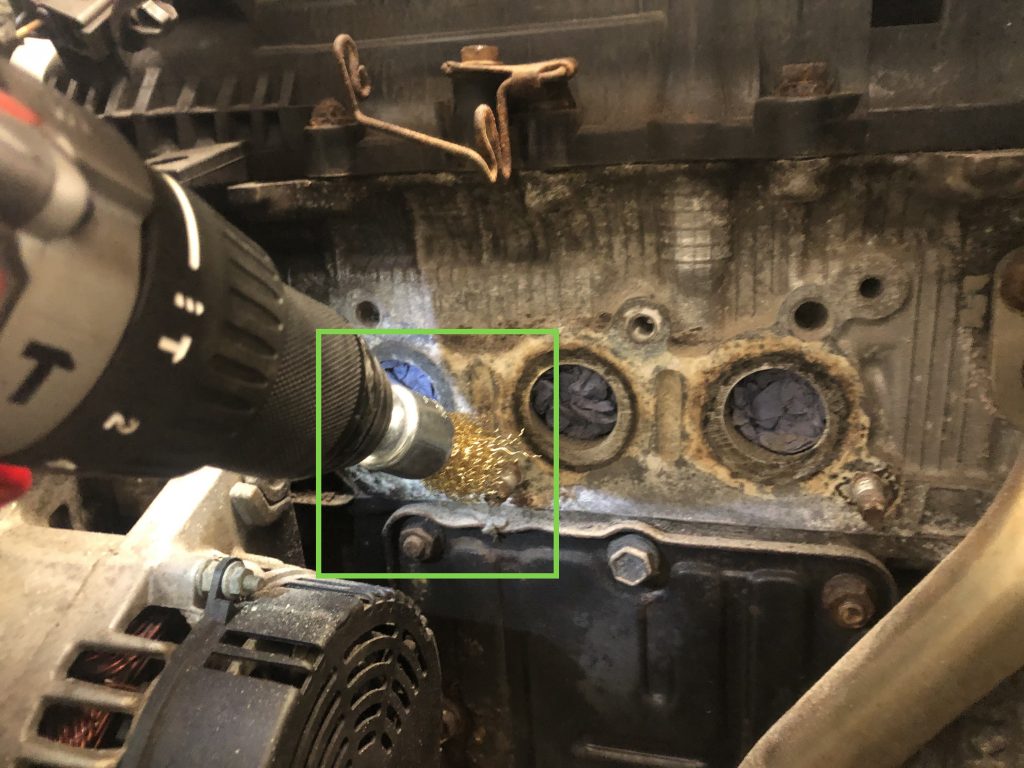
Step 8. Finally, it is important to inspect the cylinder head face, exhaust port exit points, studs and bolt holes in readiness for reassembly. Take care not to damage the face of the cylinder head end ensure you cover the holes with masking tape or a suitable cloth/paper towel so no debris enters the engine.
Tool Tip – Ensure you use a wire brush (hand or manual) or gasket scraper to remove the rust and leftover gasket in this area, bus be mindful and careful not to damage the face of the cylinder head.
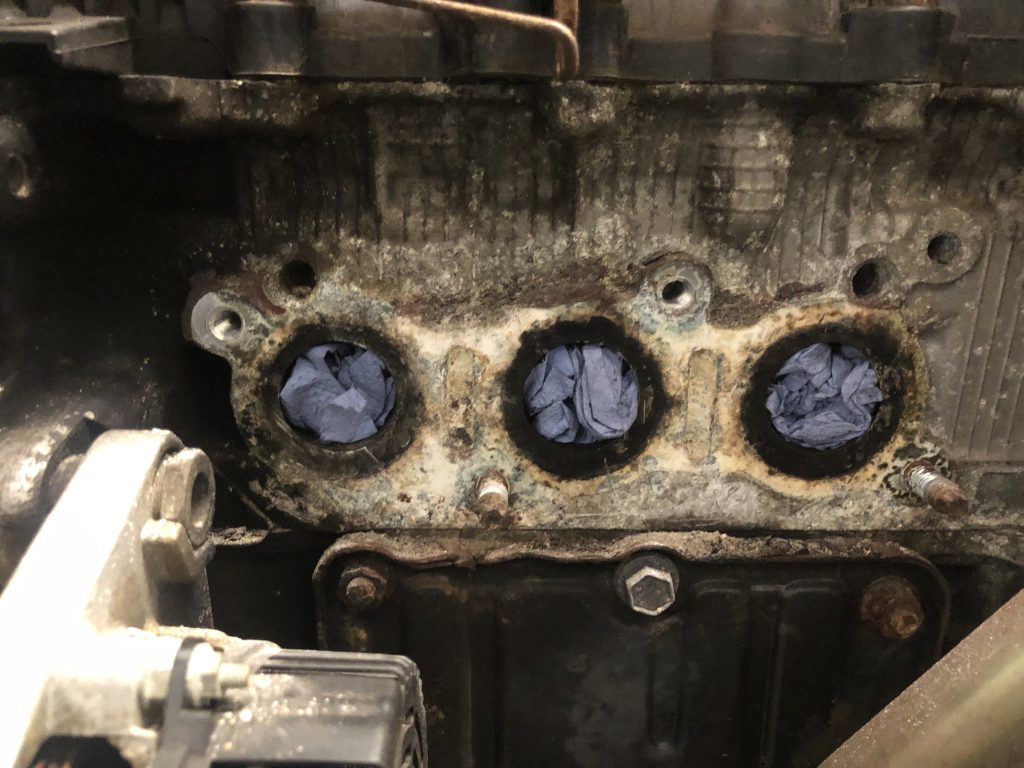
1. Protect Exhaust Ports 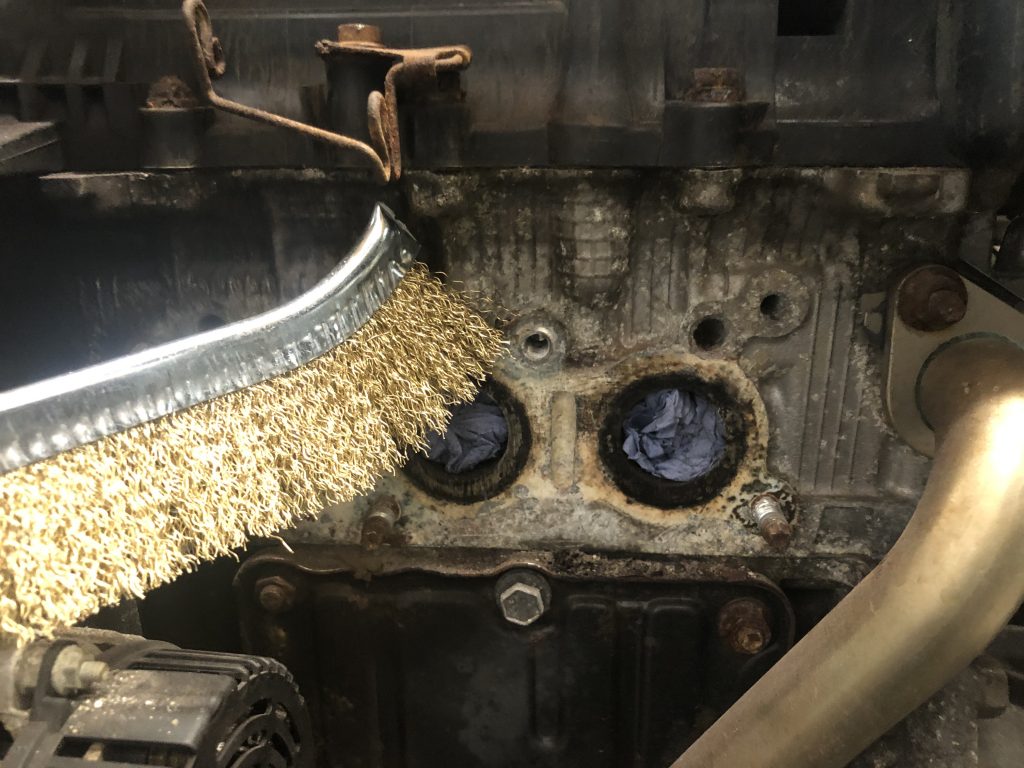
2. Debris Removal (Remove old gasket and rust carefully) 